Quick Setup Guide for IDXAddons Apps
- Last Updated April 09, 2025
🌟 Welcome to the Quick Setup Guide, your go-to resource for configuring the most essential apps in the IDXAddons platform. Whether you're just getting started or looking to optimize your IDX integration, this guide will walk you through the initial setup of each widget—quickly and clearly.
The following tools are covered:
- Search Tool - Customizable search widget for your website.
- Google Map Widget – An interactive map that displays your listings in a Google Map.
- Agent Information Widget – Displays agent contact details and links.
- Home Valuation Widget – Create a property valuation tool where clients can find their house's worth.
🔍 Search Tool
The Search Tool app allows you to quickly add a fully customizable property search widget to your website. You can control which fields appear, assign an agent, customize the style, and more—all without writing any code. Follow these simple steps to get started.
1. Access the AppLog in to your IDXAddons account and open the Search Tool app from your dashboard. This tool is designed to work seamlessly with your IDX Broker account.
2. Basic Setup
In the Setup tab, you can modify the placeholder text inside the search bar, helping users understand what to type (e.g., address, city, or ZIP code).
You can also select a custom city list from IDX Broker, assign an agent if you have an office account, choose a default sort option (like Newest Listings), and set the default listing status (such as Active or Pending).
 3. Search Fields Configuration
Under the Search Fields tab, toggle on or off key search filters like beds, baths, minimum and maximum price. You can also control how property type appears—whether as tabs (Buy/Sell), a dropdown, or hidden altogether. For more flexibility, you can add advanced fields based on the selected MLS and property type.
This is an example of what it would look like with the advanced field option.
 4. Set Default Search Criteria
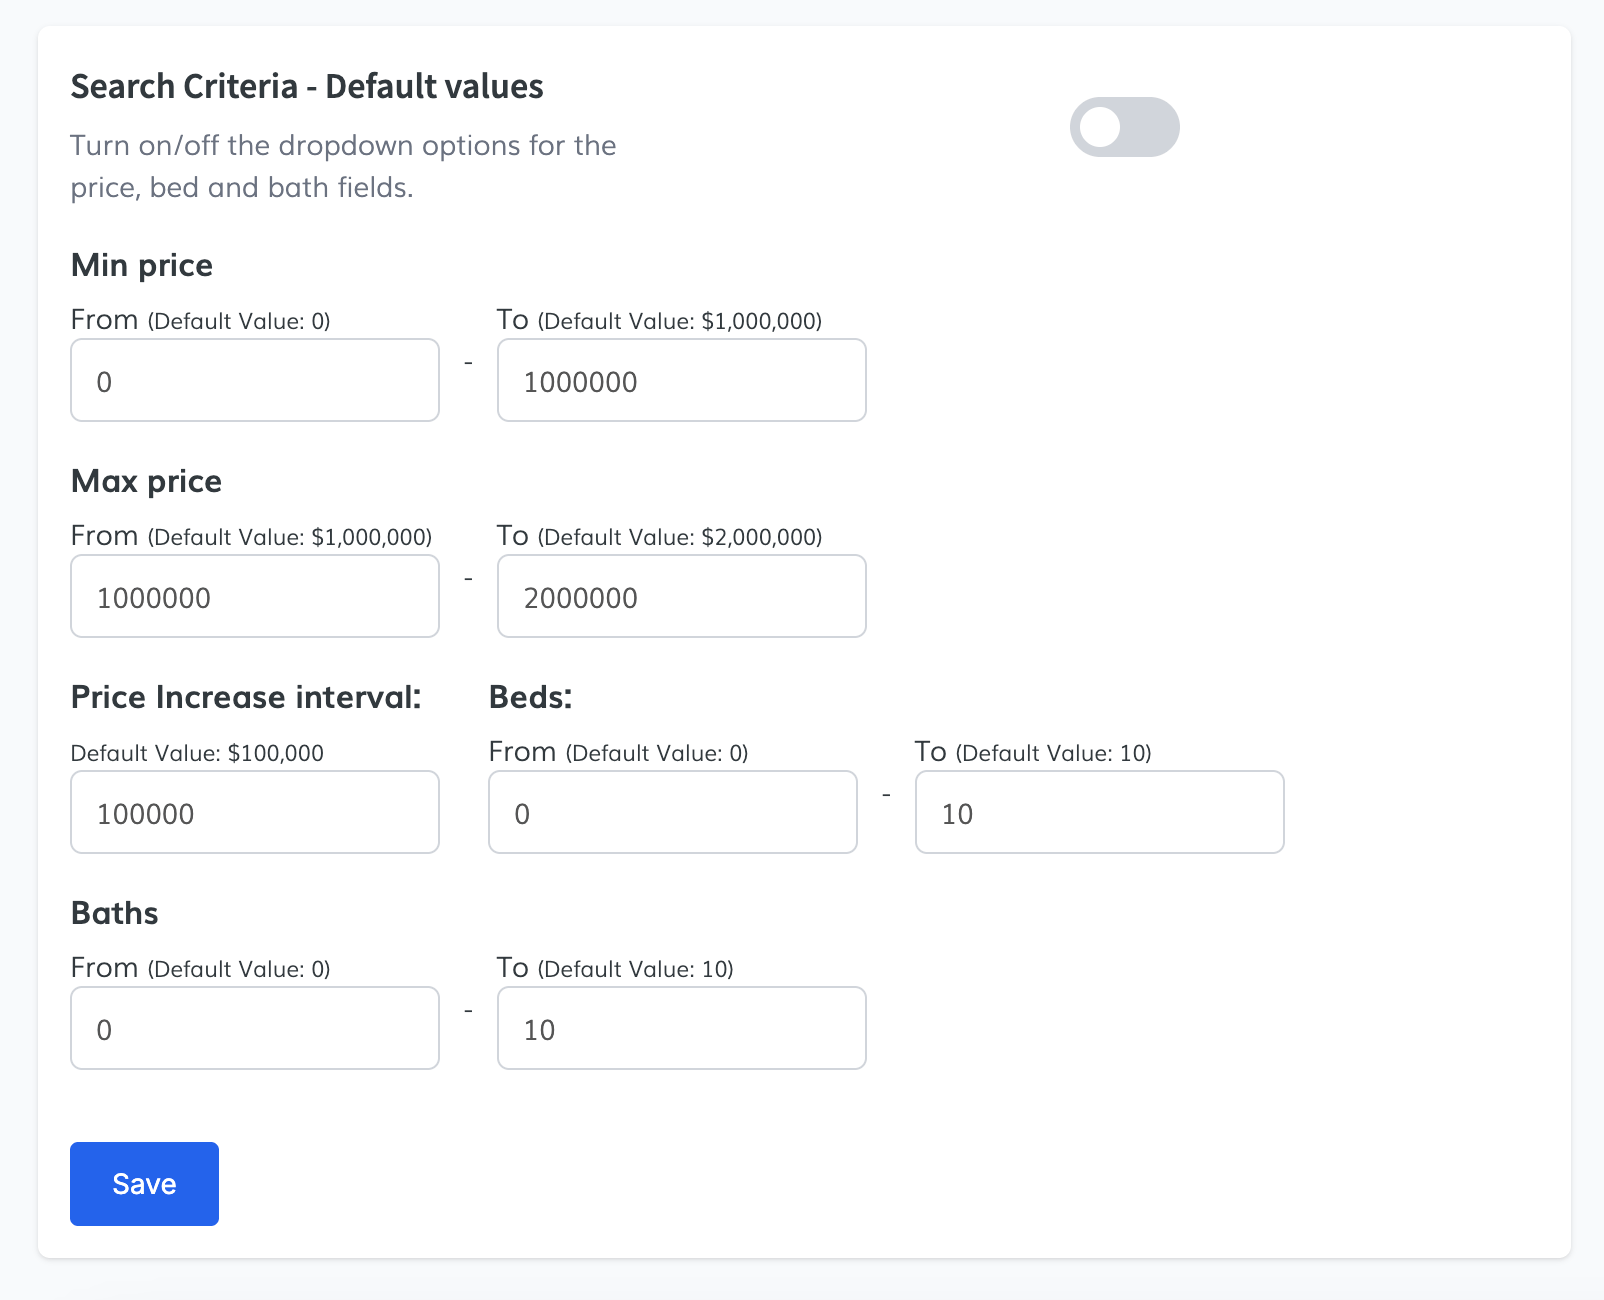
In the Search Criteria tab, you can define the default values for price, beds, and baths, and choose whether these fields should appear as dropdowns in your search tool.
- Min Price: Set the starting value users can select (default: 0).
- Max Price: Set the upper limit for pricing (default: $2,000,000).
- Price Increase Interval: Determines the steps between each price option (e.g., $100,000).
- Beds & Baths: Define the minimum and maximum values available for bedroom and bathroom filters (default: 0 to 10).
 5. Style and Design
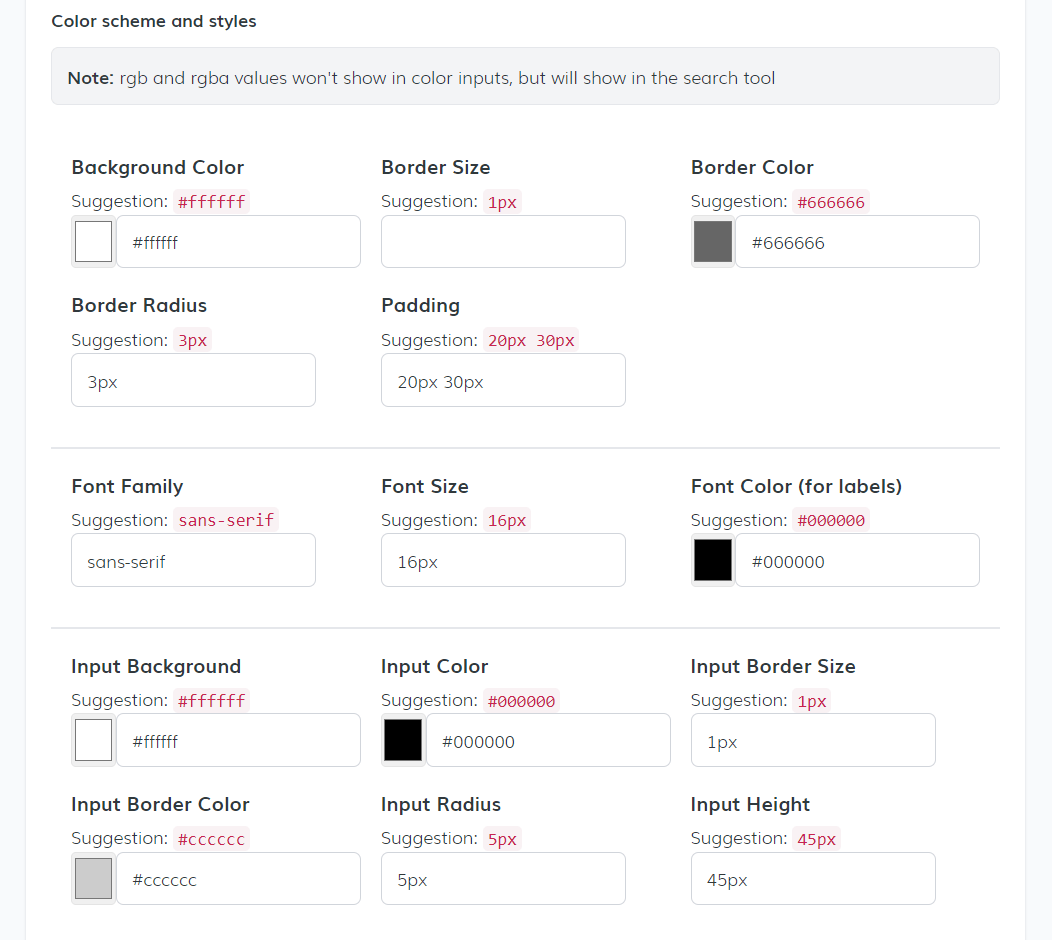
In the Style tab, choose a theme (currently only Basic is available) and customize your search tool’s appearance. Adjust background color, font, button color, and layout to match your brand. You also have the option to add custom CSS and JavaScript to fine-tune the design or behavior.
 7. Address Autocomplete
The Address Autocomplete tab helps improve search precision. By selecting the correct MLS and property type, your search tool can offer more relevant address suggestions as users type.
 8. Embed the Search Tool
When your setup is complete, simply copy the provided code snippet and paste it into your website where you want the search tool to appear. Each tab generates its own code, giving you the flexibility to embed only the parts you need.

📍Go to the Search Tool app.
🗺️ Google Map Widget
The Google Map Widget allows you to display a fully interactive map on your website featuring your IDX listings. With customizable styles, filters, and layout options, this tool makes it easier for visitors to explore properties visually.
1. Setup Tab-
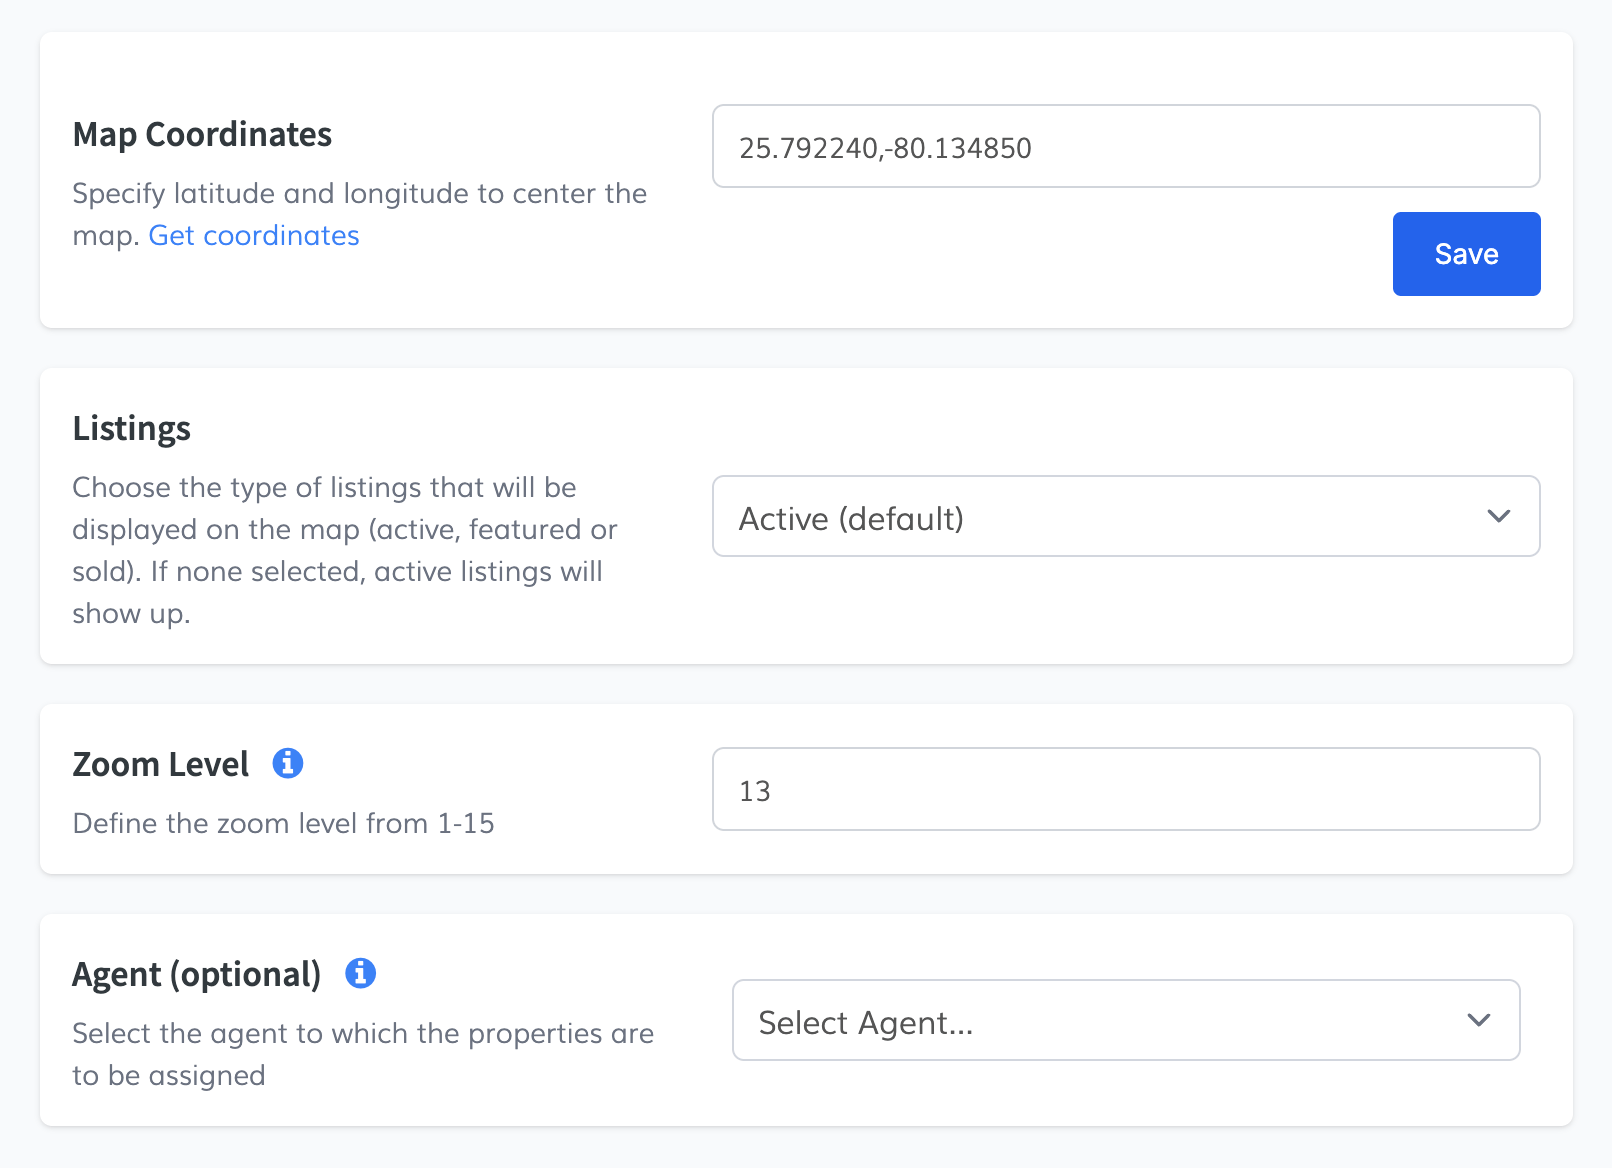
Map Coordinates:
Click the “Get Coordinates” link to open a pop-up and locate your desired center point. Copy the latitude and longitude provided, paste them into the Map Coordinates fields, and click Save. -
Listings to Display:
Choose which listings to show on the map. Available options:- Active (default)
- Featured
- Sold (Engage only)
- Active and Featured
The embed code will update automatically based on your selection.
-
Zoom Level:
Define how zoomed in your map should be. A zoom level of 10, for example, is ideal for a city-level view. -
Agent Assignment (Optional):
You can assign listings to a specific agent and use the info button to get more context on how this works.
 2. Search Values Tab
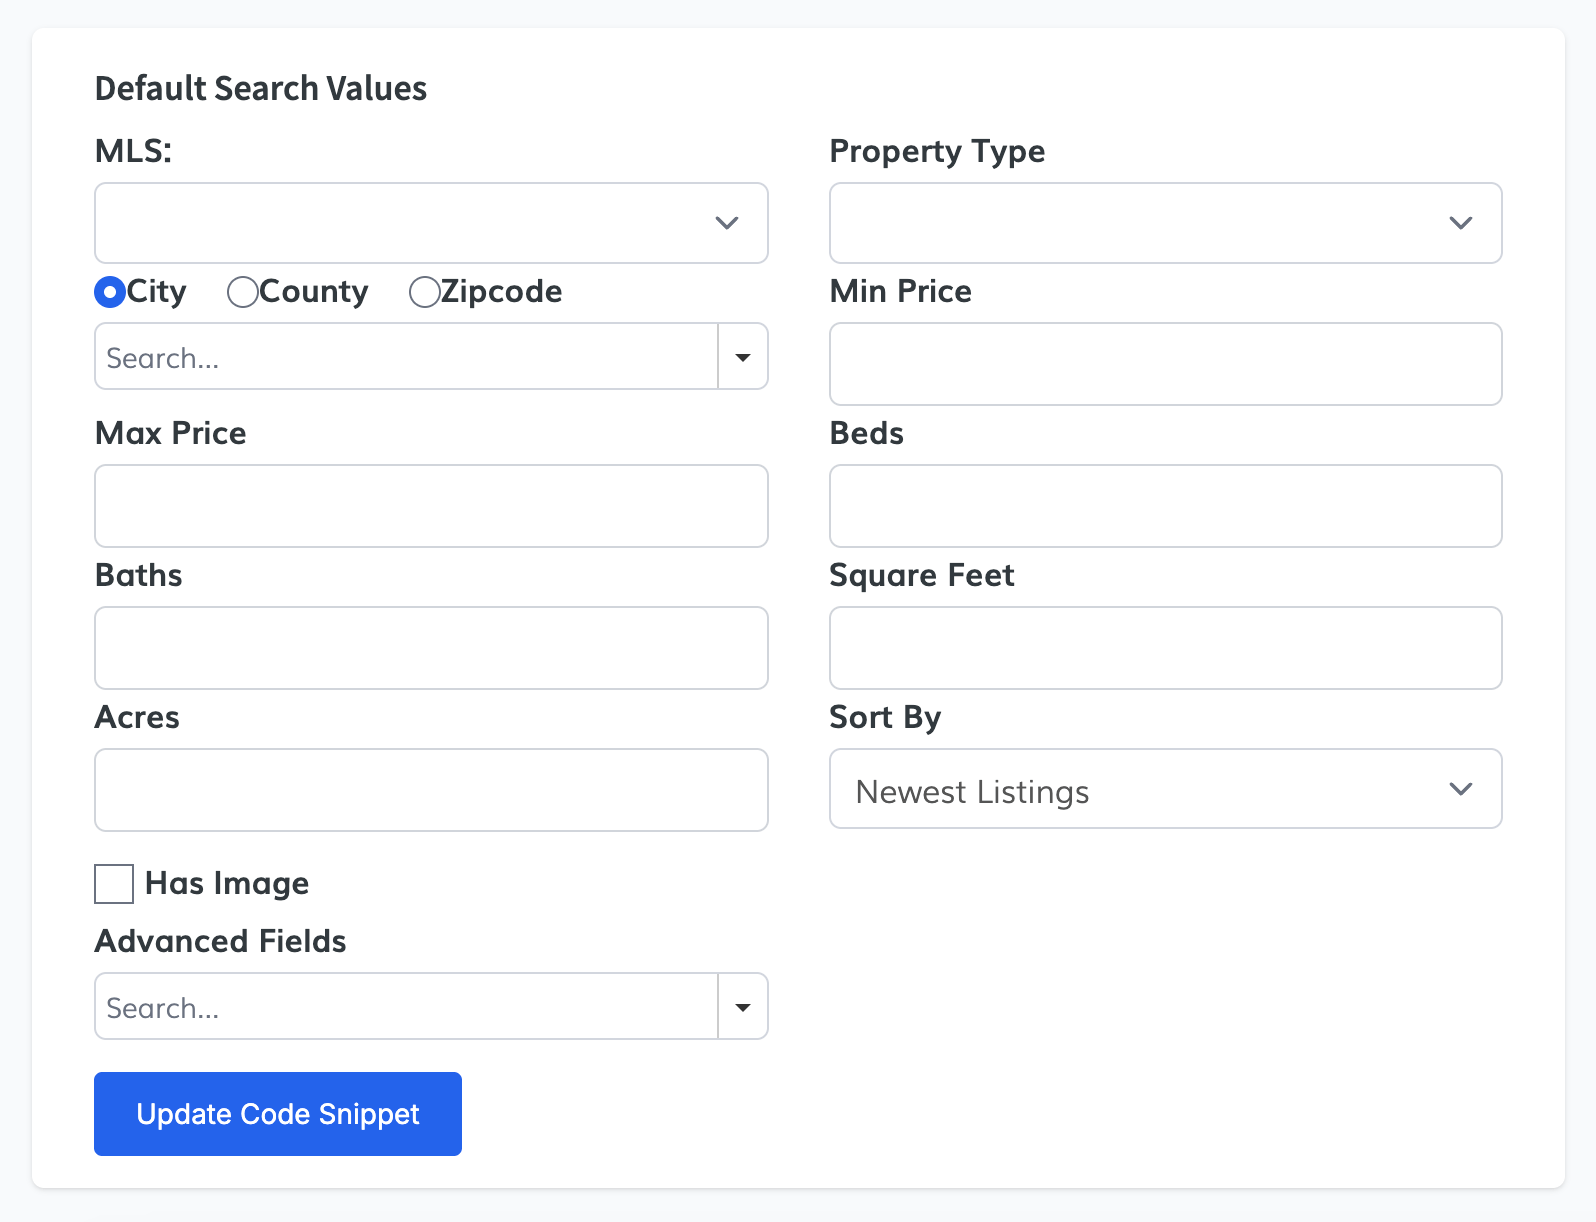
This section lets you filter listings even further:
- Search Filters: include MLS, property type, city, county, ZIP code, min/max price, beds, baths, square feet, acres, and sort order.
- Has Image: Filter to only show listings that include images.
- Advanced Fields: Access additional filters relevant to your MLS and property type.
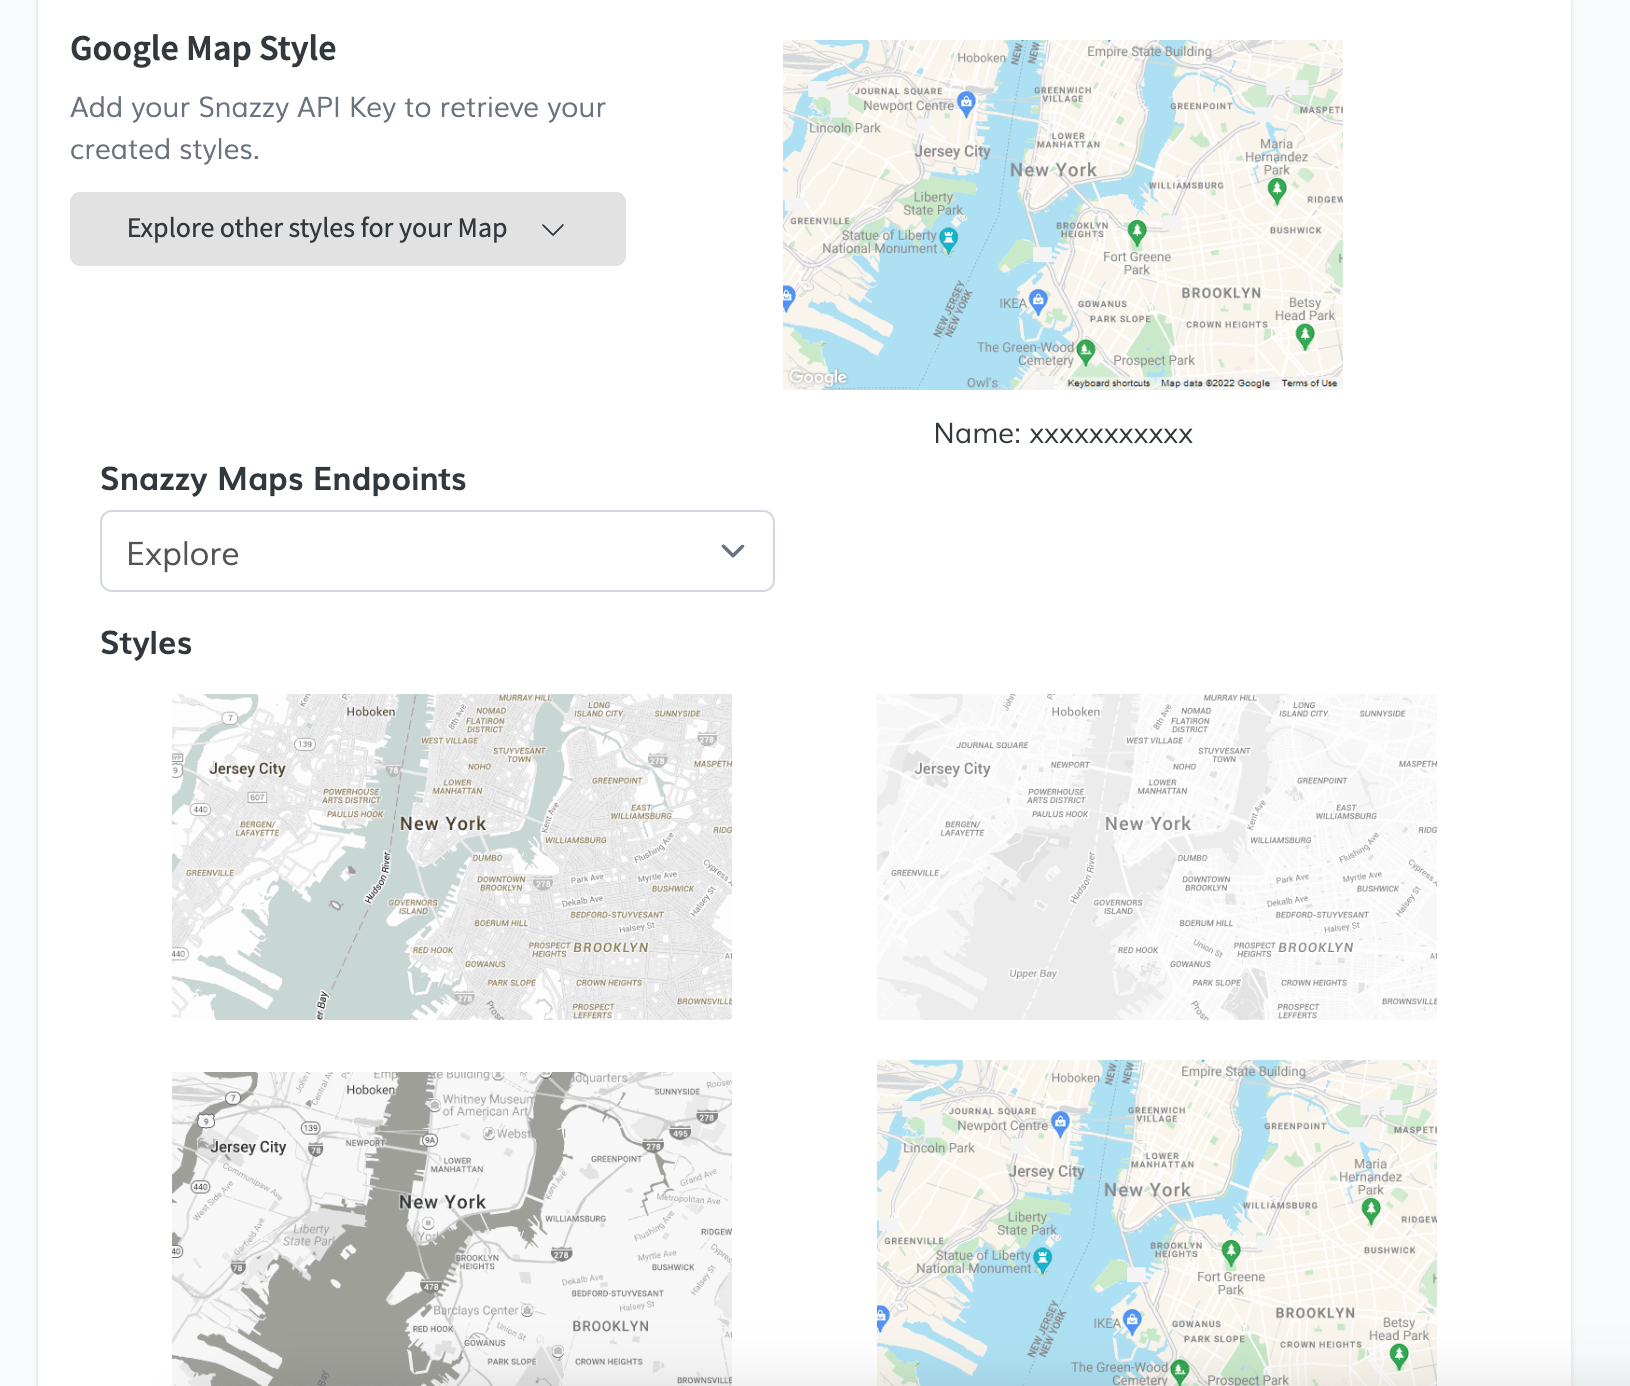
 3. Map Style
-
Snazzy Maps API Key:
Add your Snazzy Maps API key to enable custom map styles and click Save. -
Explore Styles:
Click Explore Other Styles for Your Map to choose from:- Explore (new styles)
- My Styles (recently used)
- Favorites (saved styles)
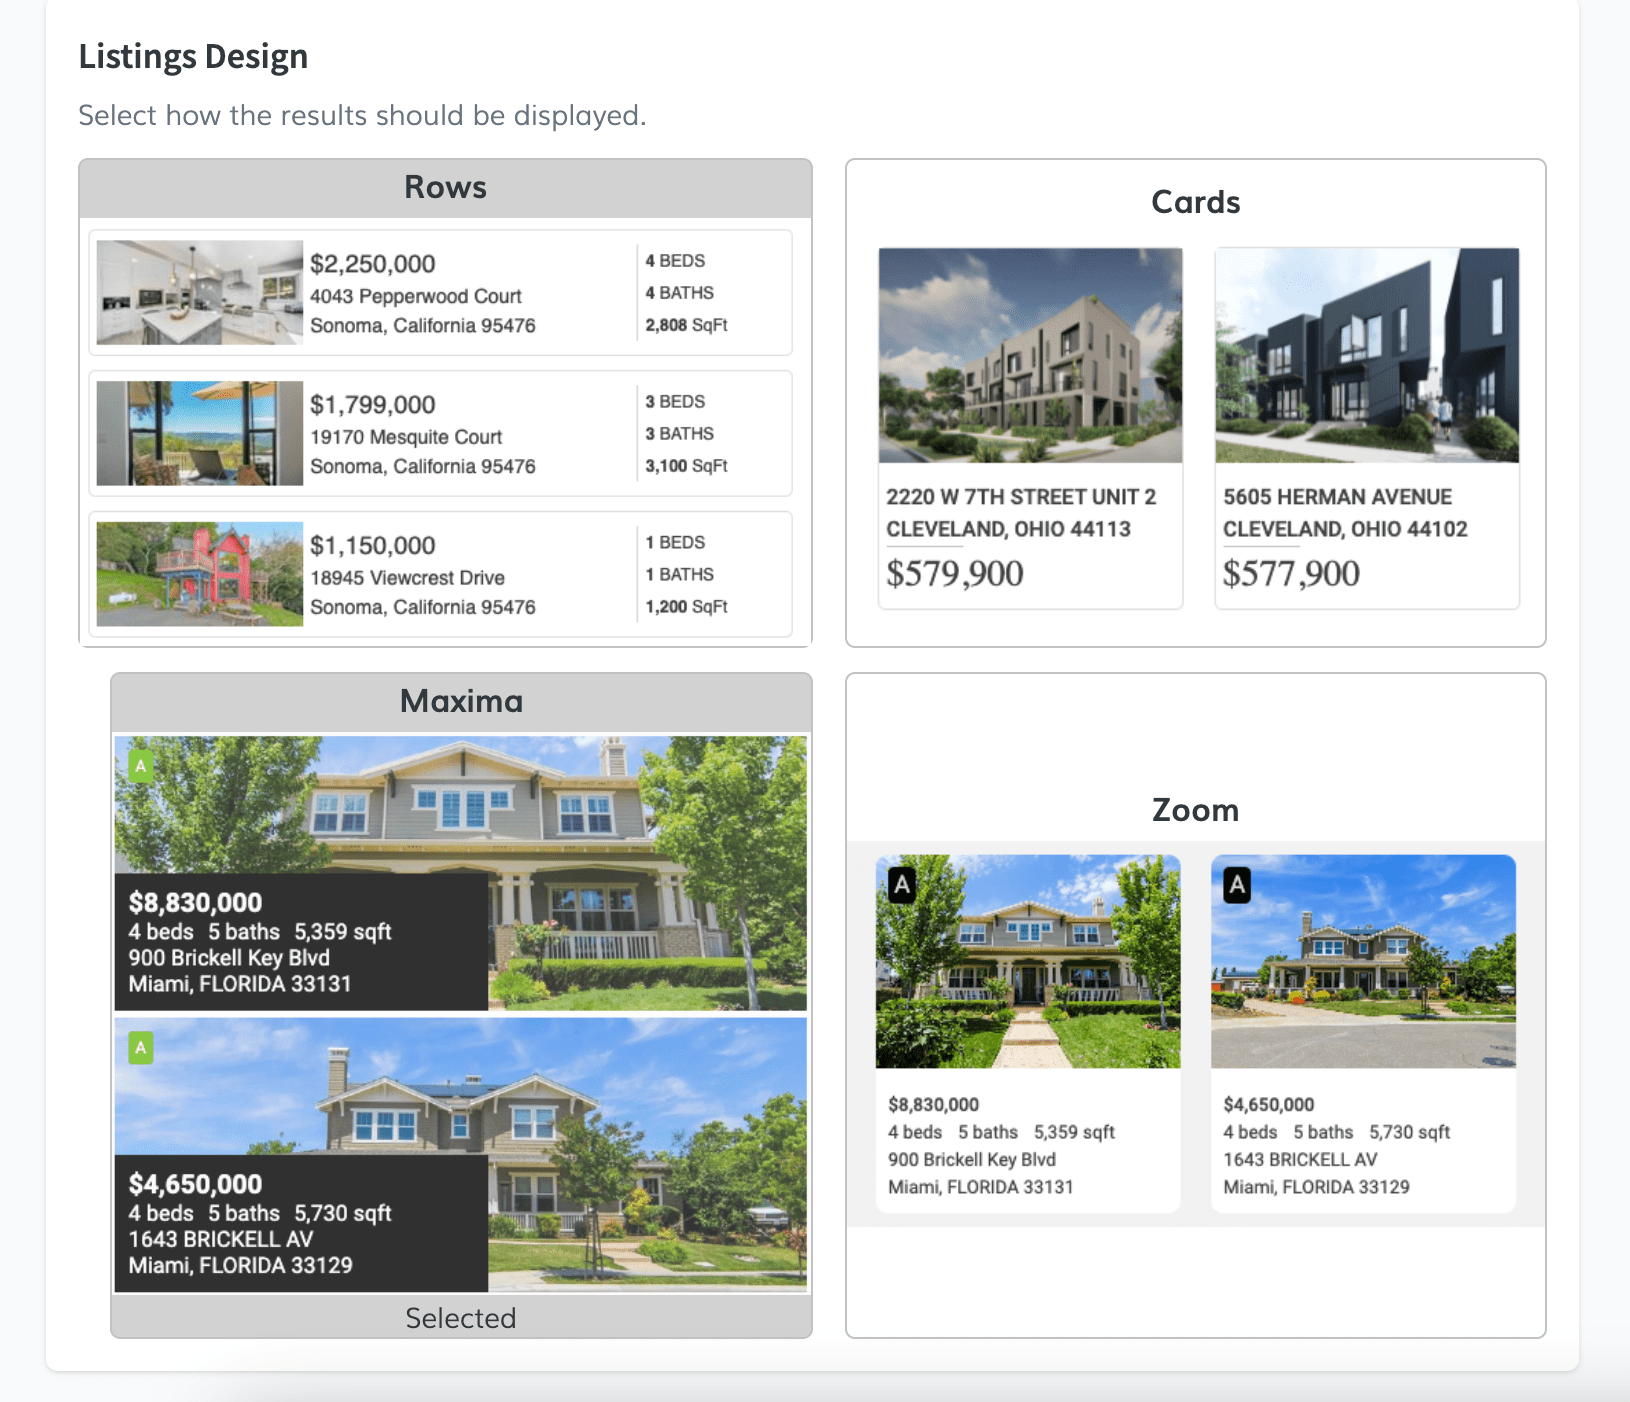
 4. Listings Design
Choose how listings appear on the map interface. You can display them as:
- Rows
- Cards
- Maxima
- Zoom
This allows for flexible visual presentation of listing details.
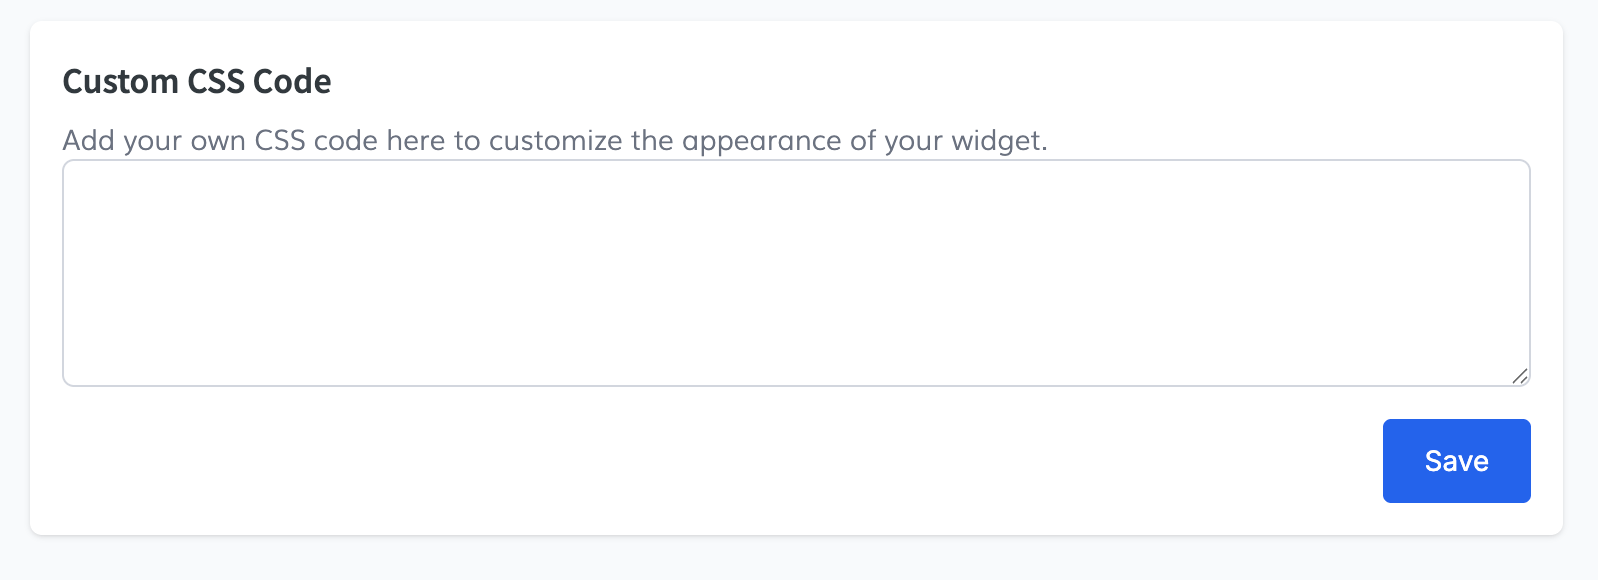
 5. Custom CSS
Add custom CSS code to further personalize the appearance of the map. Once you're done, hit Save.
 ✅ Be sure to save changes in each section before copying your code.
With the Google Map Widget, you can offer a powerful, location-driven experience to your visitors while keeping your listings front and center.
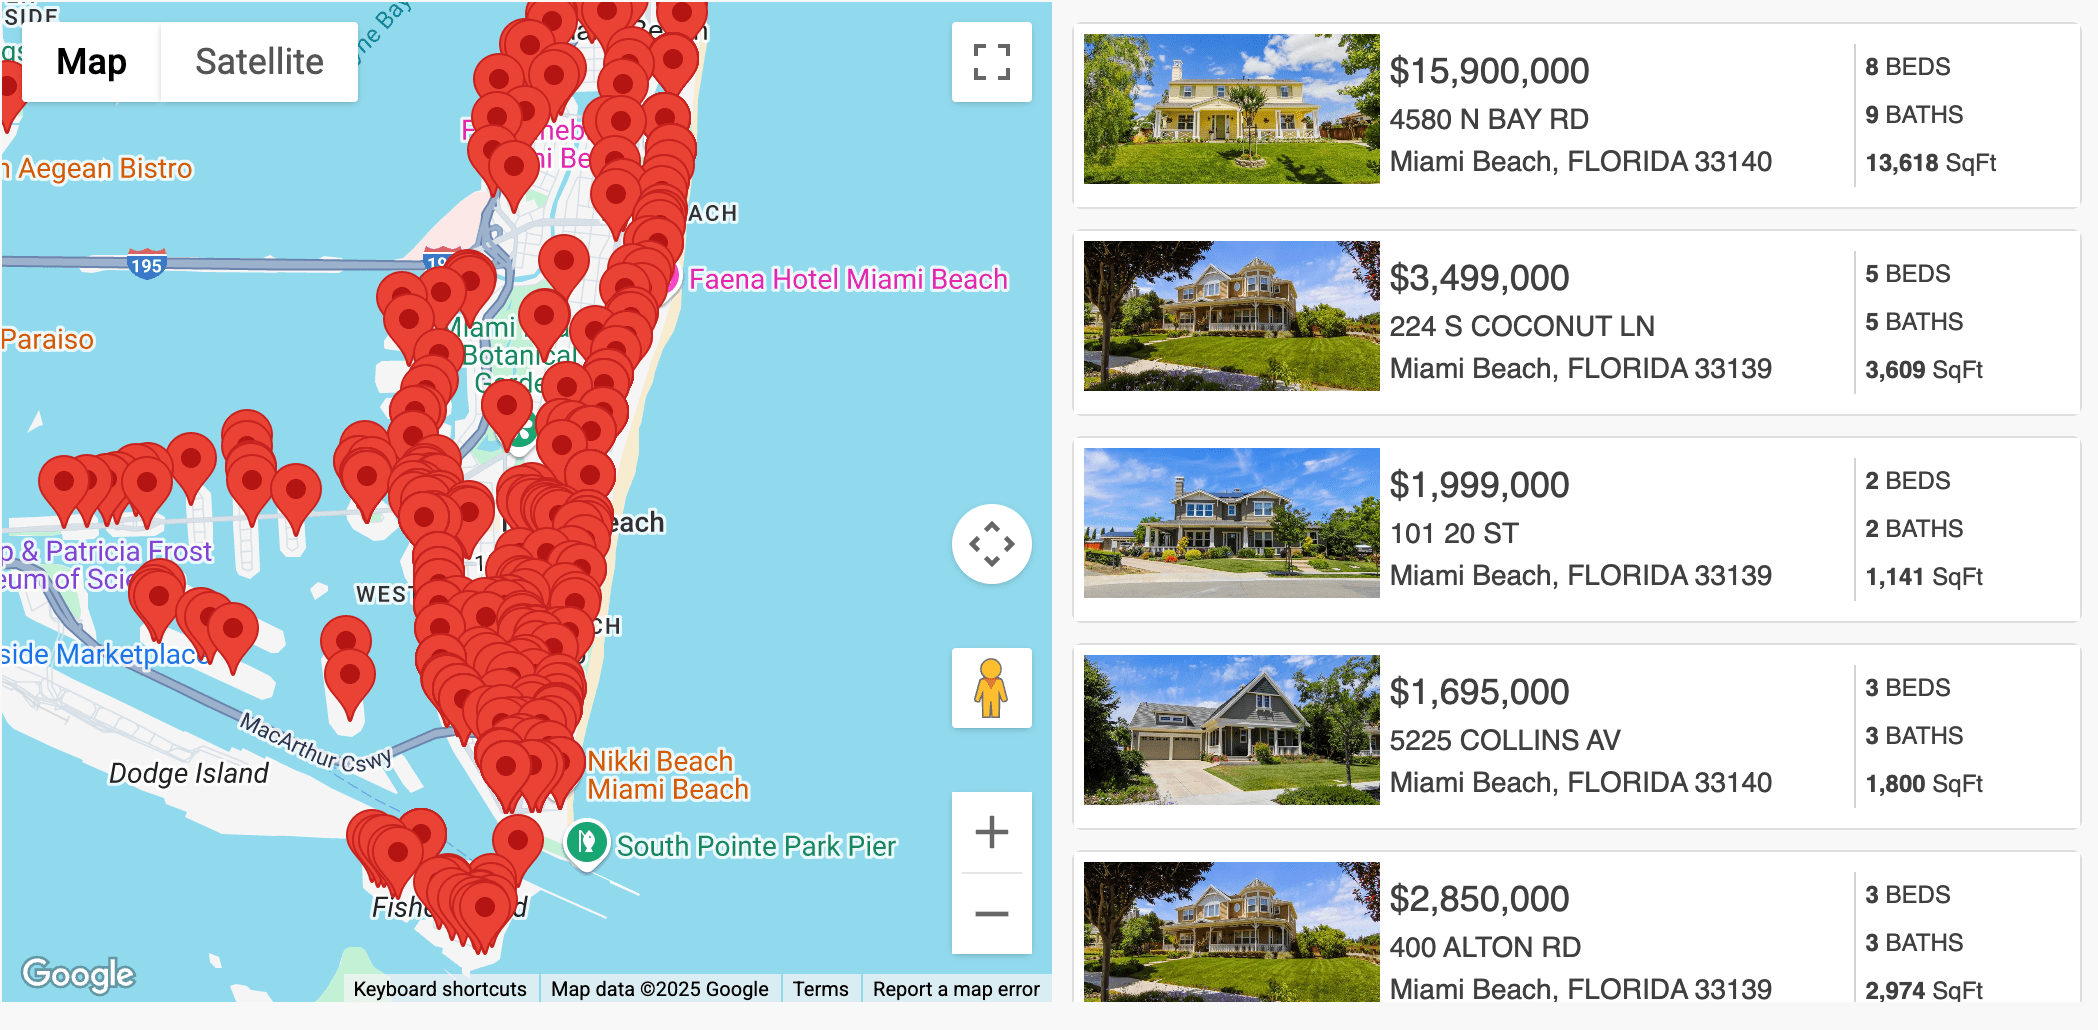
This is an example of what the map looks like.
📍Go to the Google Map Widget.
👤 Agent Information Widget
The Agent Information Widget is designed specifically for single-agent IDX accounts. If you're using a team or office account, access to this widget will not be available, and a message will inform you accordingly.
1. Setup Tab-
Turn Widget On/Off
Use the toggle to activate the widget. Once enabled, it will appear automatically on all your IDX details pages.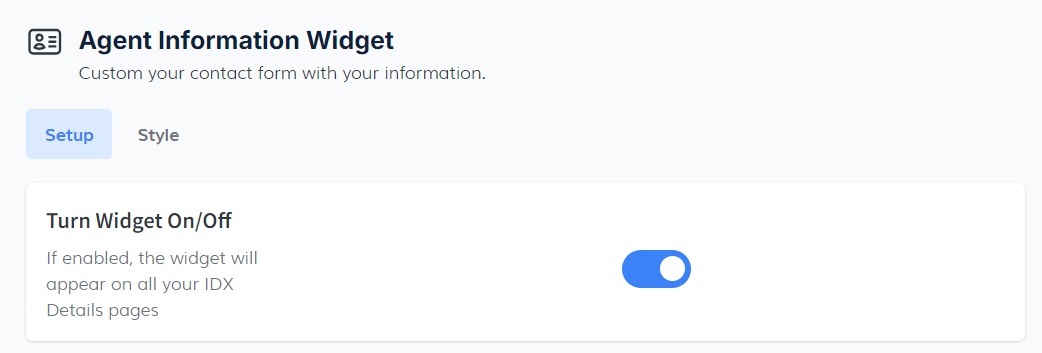
-
Agent Image URL
Upload your agent’s image using a direct URL. The image must be square (1:1 ratio), such as 150x150 pixels. It will appear in the top-left corner of the widget.
-
Agent Video
Enable this toggle to upload a promotional or introductory video in.mp4format. This video will be visible within the widget, helping to create a stronger connection with visitors.
-
Agent Contact Information
Fill in the required fields:- Name
- Office
- Phone
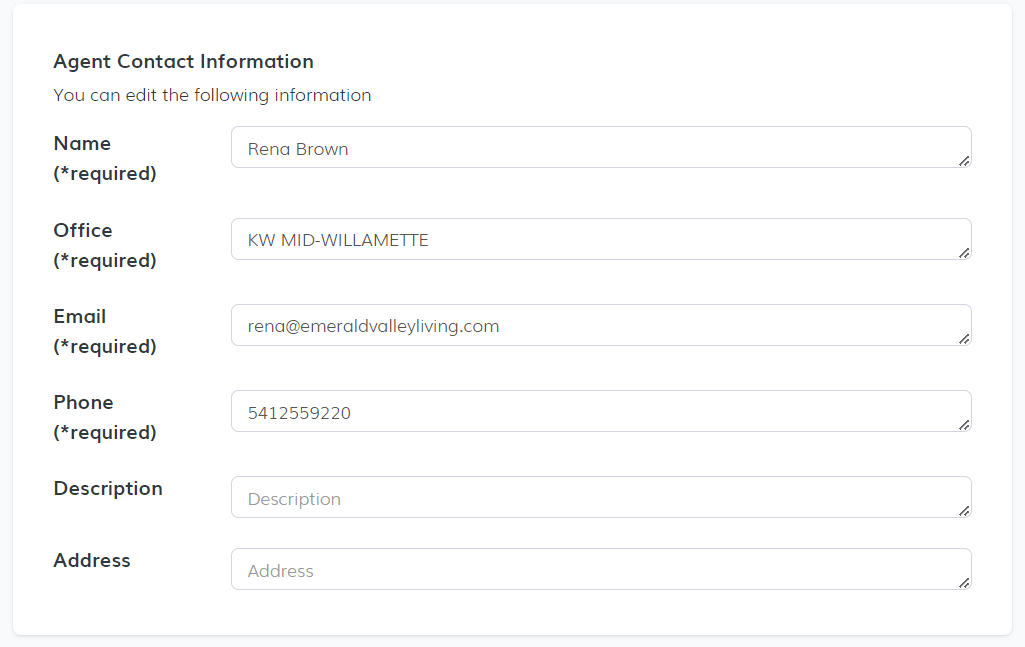
-
Social Media Links
Add links to your agent’s social media profiles (Facebook, LinkedIn, Instagram, etc.) so leads can connect with them easily.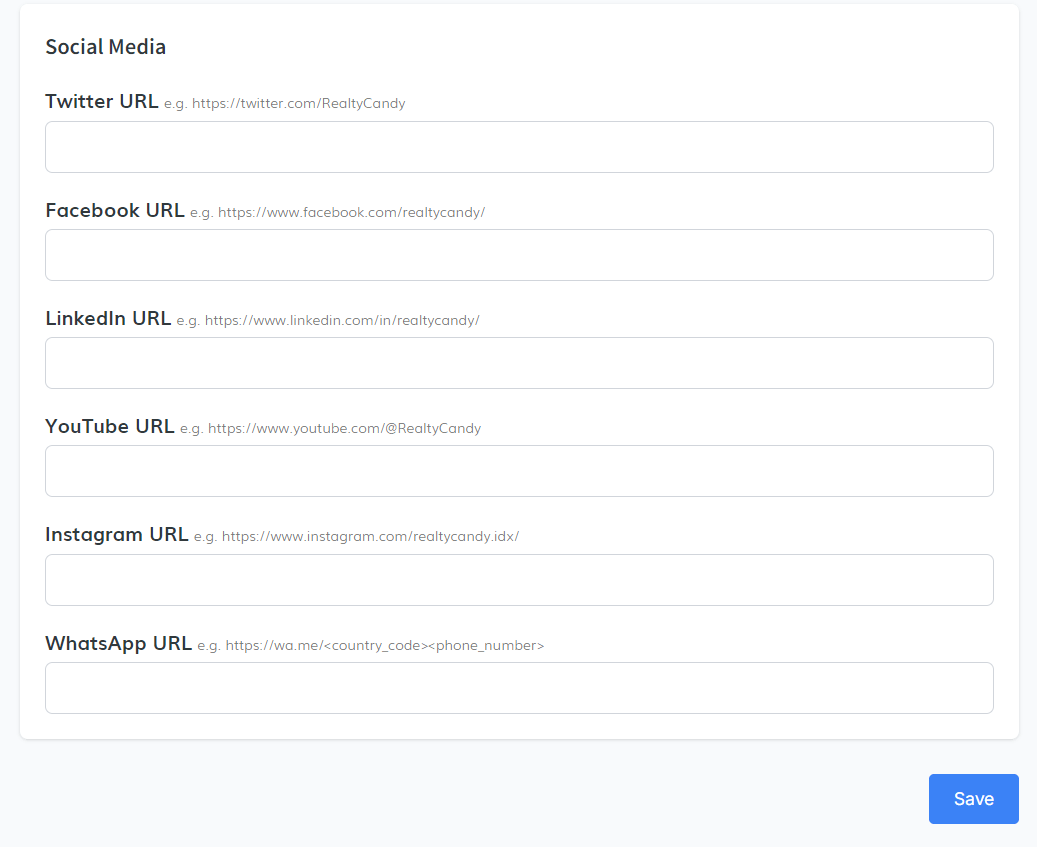
-
Theme Selection
Choose a theme from the dropdown menu to control how the widget appears on your IDX details pages. -
Show Advanced Settings
Expand this section to insert:-
Custom CSS: Style the widget with your own code (no
<style>tags needed). -
Custom JavaScript: Add behaviors or tracking features (no
<script>tags required).
-
Custom CSS: Style the widget with your own code (no
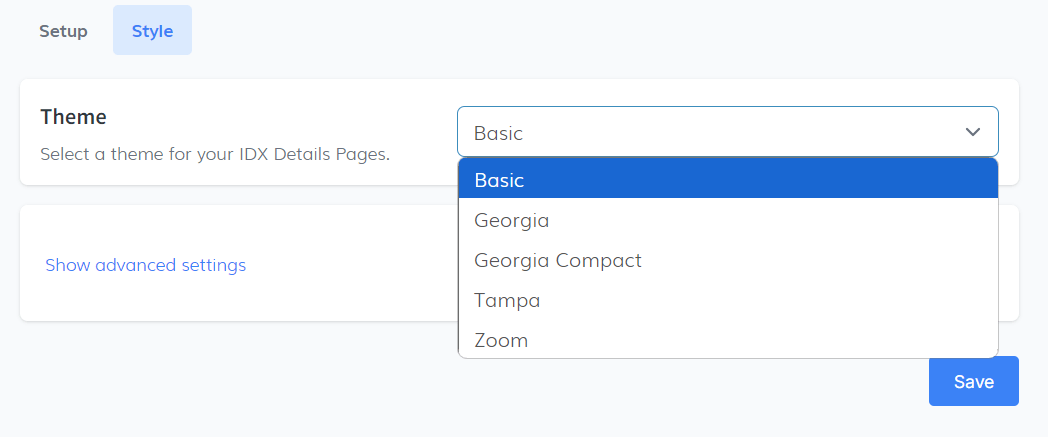
Click Save after making any visual or functional adjustments.
3. Embed the WidgetOnce your widget is fully configured, click the Copy Code button. Paste the code snippet into the section of your site where you'd like the agent information to appear.
✅ Be sure to save changes in each section before copying your code.📍Go to the Agent Information Widget.
🏡 Home Valuation Widget
The Home Valuation Widget allows your visitors to request an estimated value of their home directly from your website. This powerful lead-generation tool helps you capture motivated sellers and buyers while providing a seamless experience.
1. Settings TabIn the Settings tab, you’ll find general setup options:
- Show valuation before asking for lead info: Let visitors see their estimated home value before filling out the form to boost engagement.
- Automatically create IDX Broker leads: Enabled by default to send new lead info straight to your IDX Broker account.
- Agent’s Phone Number: Add your number to receive SMS alerts when someone requests a valuation.
- SMS Message: Customize the text message users receive. Use {address} to auto-insert the property address for a personalized experience.
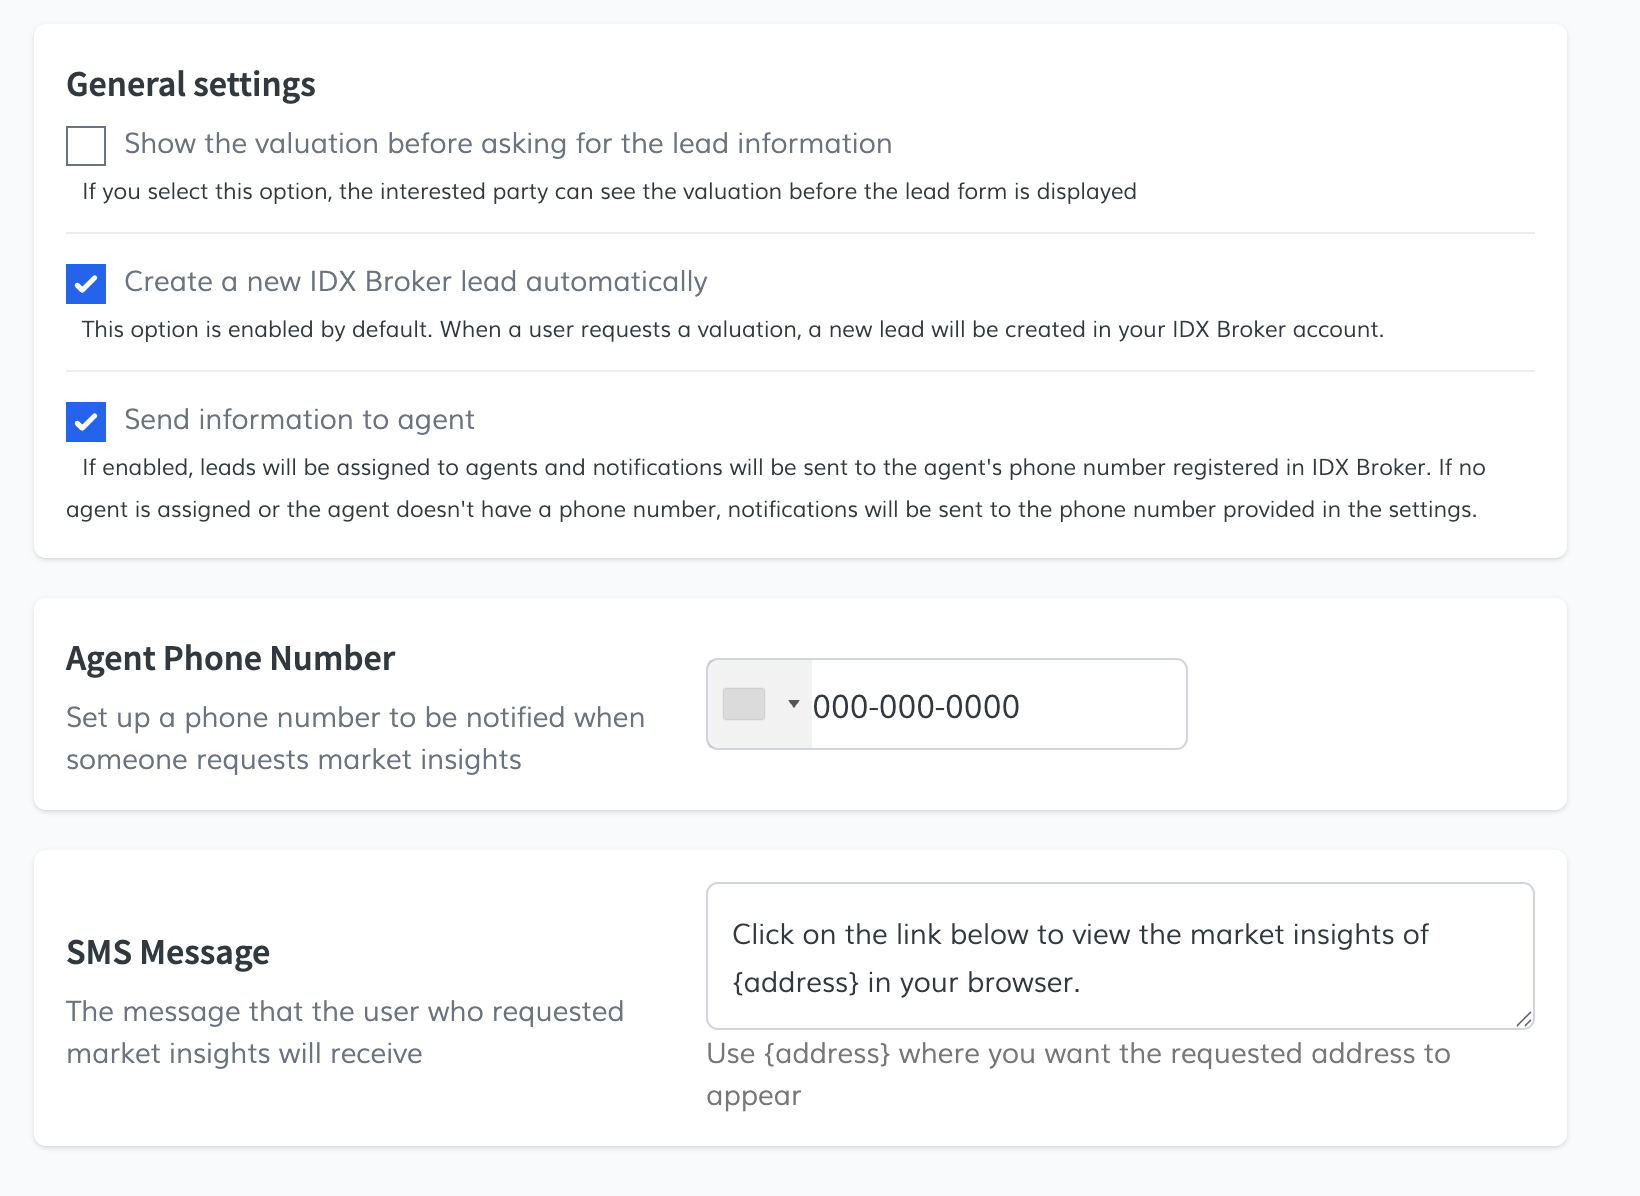
After filling in the settings, click Save, then copy the code snippet provided to embed the widget on your site.
Advanced SettingsThis section lets you add branding and layout customizations:
- Logo URL: Display your logo on the results page.
- Header/Footer Content: Add custom text to better communicate your brand or CTA.
- Additional CSS: Style the widget even further with your own CSS code.
Click Save after making changes to access the updated embed code.
2. Style TabCustomize the widget to match your site’s branding:
- Choose colors for background, buttons, and text.
- Adjust fonts and visual spacing.
After styling, save your changes to apply them immediately to the live widget.
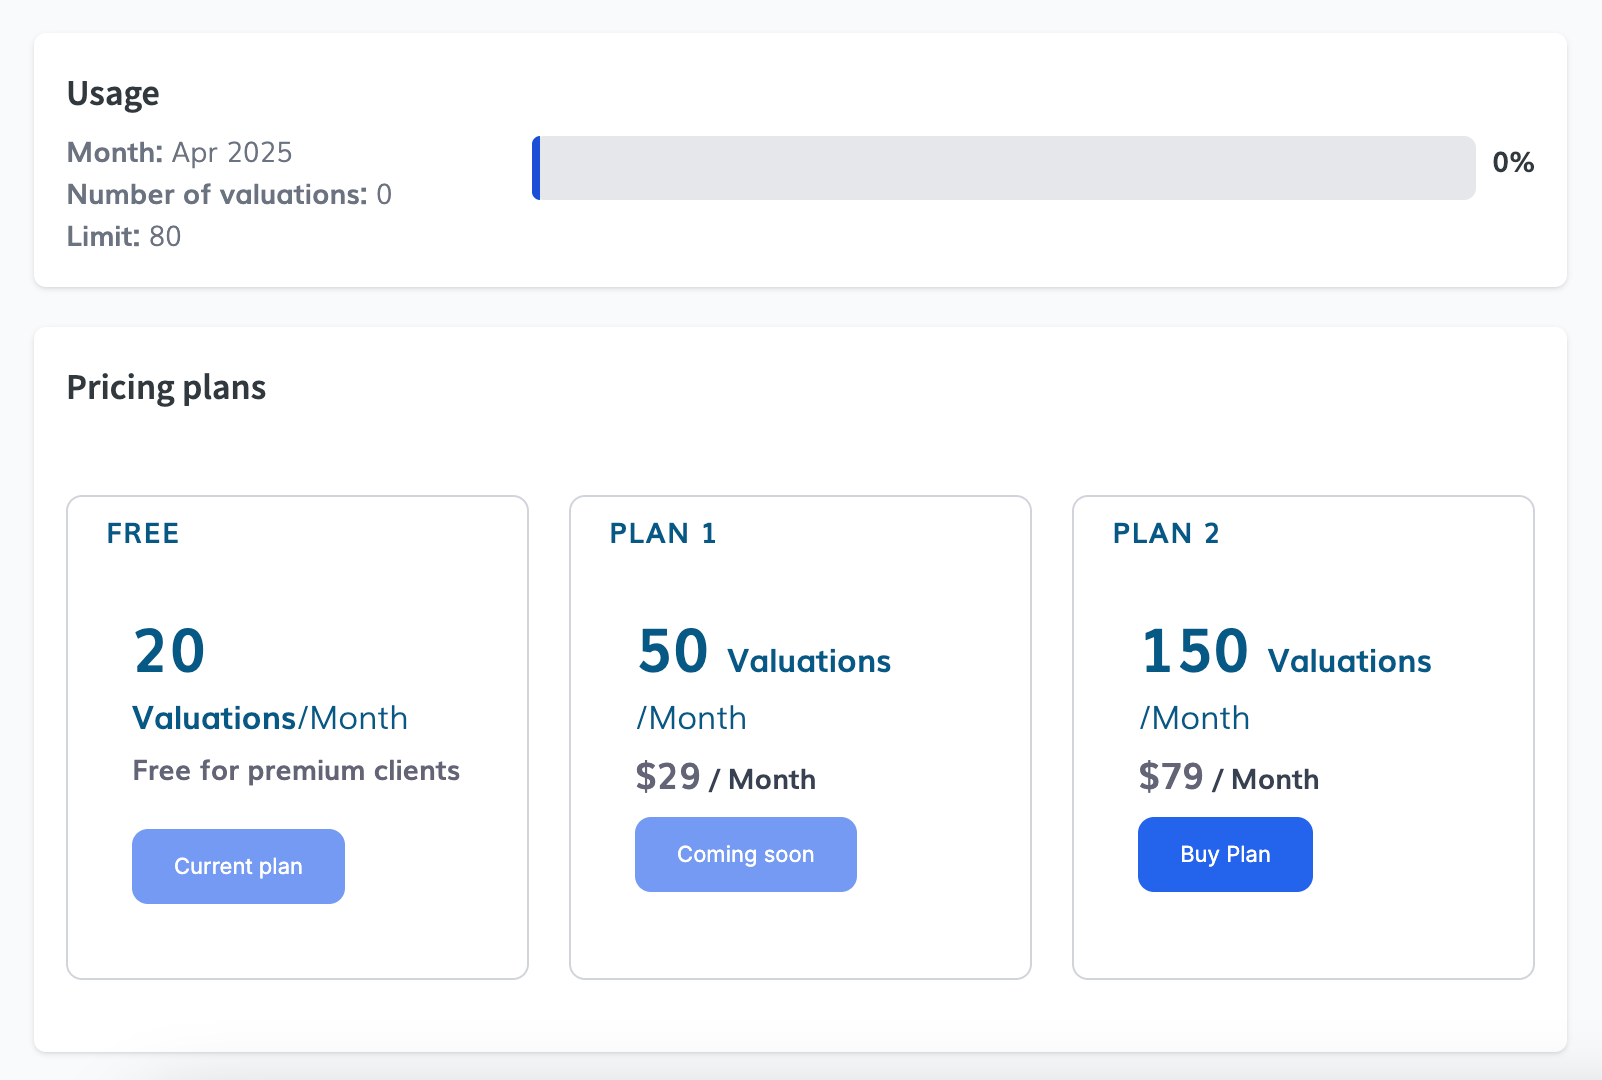
3. Usage TabTrack widget activity from the Usage tab:
- View monthly usage as a percentage.
- See how many valuations have been created.
The widget includes 20 free valuations/month, with optional plans:
- 50/month – $29
- 150/month – $79
 4. Requests Tab
Review your leads under Requests, including both Valuations and Market Insights:
- Valuations: Shows data like address, value result, date, and lead info.
- Market Insights: Displays detailed reports and a clickable link to the full market data.
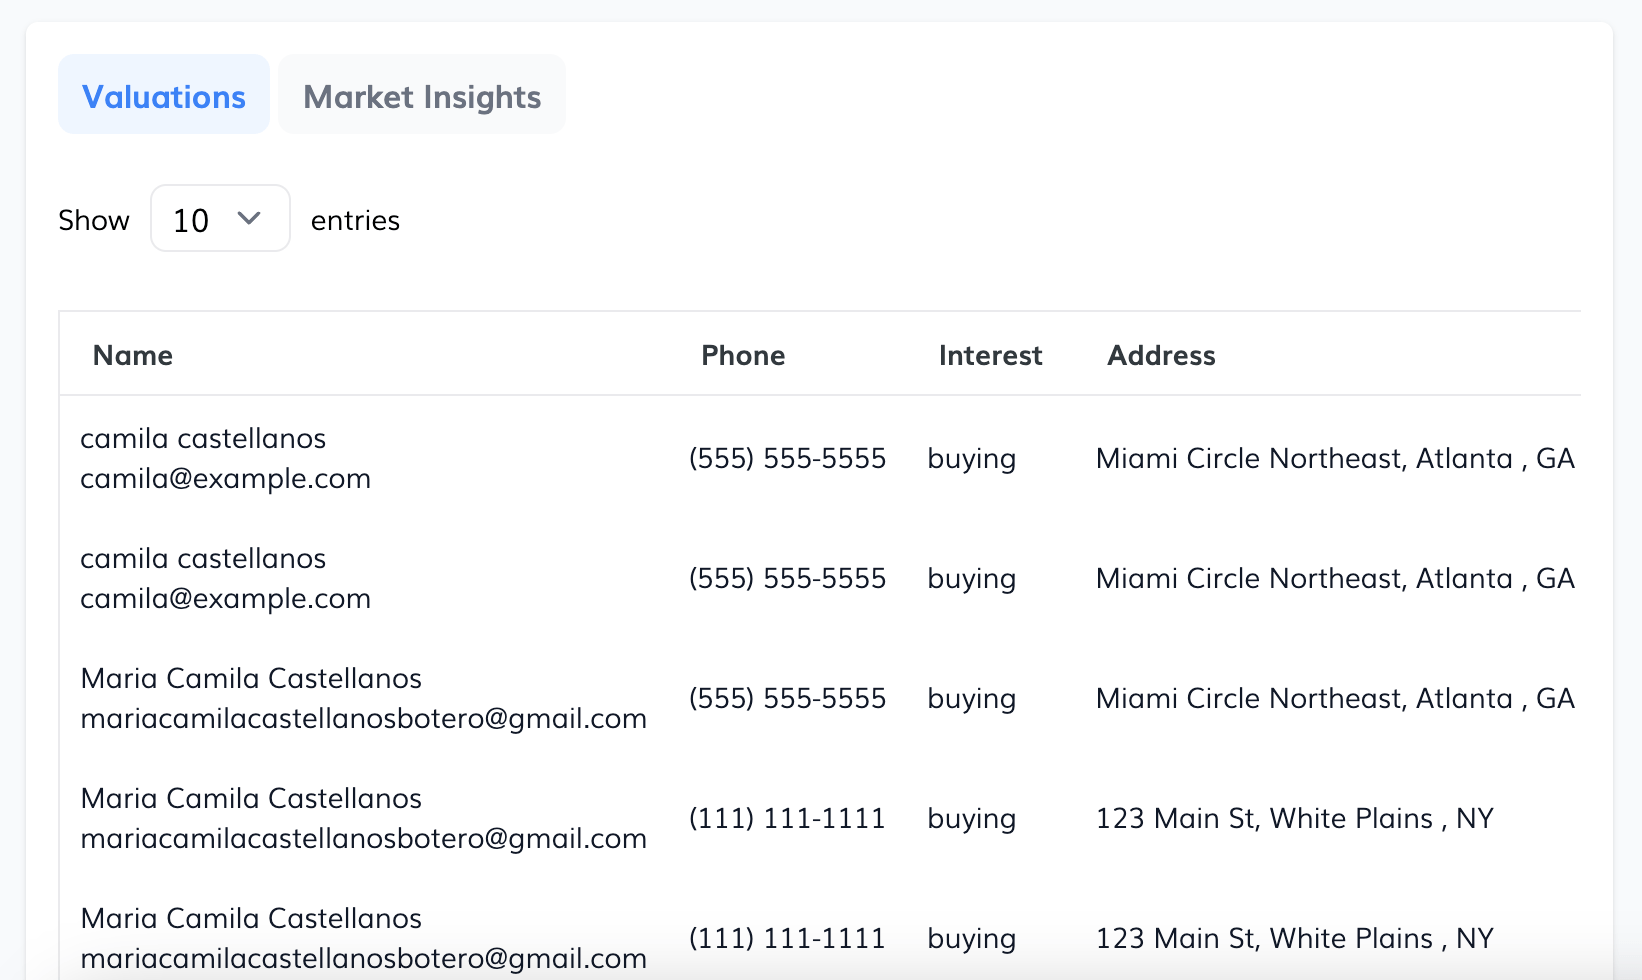
Results will show a green "Successful" or red "No Results" badge depending on data availability.
5. GHL Integration (LeadConnector)You can automatically send leads to your GHL (GoHighLevel) account:
- Go to the LeadConnector Integration tab.
- Click Connect LeadConnector and follow the prompts.
- Back in the widget settings, enable Send leads to LeadConnector.
- Confirm the popup action.
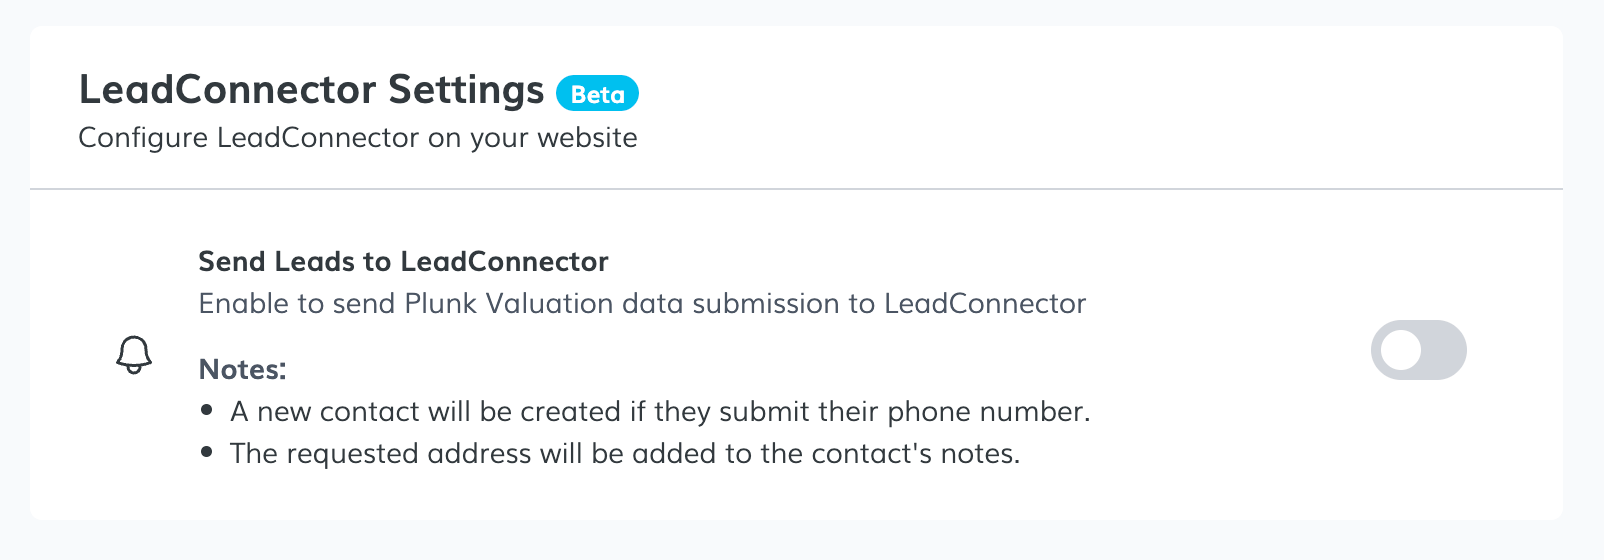
Leads will be tagged with "plunk" and the property address will be saved as a note.
📍Go to the Home Valuation Widget.