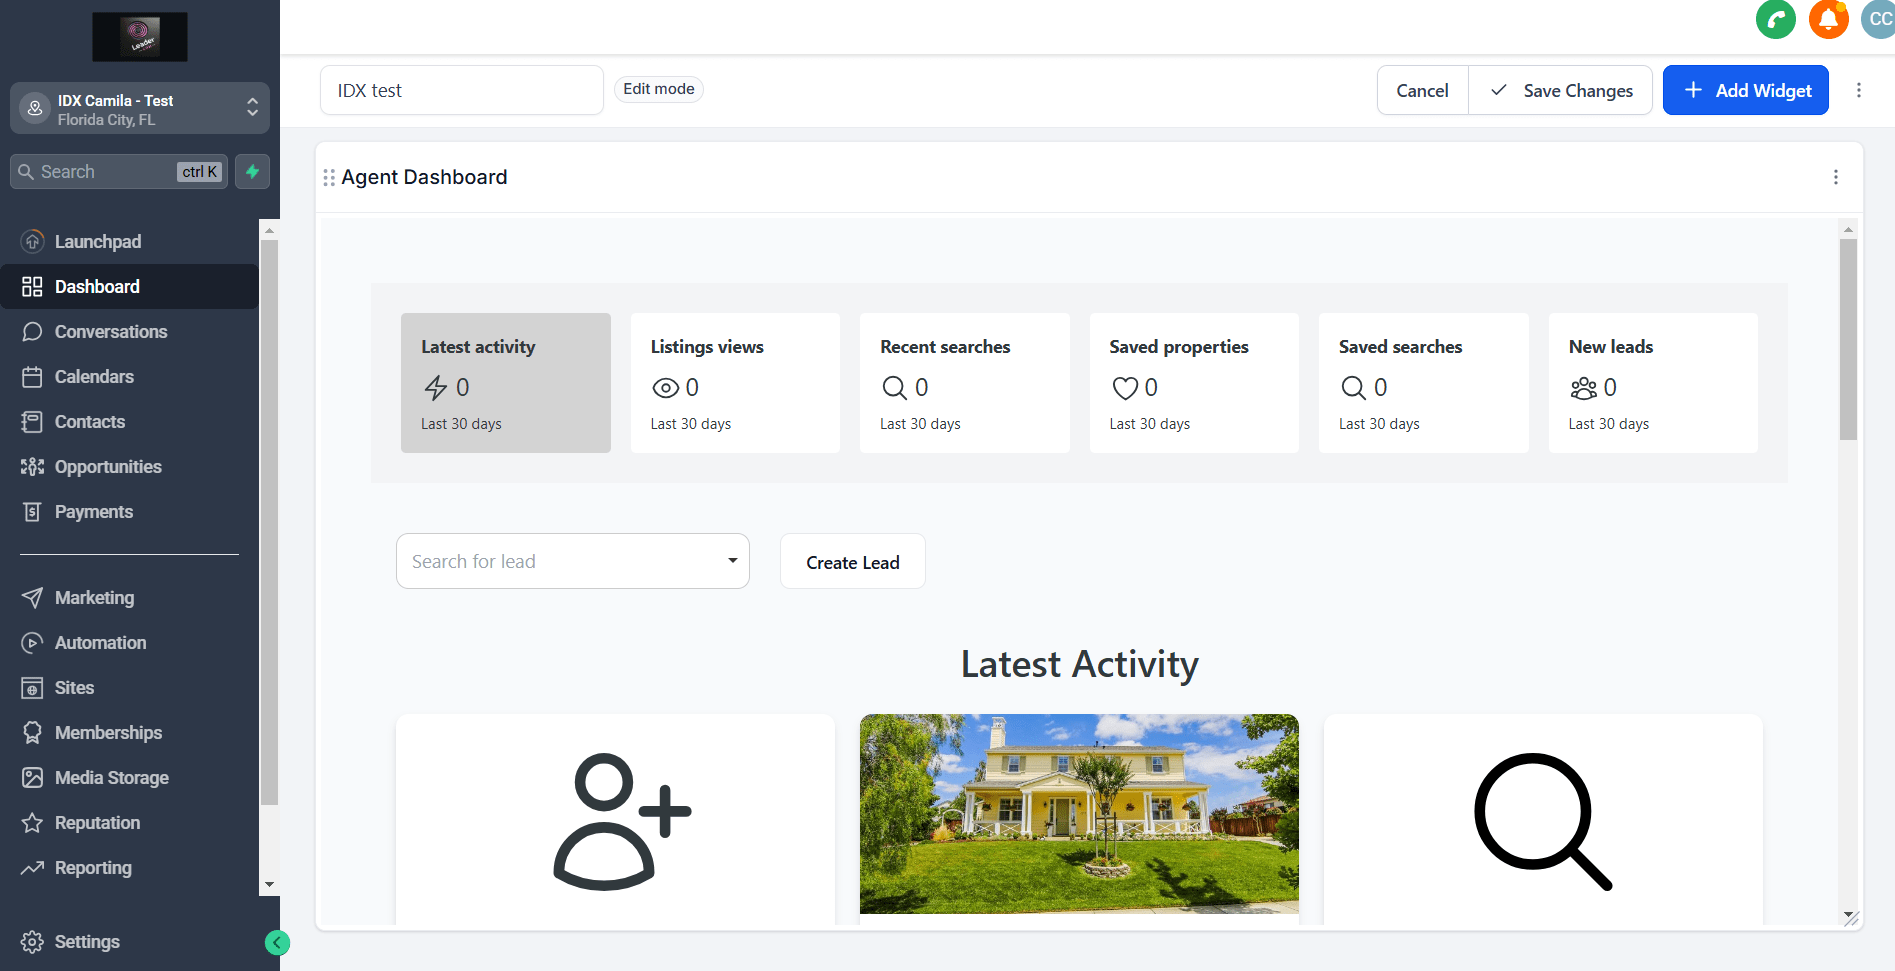
-
Access the Platform
Log in to your IDXAddons account
Go to Configuration and select HighLevel - Agent connections.
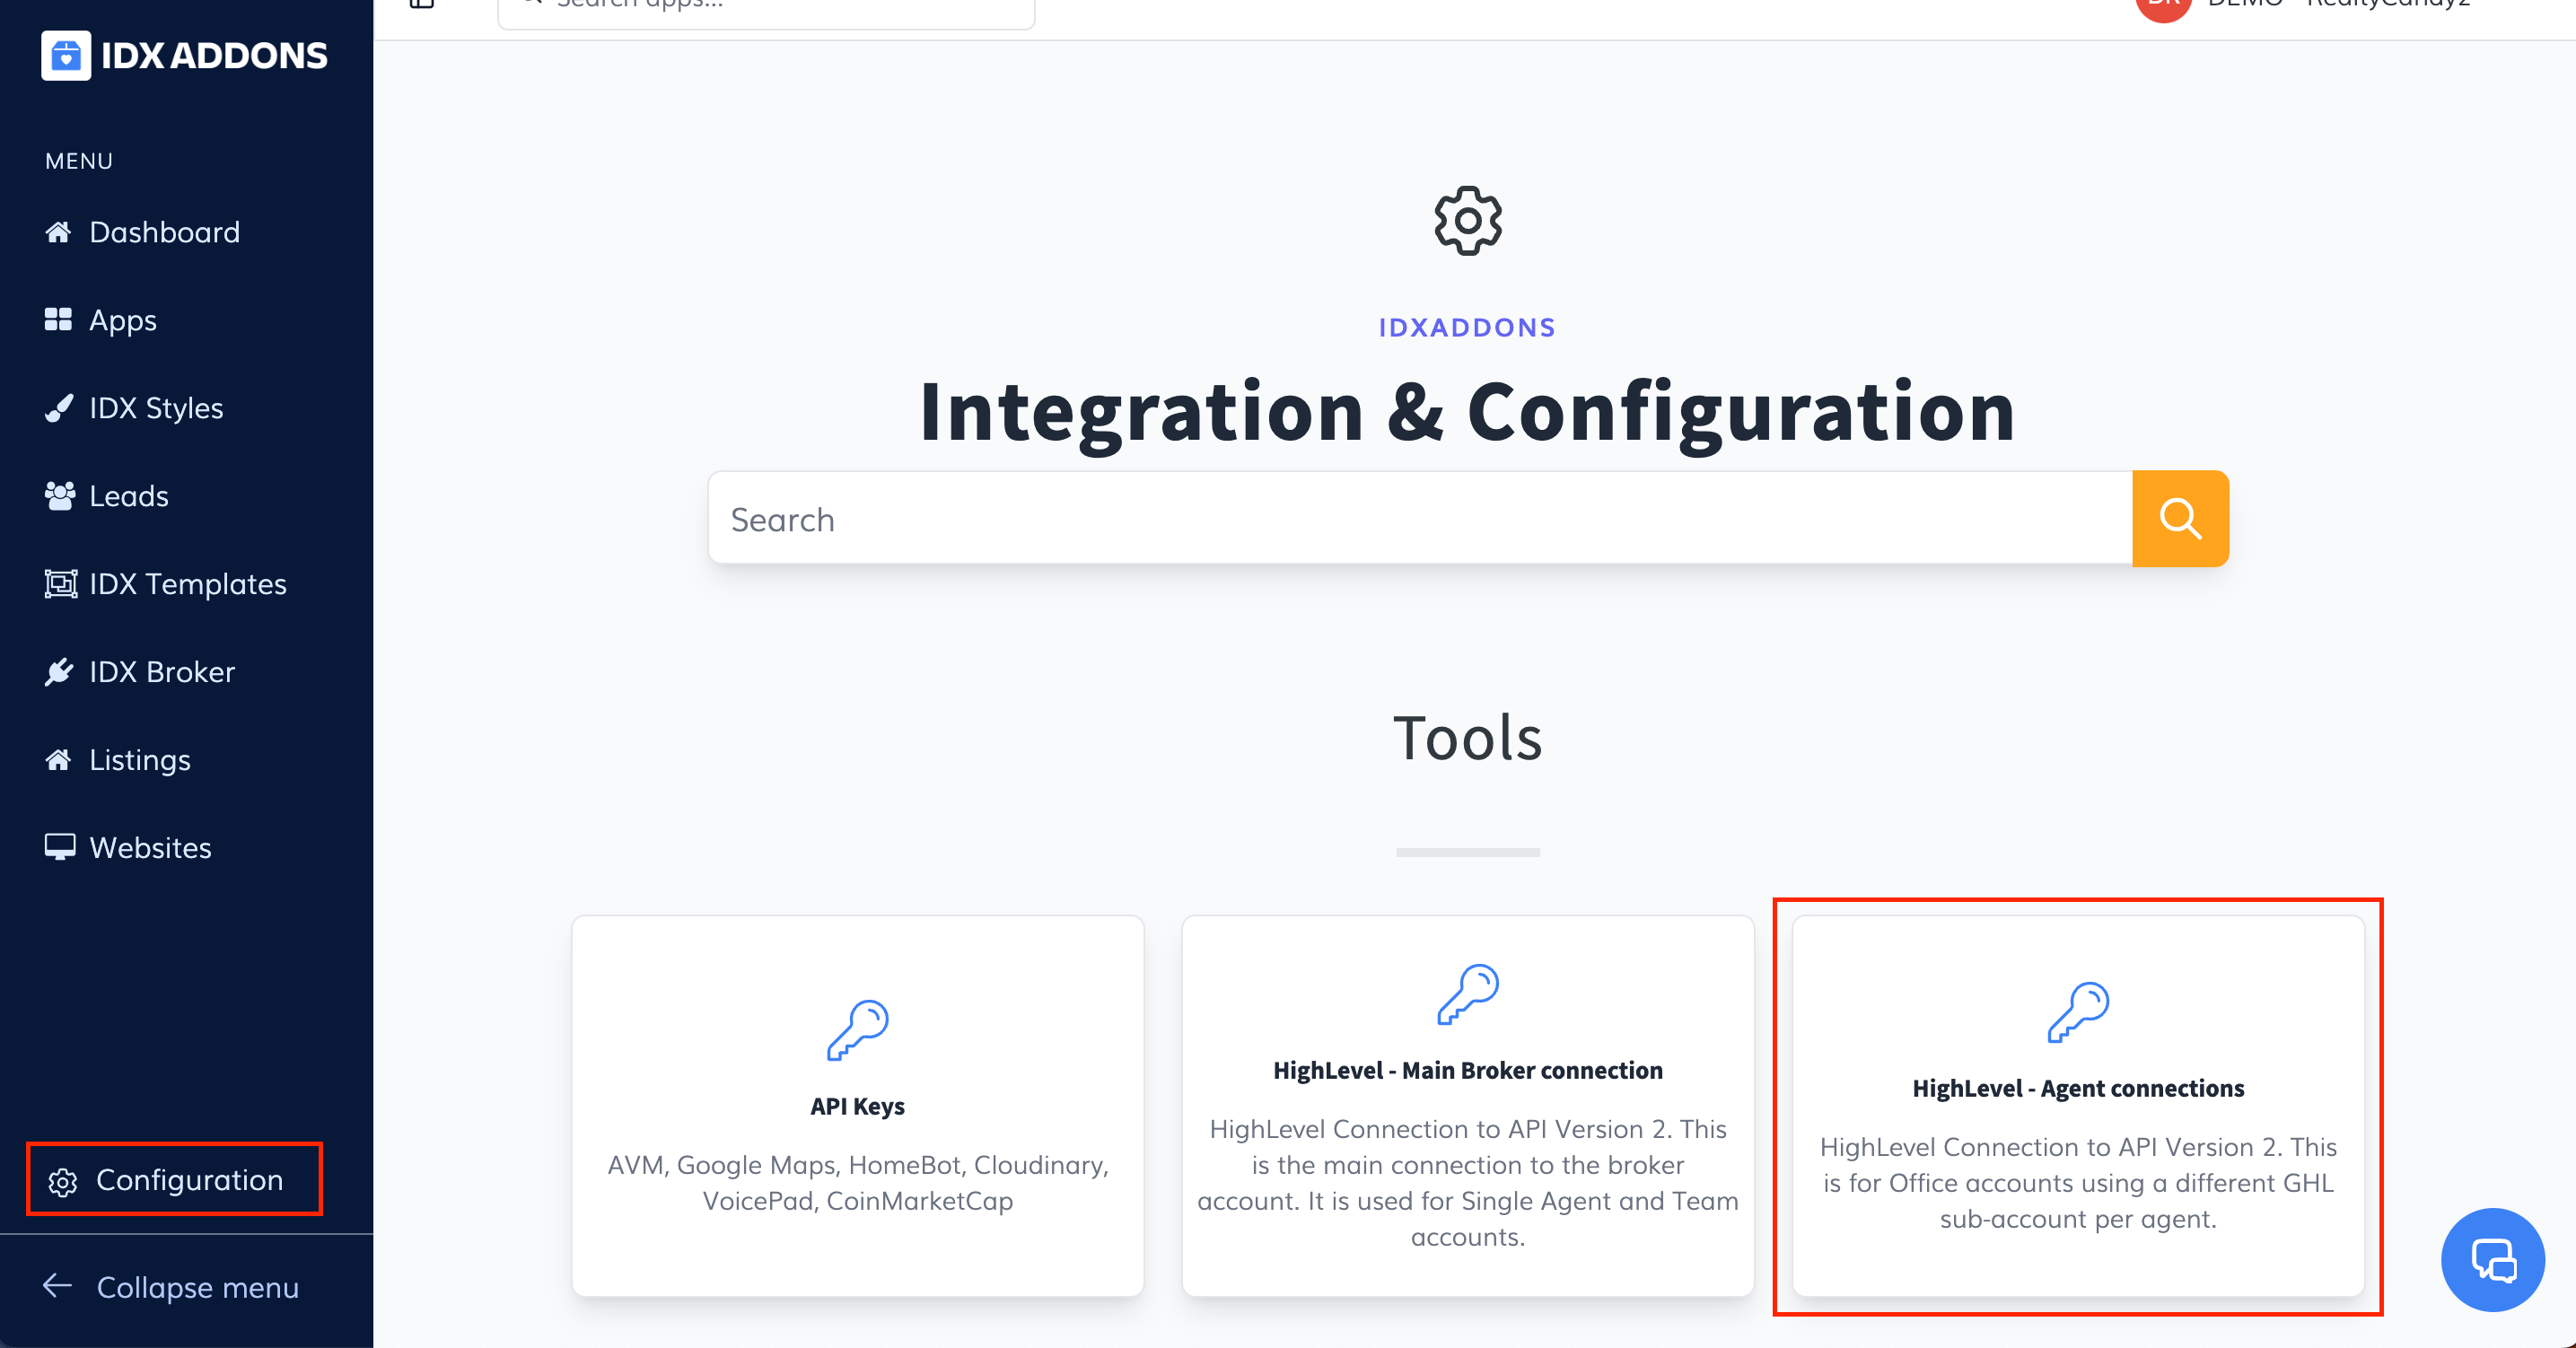
-
Office Account Tab
The first time you access to the setup page, you will see a list of the agents in your Team or Office account with empty setup fields.

For this tutorial, we will select the first agent in the list to setup the GHL sub-account.

Click on the button "Connect HighLevel" and select the sub-account that will be used for this agent.

A loading icon will appear while the information is being saved and the Custom Values and Fields are being created in the GHL sub-account.

Once the setup is completed, a success message will appear.

If you reload the page, you will be able to see the Agent Hash. This is a unique identifier for the agent that will be used to link the agent's GHL sub-account and show the lead activity, saved properties, and saved searches.

-
GHL Custom Menu Link
In the Agency Settings > Custom Menu Link, click on "Create New".

A pop-up will appear.

Select a Link Icon. We recommend the "Building" or "Home" icon, but feel free to choose the one you like the most.

Enter the Link Title. For this example we will use "IDX Agent Dashboard", but feel free to choose the one you like the most. This will be the name of the link in the GHL menu.

Now paste the IDXAddons - LeadConnector Dashboard for Agents link in the URL field. This will be the link that will open the IDXAddons - LeadConnector Dashboard for Agents in GHL.

This is how the form should look like.
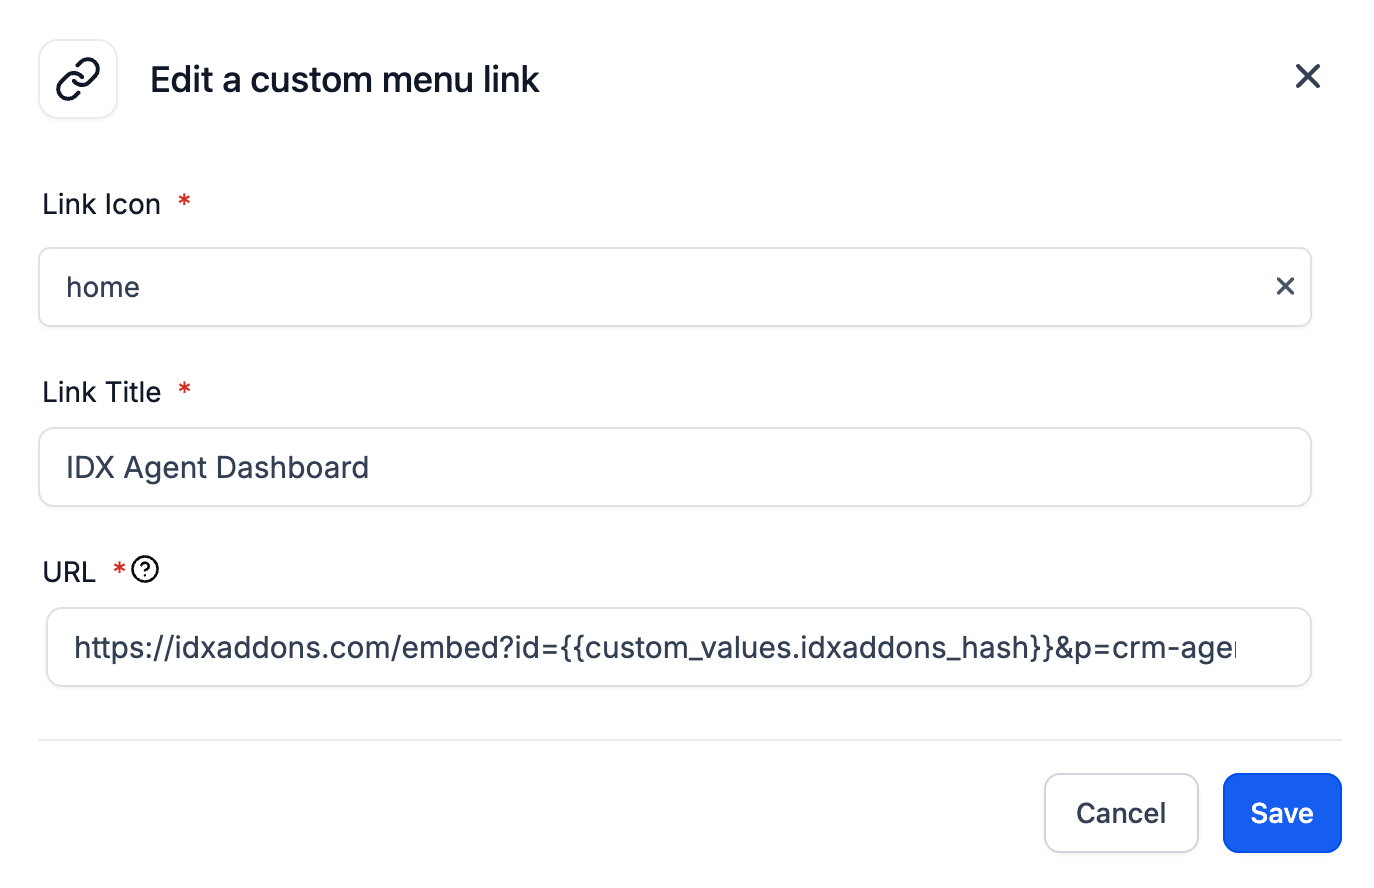
Now scroll down to see the rest of the settings.

Now you need to select which sub-accounts you want to display the IDXAddons - LeadConnector Dashboard for Agents link on. You can select all subaccounts or just some of them.

In the "When Clicked" option, select "Open in iFrame inside the platform".

After filling all the fields, click on "Save".

Now you can see the IDX Agent Dashboard link in the GHL menu. The first time, you won't see data in the dashboard because the webhook will start sending from your leads' activity from that moment on, but after a few days, you will see your leads' activity in the dashboard.
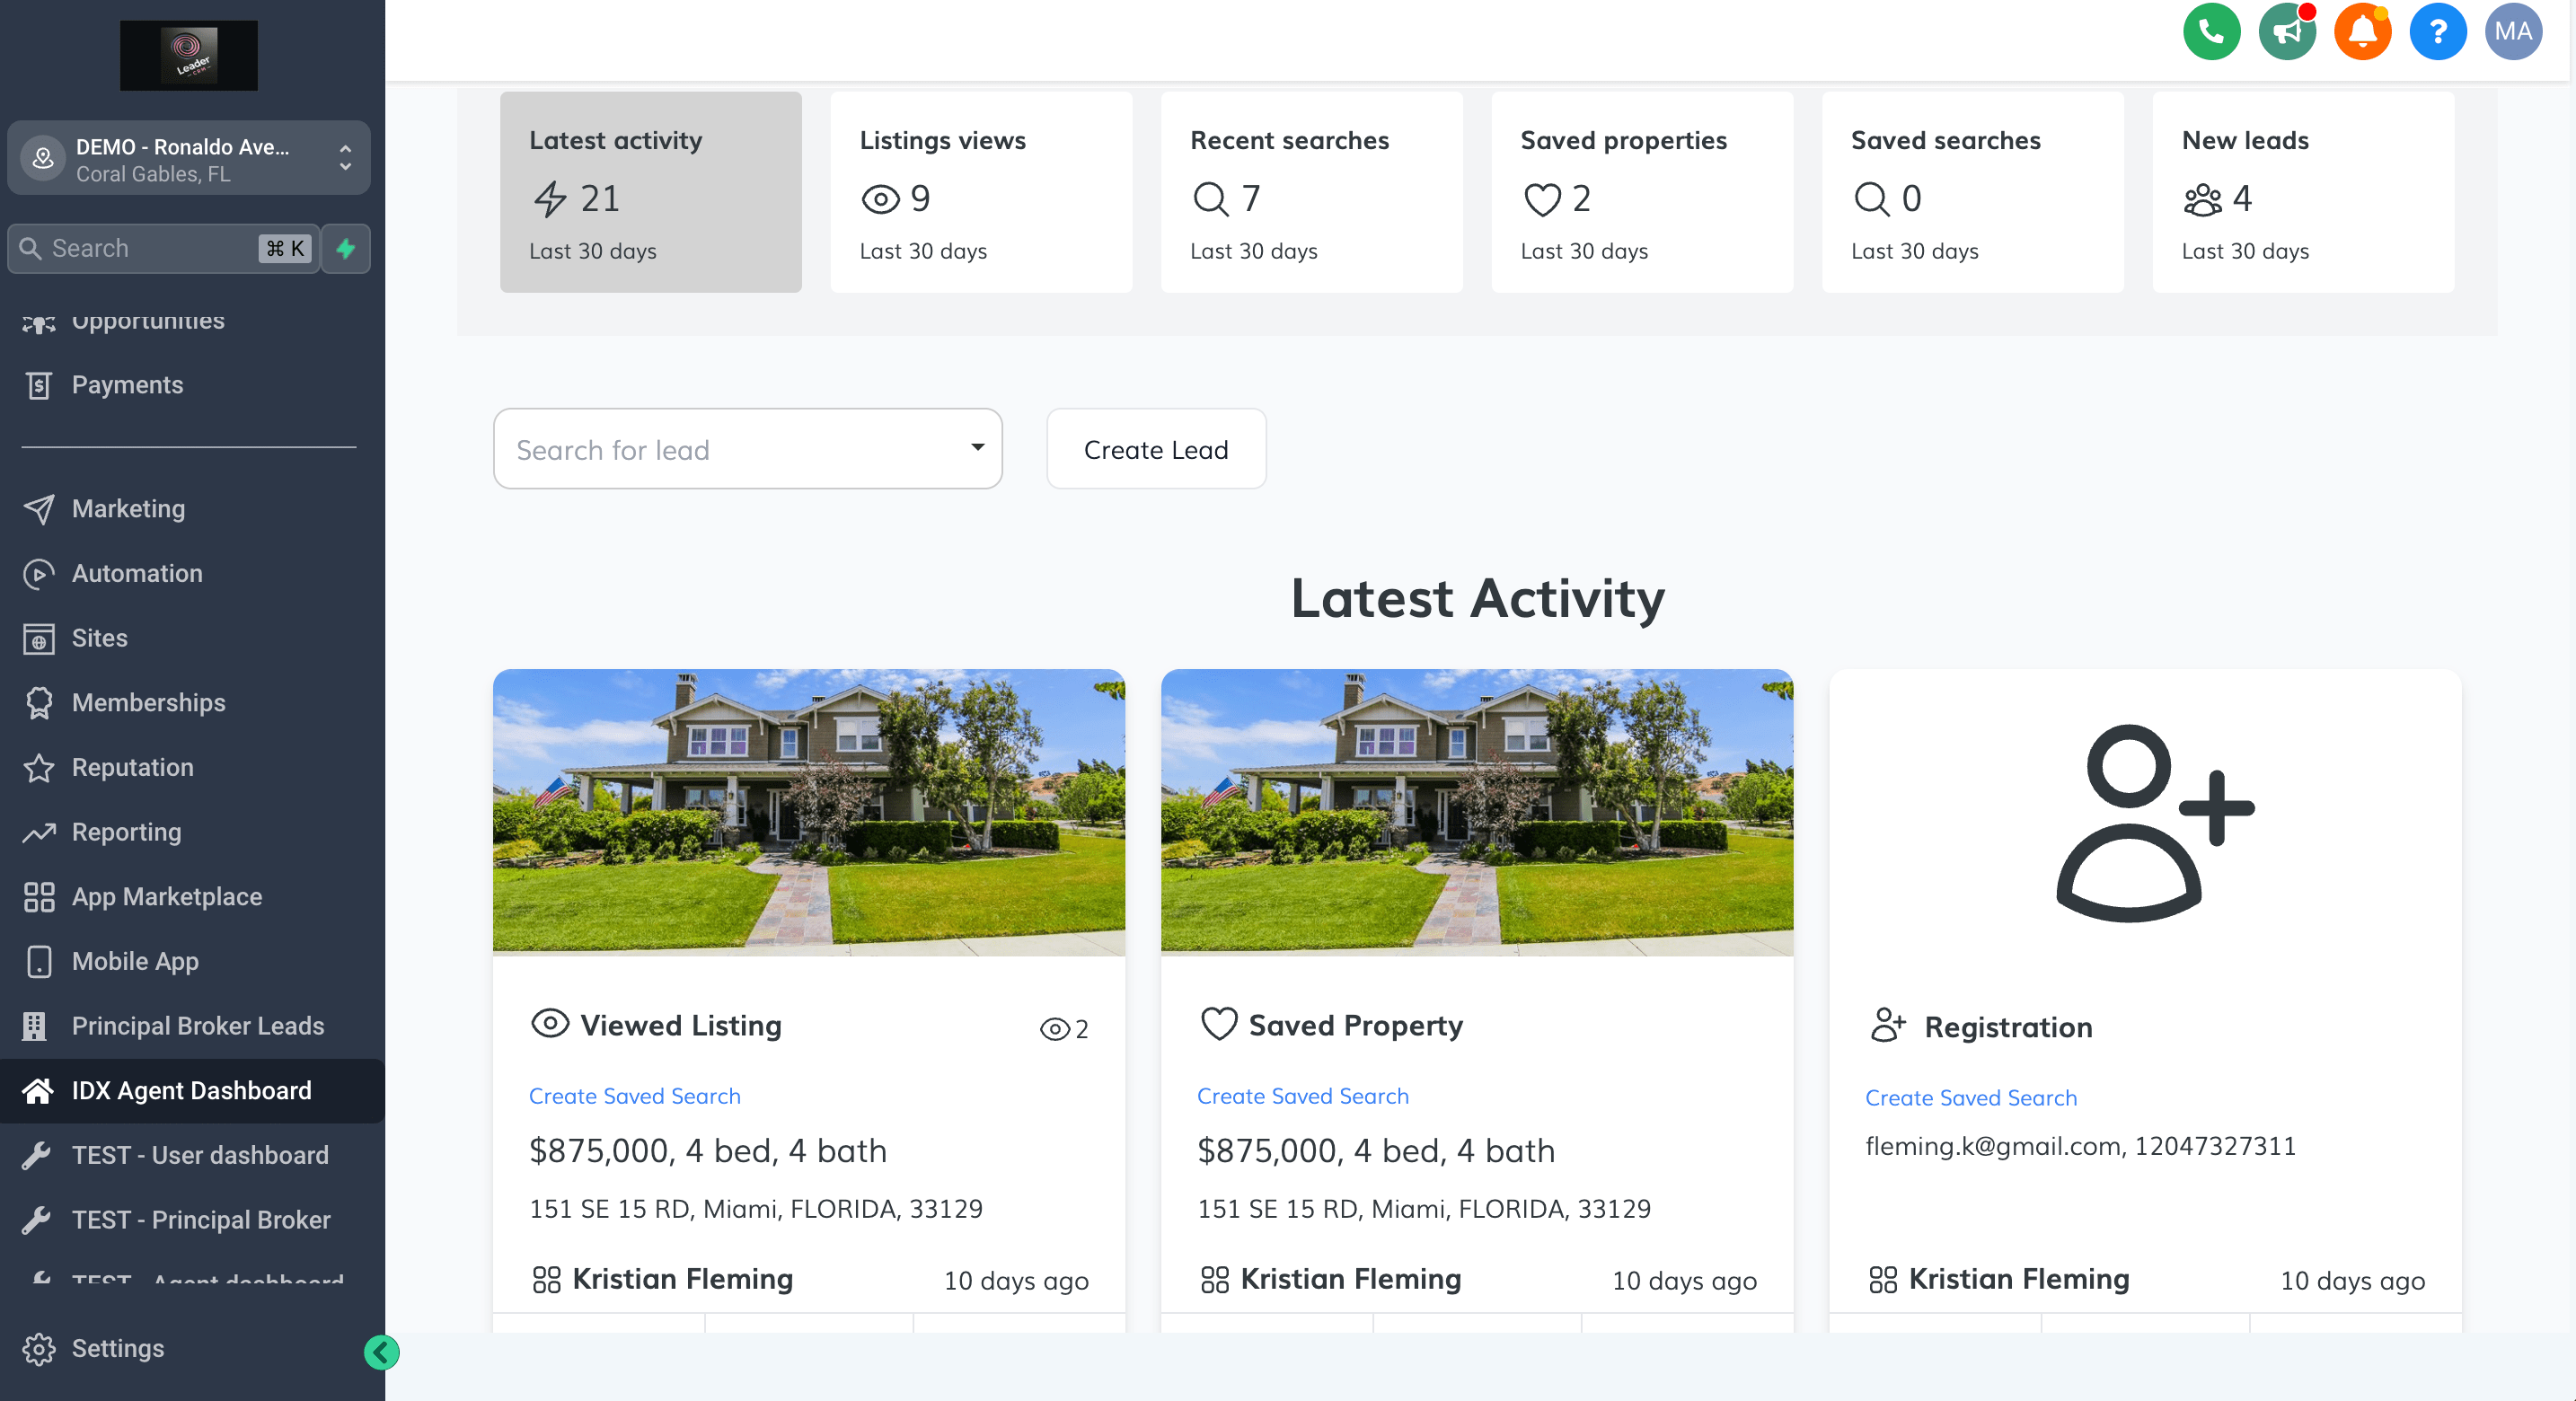
-
How to Add the Dashboard as a Widget in HighLevel
Go to the LeadConnector Integration page in the Office Account section.
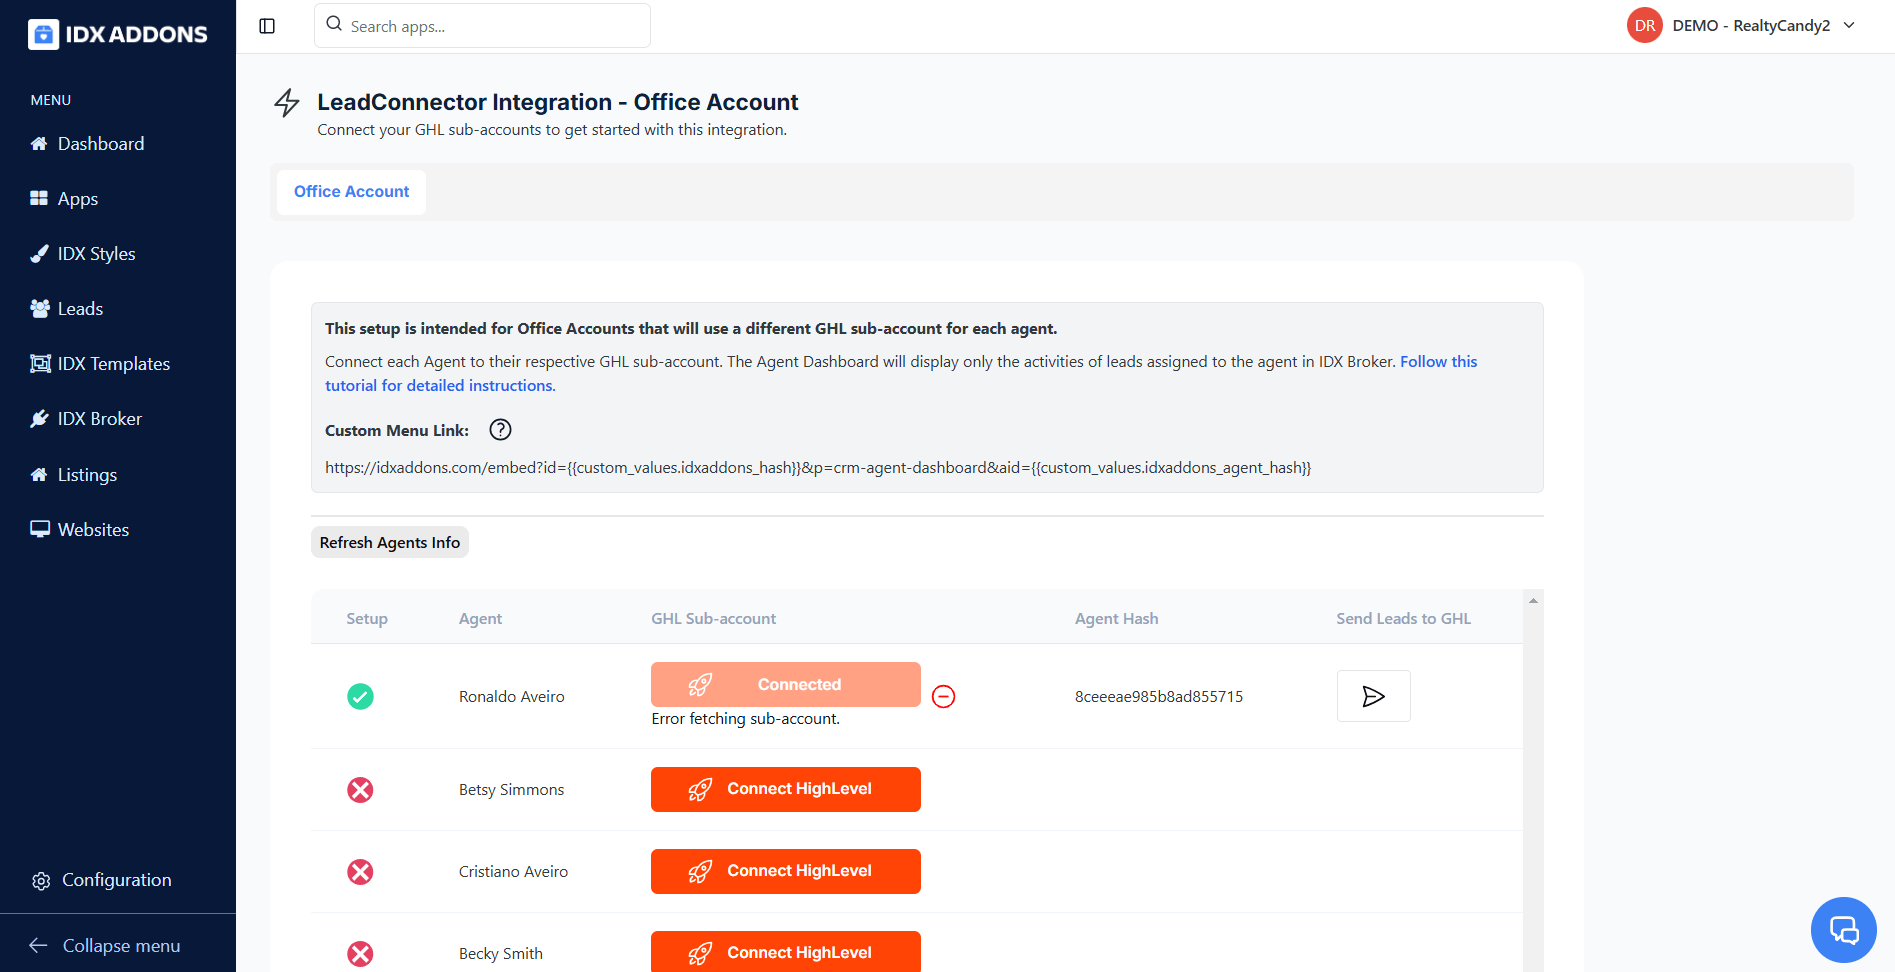
On this page, you'll find the Custom Menu Link.

Go to the HighLevel page and log into the dashboard.
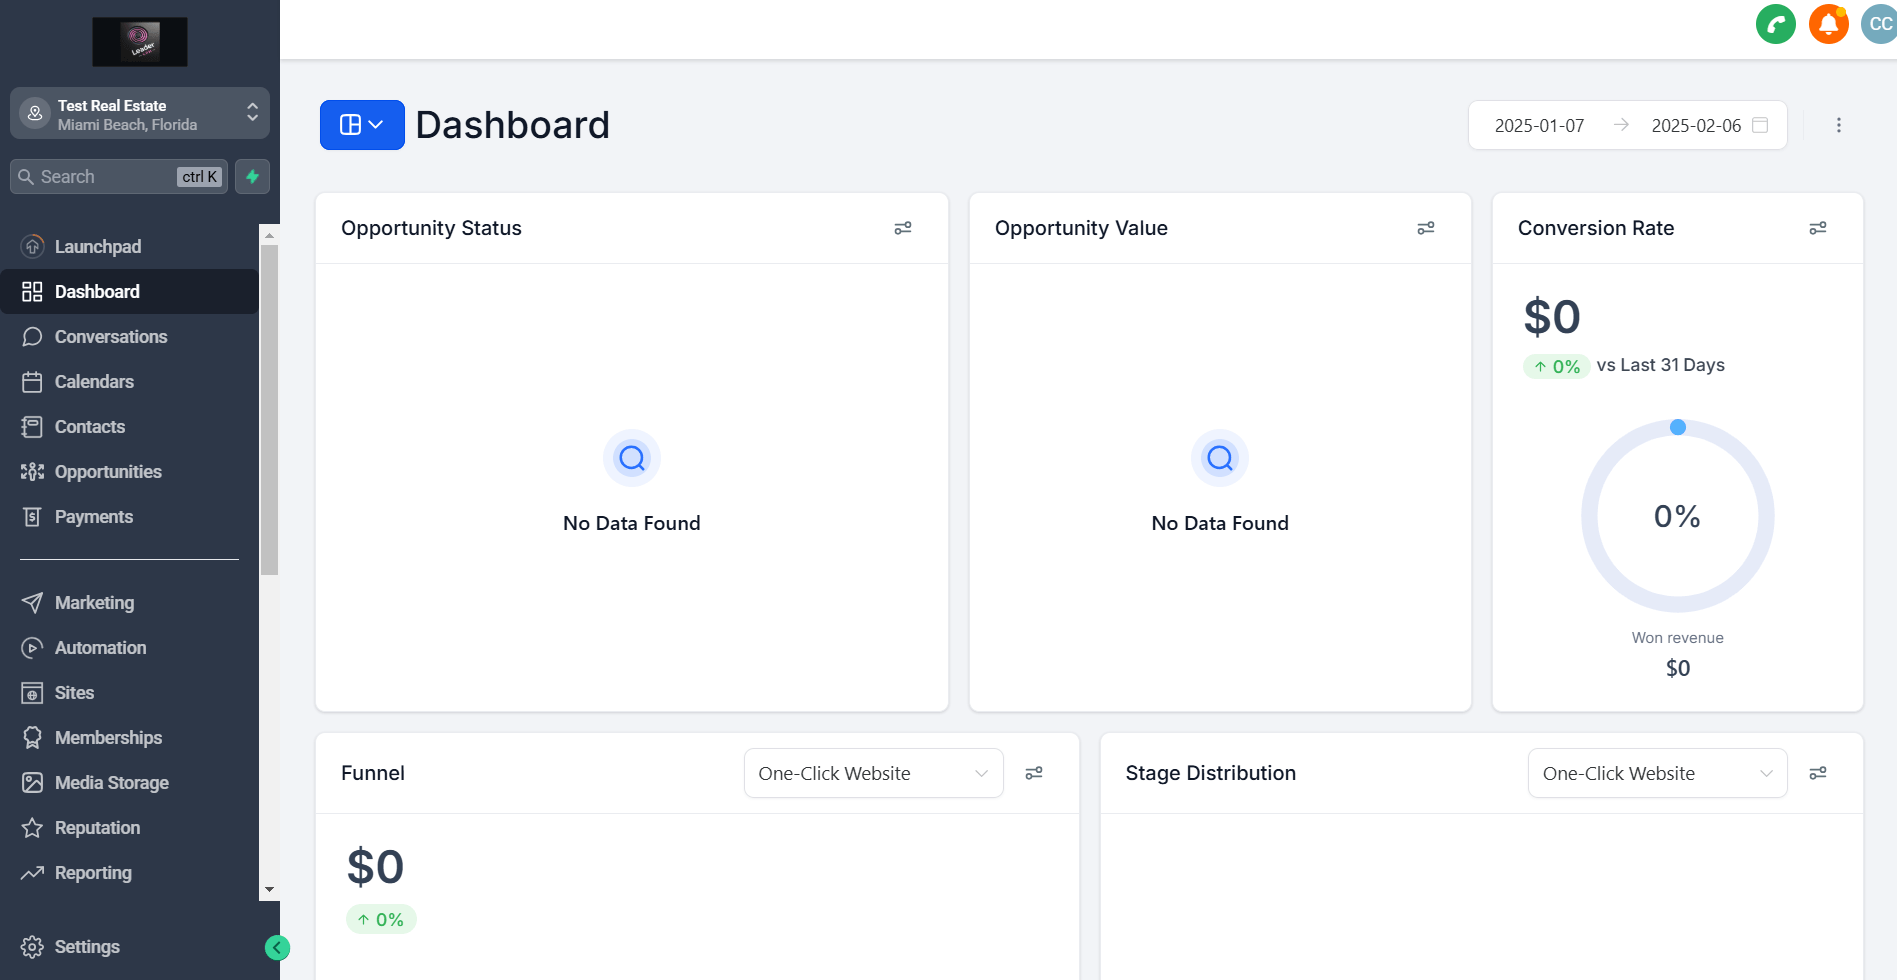
Click the "Edit Dashboard" button.

The "Add Widget" option will appear.

When you click, a menu will open. Go to 'Elements' and select 'Embed'.
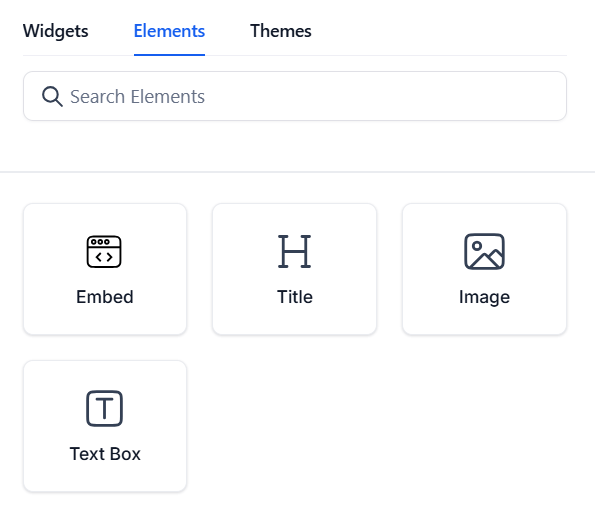
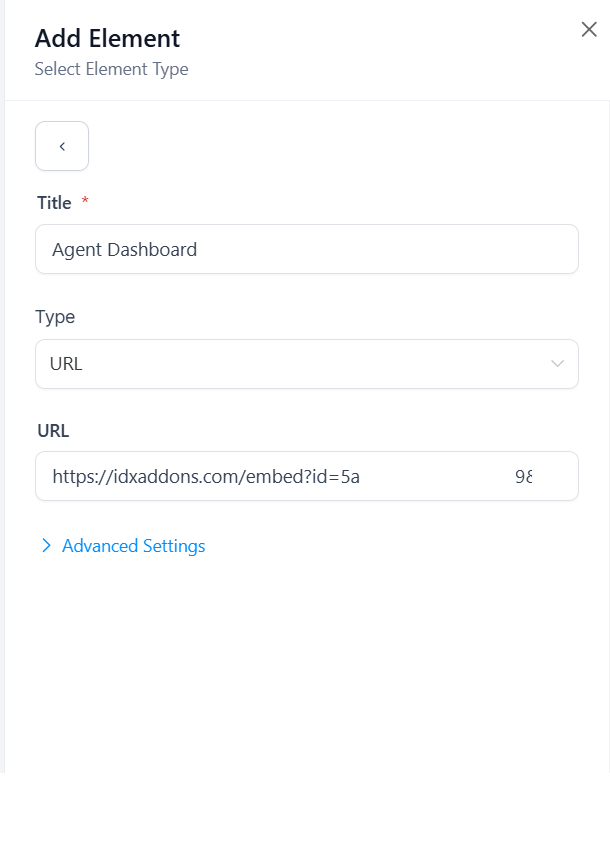
Enter a title for the widget and leave the Type as "URL".

Note that HighLevel does not recognize custom values, so you need to replace the variables with the actual values.
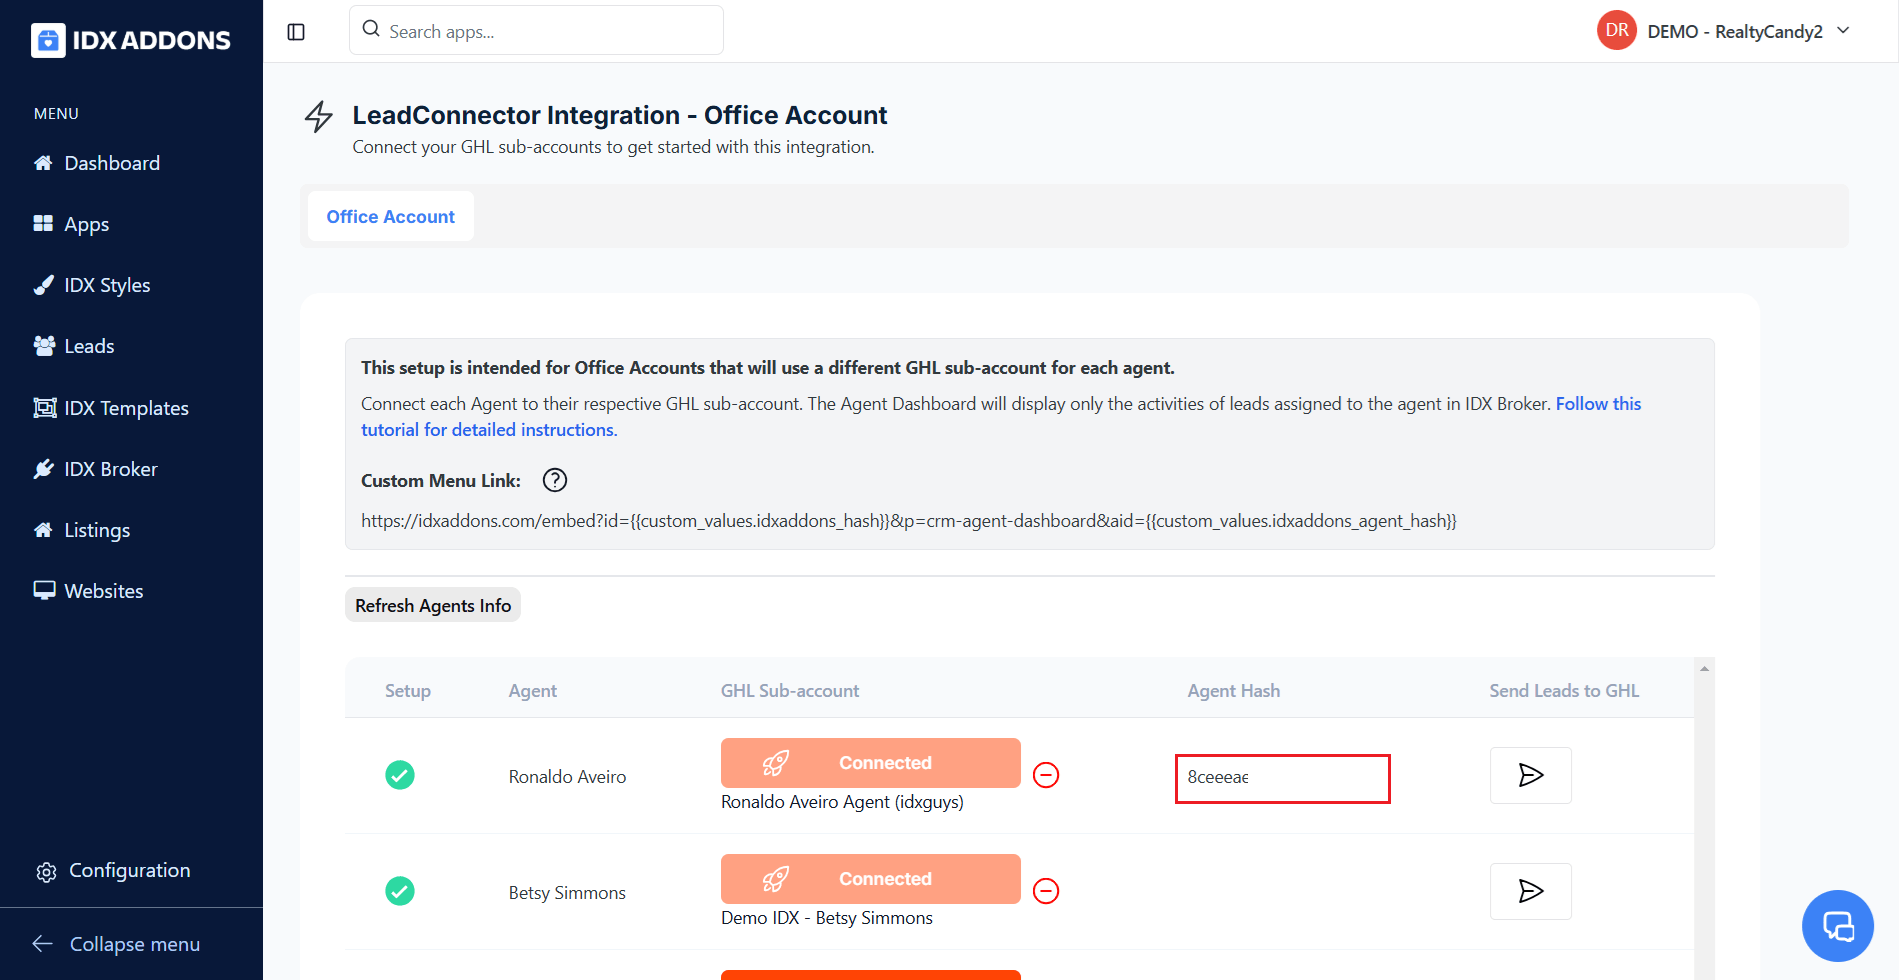
To get the custom value of the IDXAddons Hash, go to the LeadConnector Dashboard. You will find it at the bottom of the page.
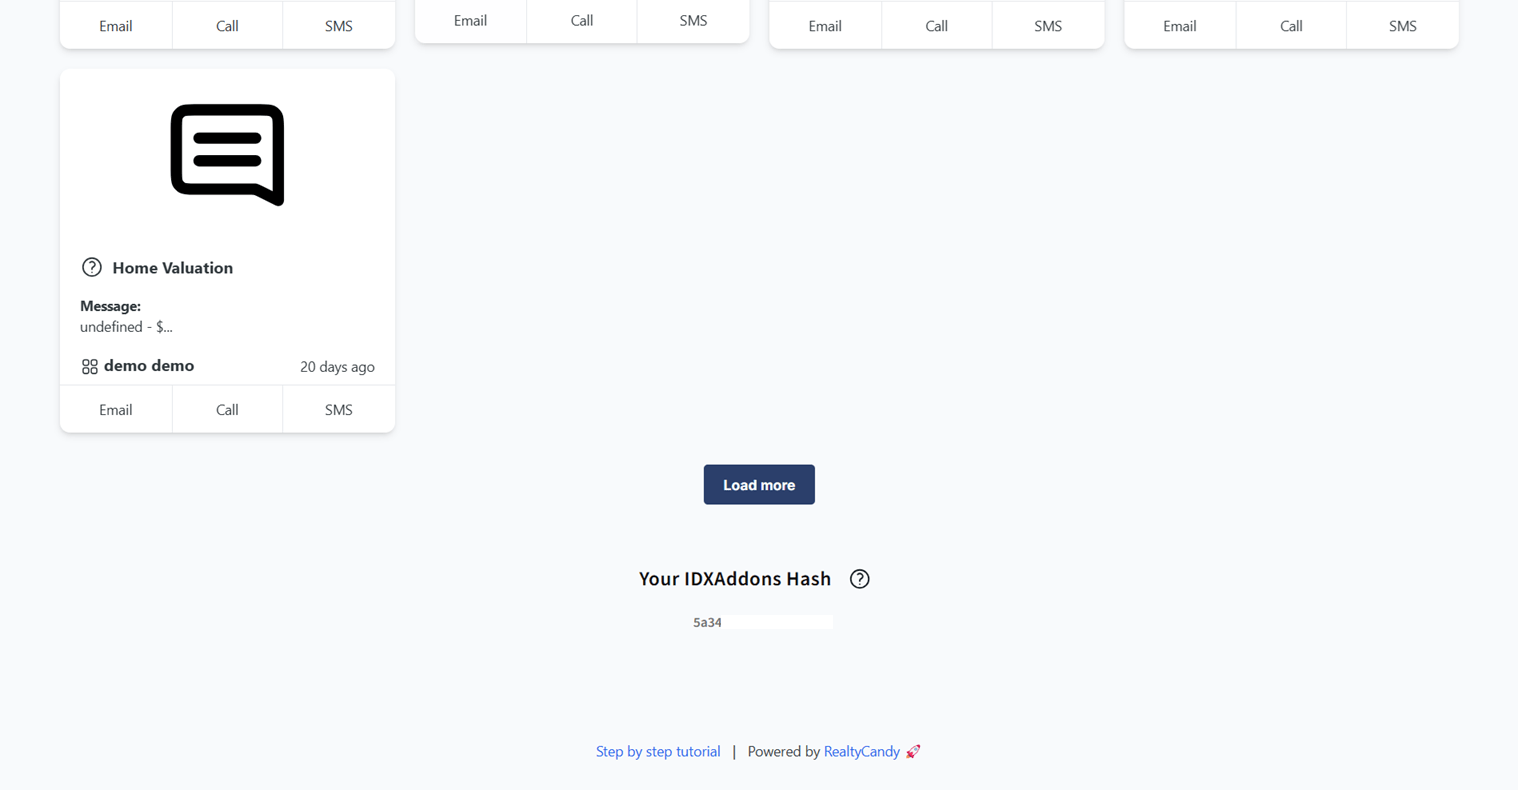
Replace this hash in the main URL in HighLevel.
The Agent Hash is located on the LeadConnector Integration - Office Account page.
In the table, find the "Agent Hash" field and get the Agent ID.
This is how it should look, by replacing the variables with the agent's hash.
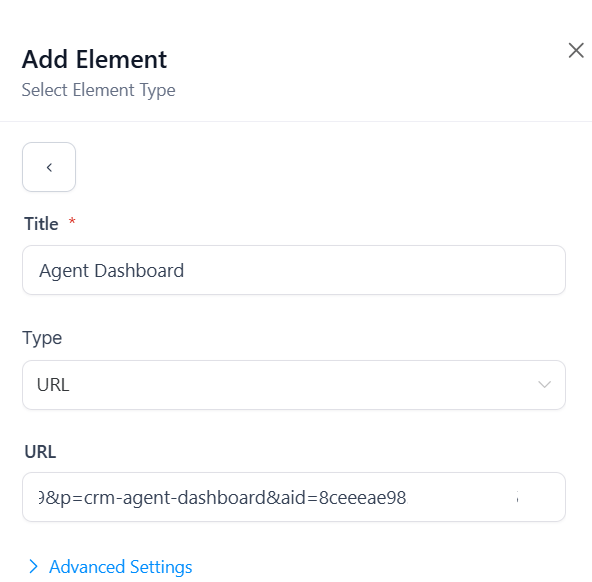
Click the "Save" button to save your changes.

The widget will now appear in your GHL dashboard.
