-
Access the Platform
Log in to your IDXAddons platform account
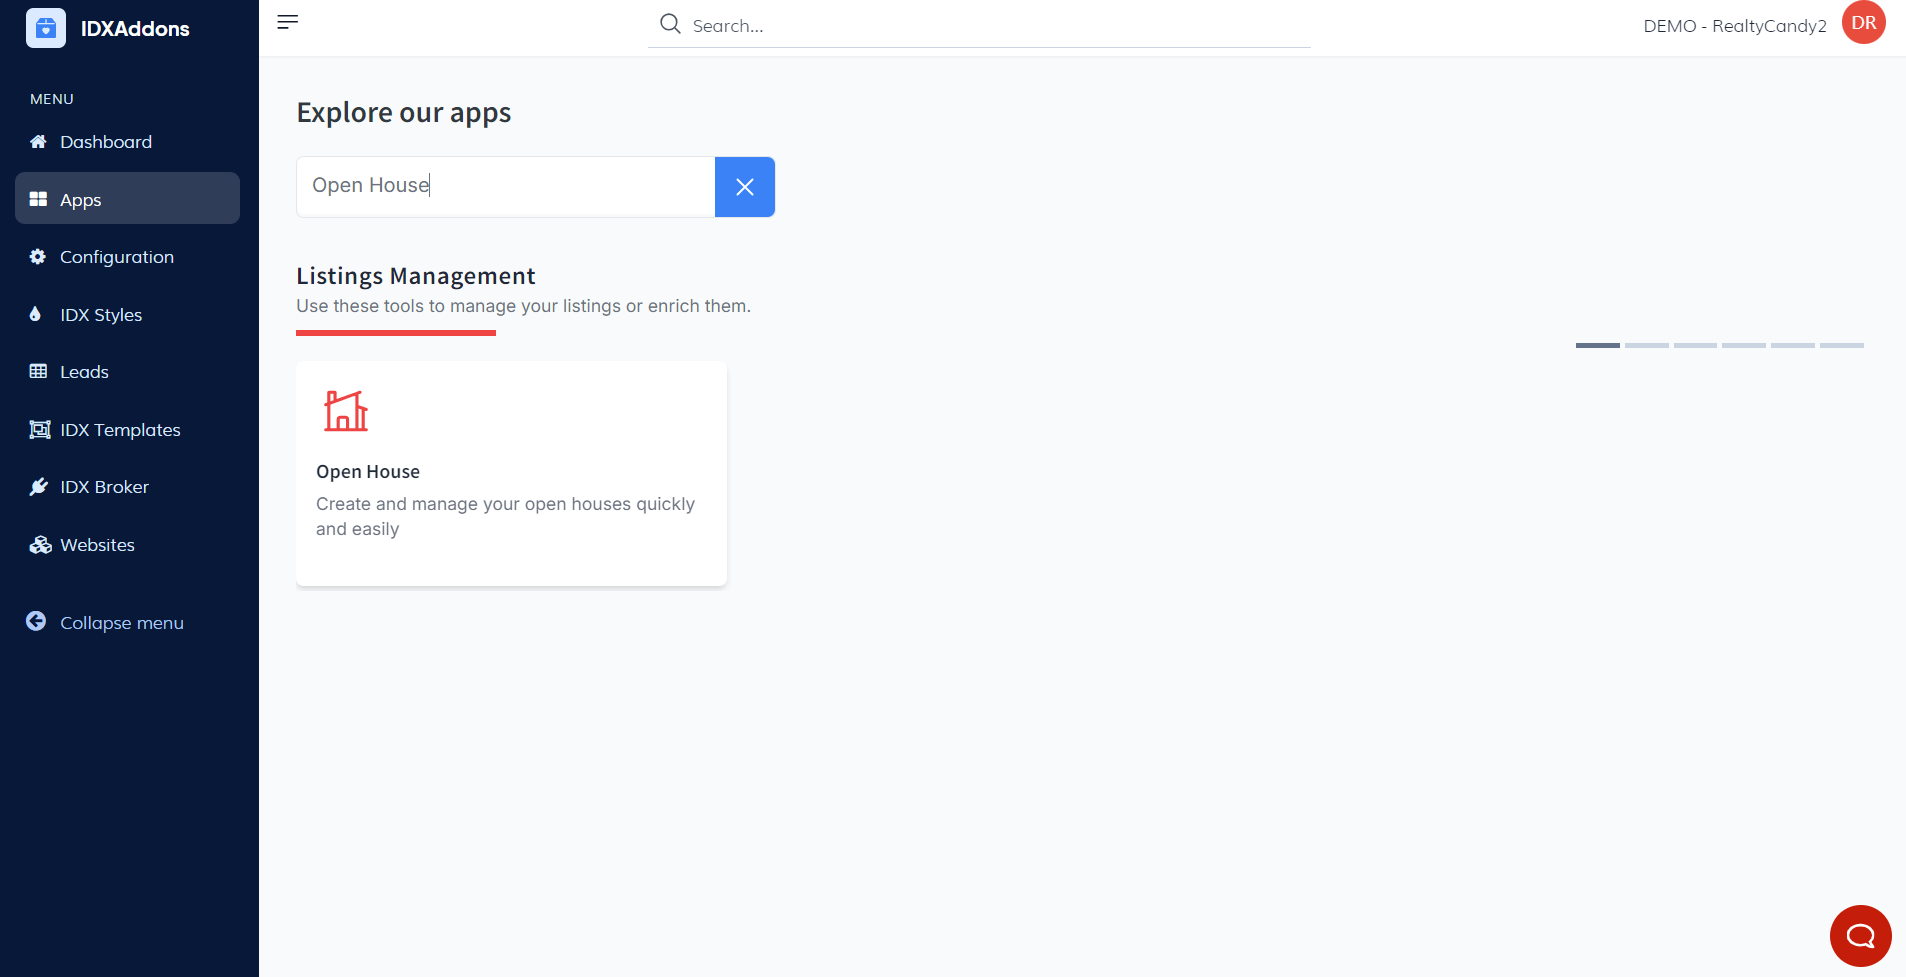
In the main menu, select the Open House App option.
-
Activating the Open House App
When you log in, if the service is not yet active, this will be the first view you encounter. Go to the Turn Service On/Off section and click the button.
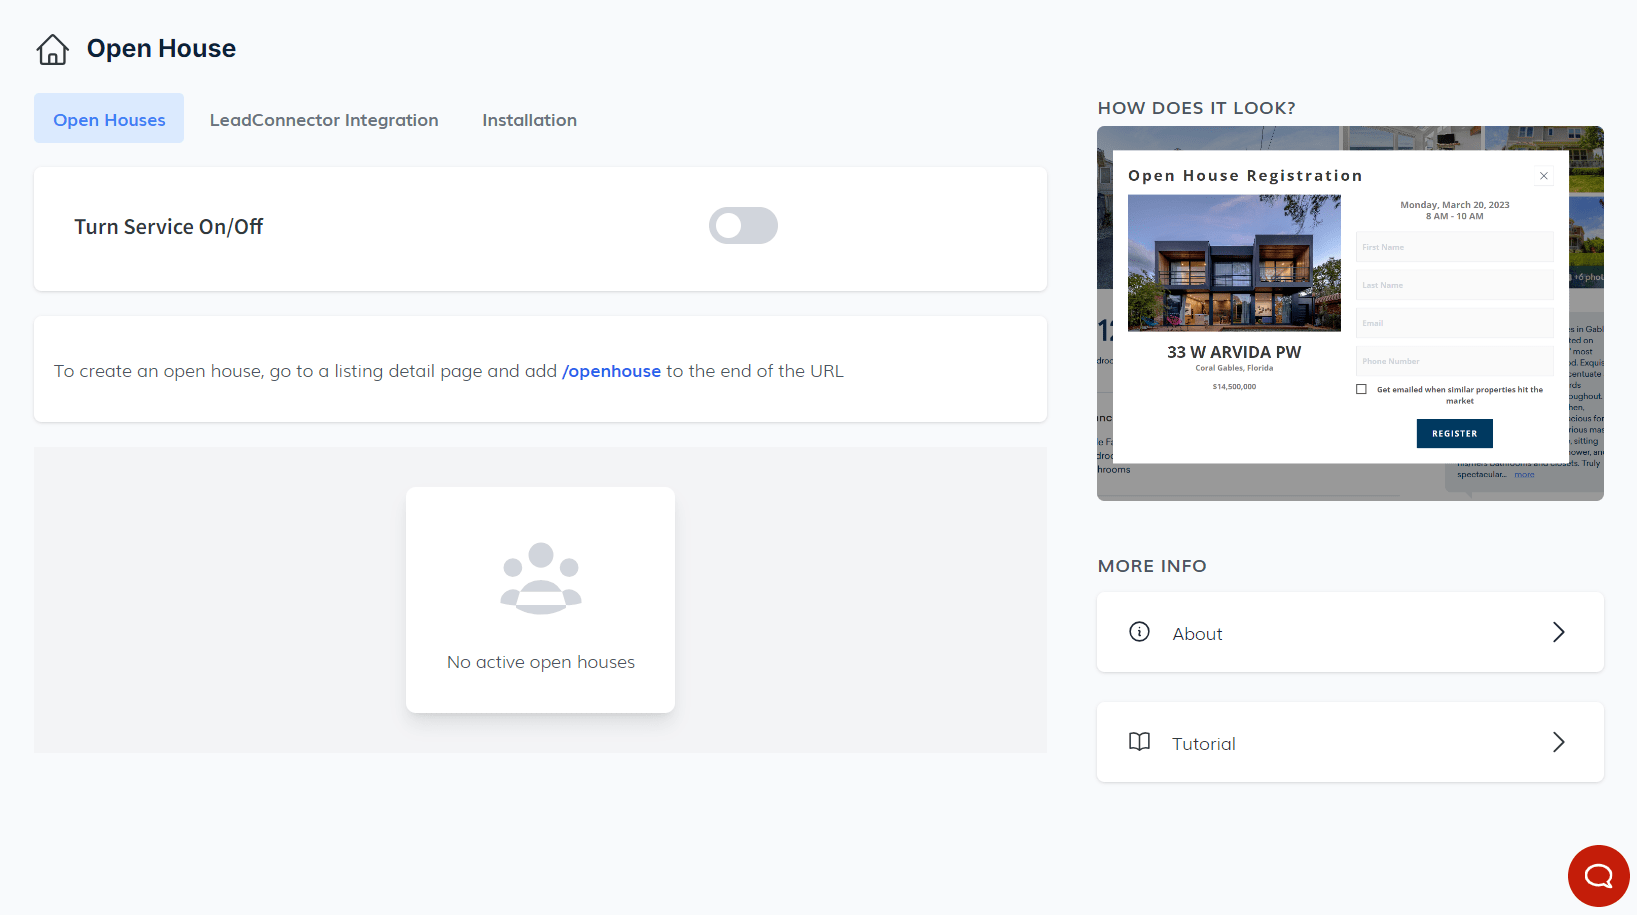
After a few seconds, a message will appear at the top of the screen confirming that the installation was successful.
-
Find or Manually Install the Script
Go to Design > Website > Sub-headers > Pages > Details to locate your Open House installation script.
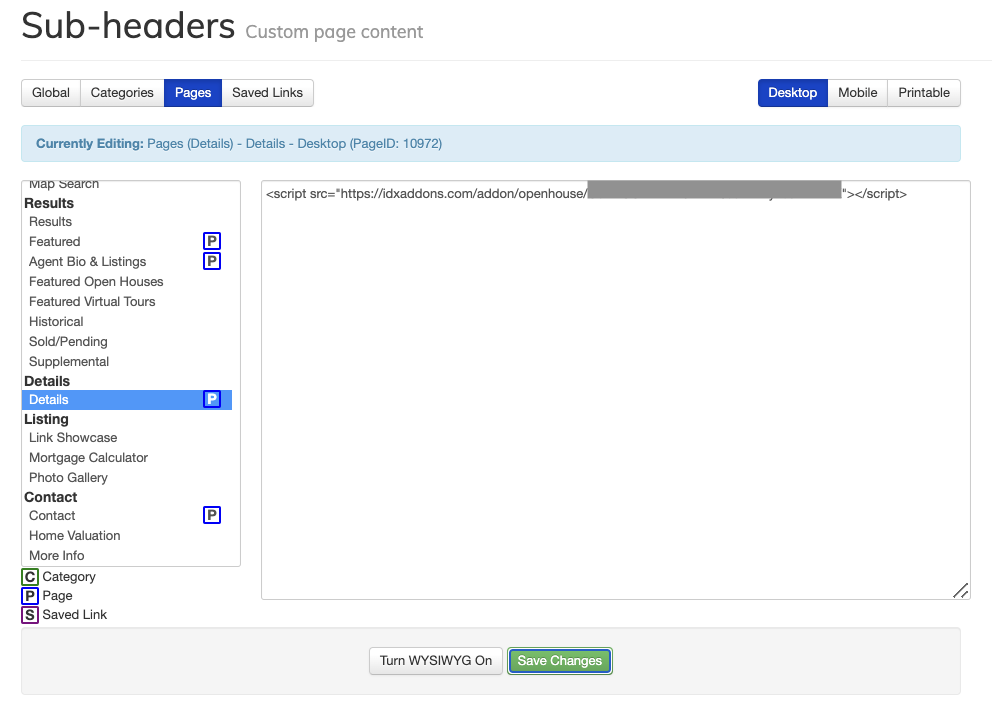
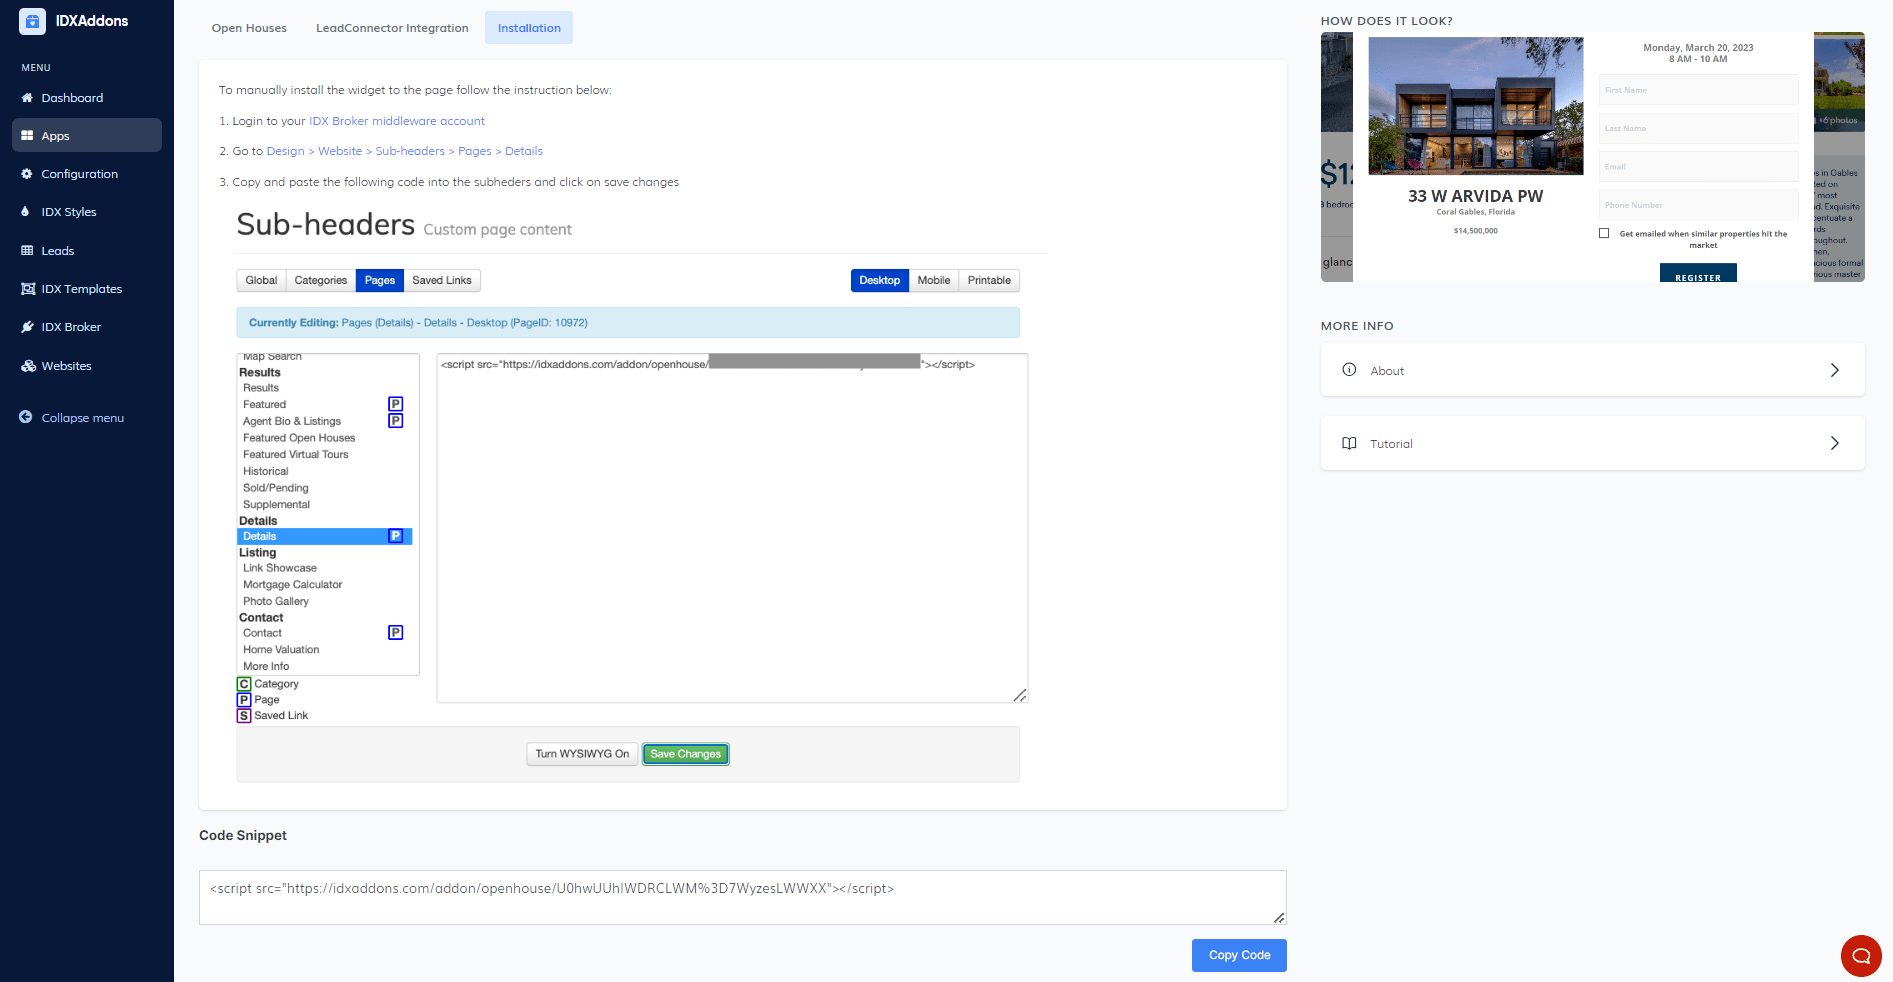
If the script is not automatically generated, you can install it manually by going to the "Installation" tab, copying the code snippet provided, and pasting it into the sub headers section. Don’t forget to save your changes.
-
Creating a New Open House
To create an Open House, go to the Listing Detail Page of the property you want to configure and add /openhouse to the end of the URL.
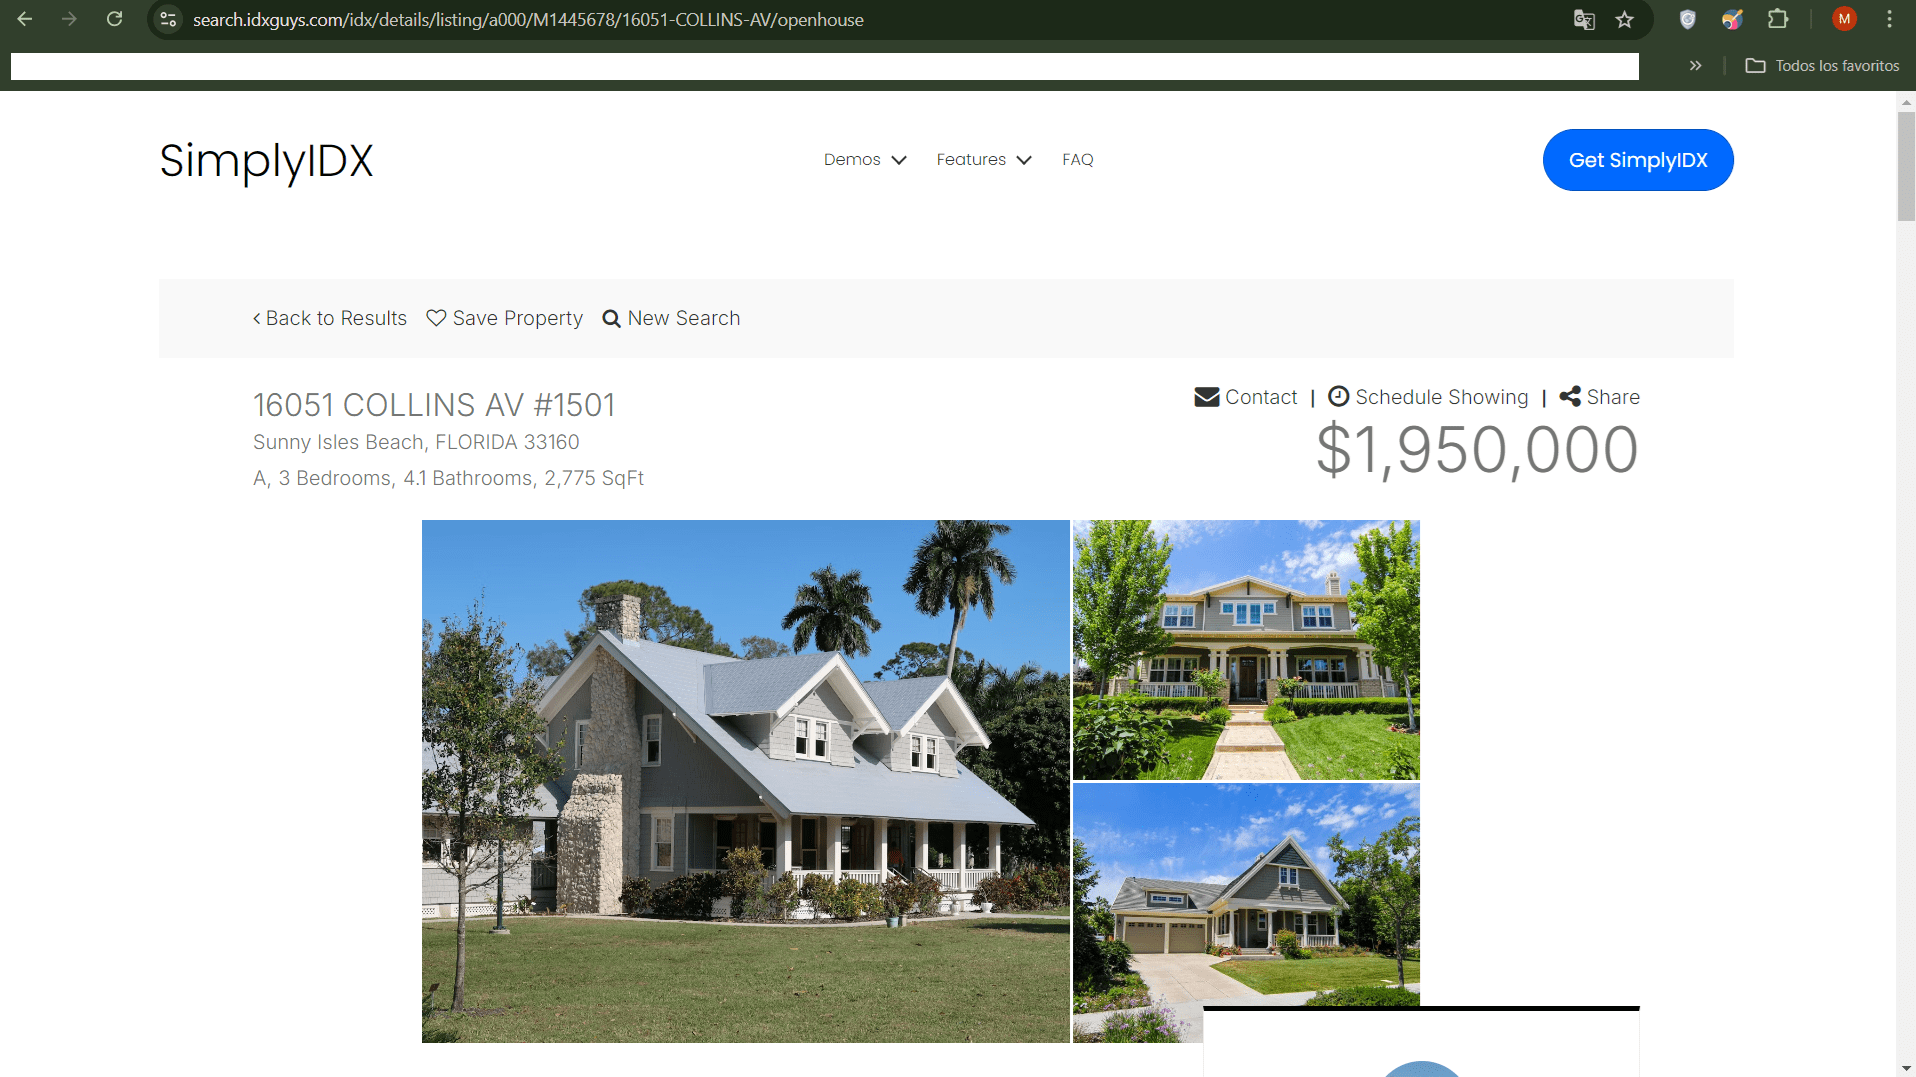 Open House Setup Form
Once you enter, a form will appear where you need to fill out the information to create the new Open House.
Required fields include:- Registration Type: You can choose between two types of registration:
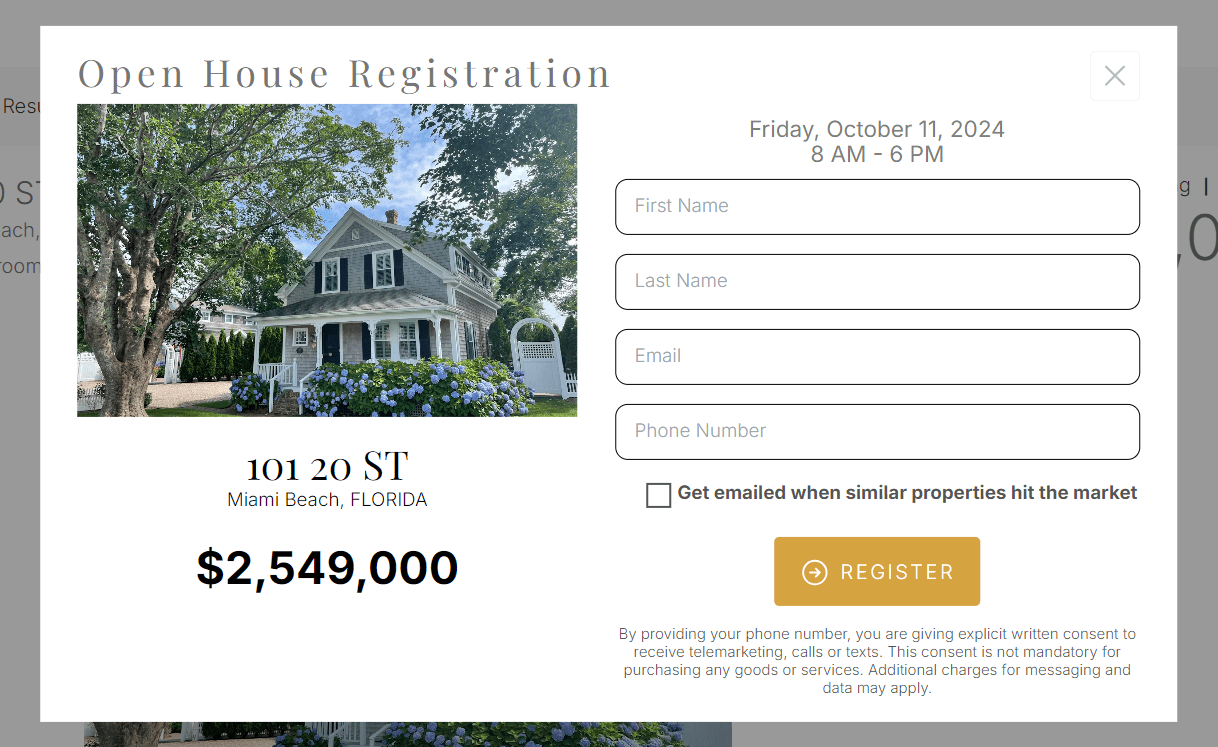
- Light Registration - it will only ask for the visitor's name, email and phone
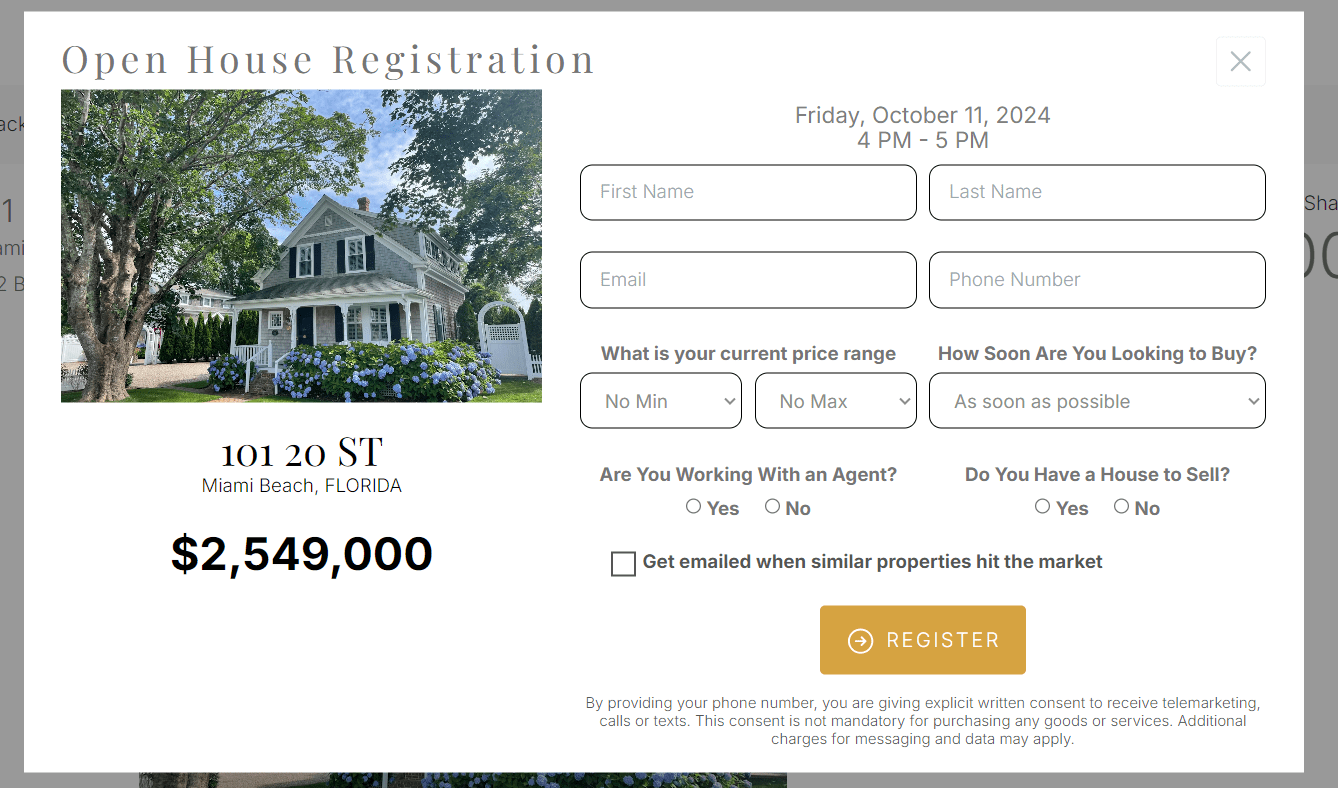
- Full Registration - it will ask for more information such as price range, time to buy, has agent, and has house to sell
- Date
- Start Time
- End Time
- Instructions: If you want to add any additional information, for example the meeting link if it's a virtual event.
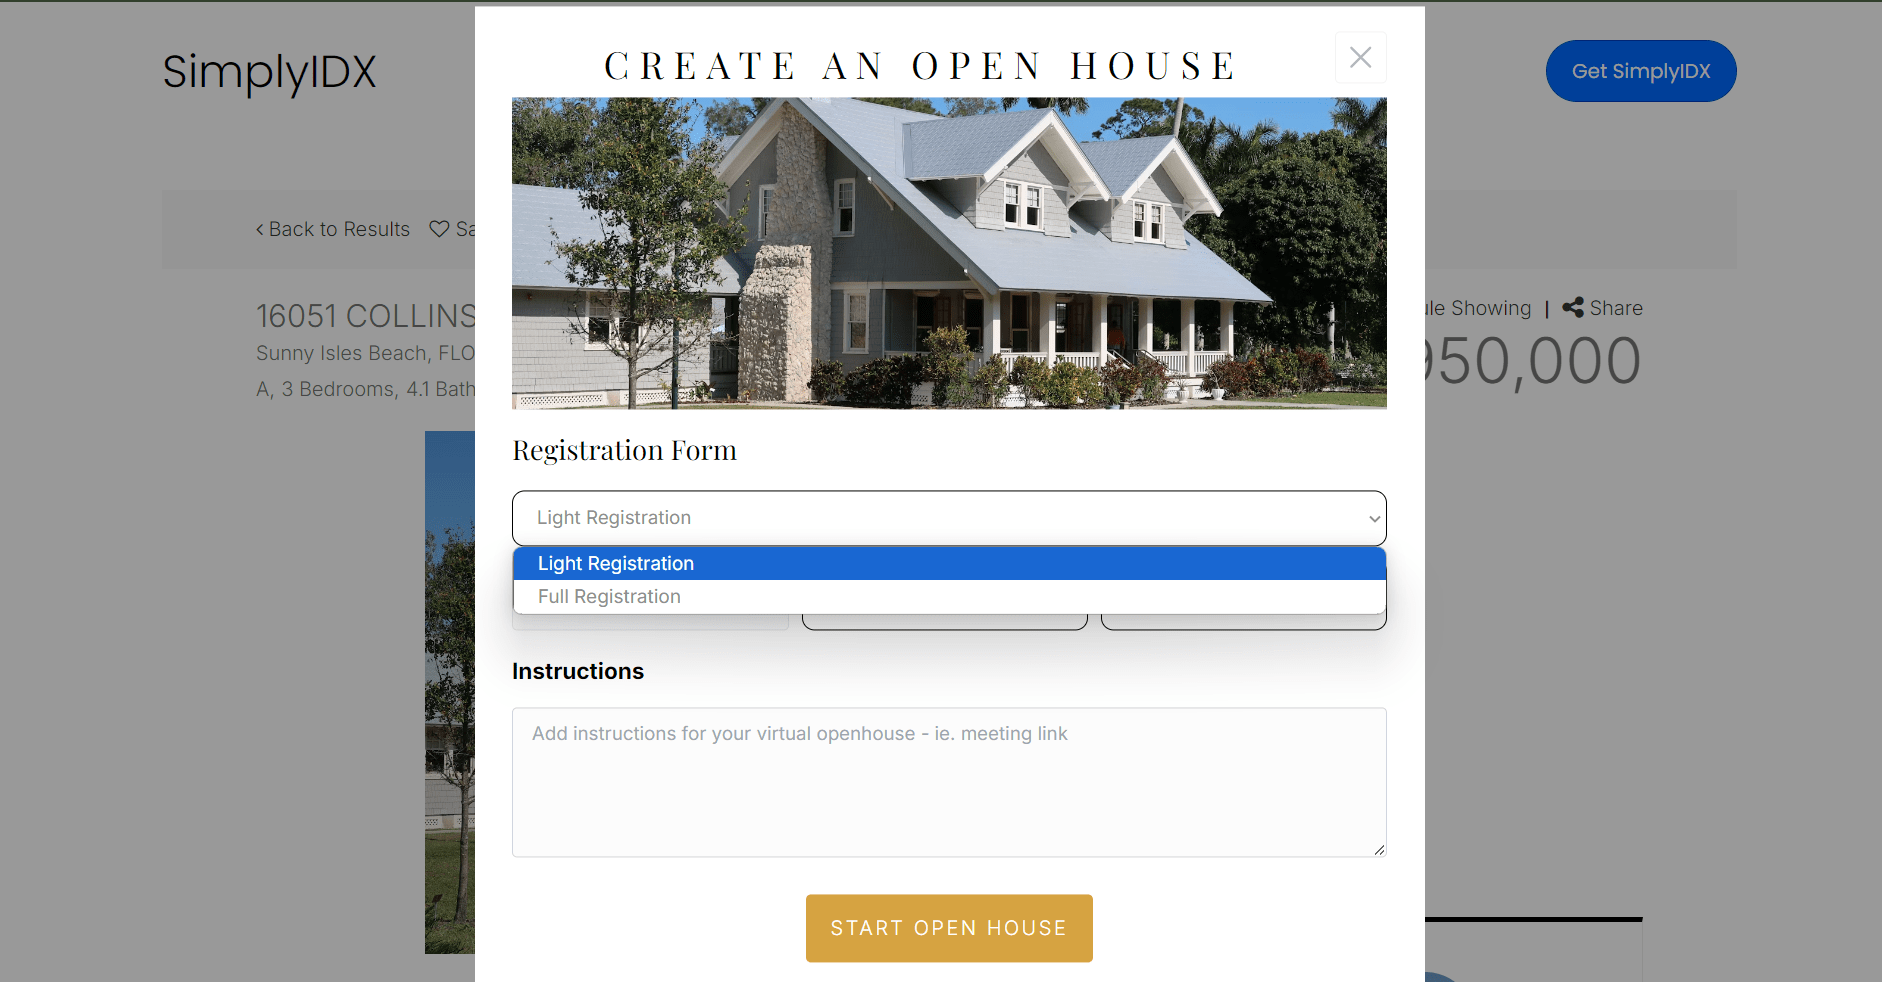
After entering all the information, click the "Start Open House" button.
- Registration Type: You can choose between two types of registration:
-
Visitor Registration Form
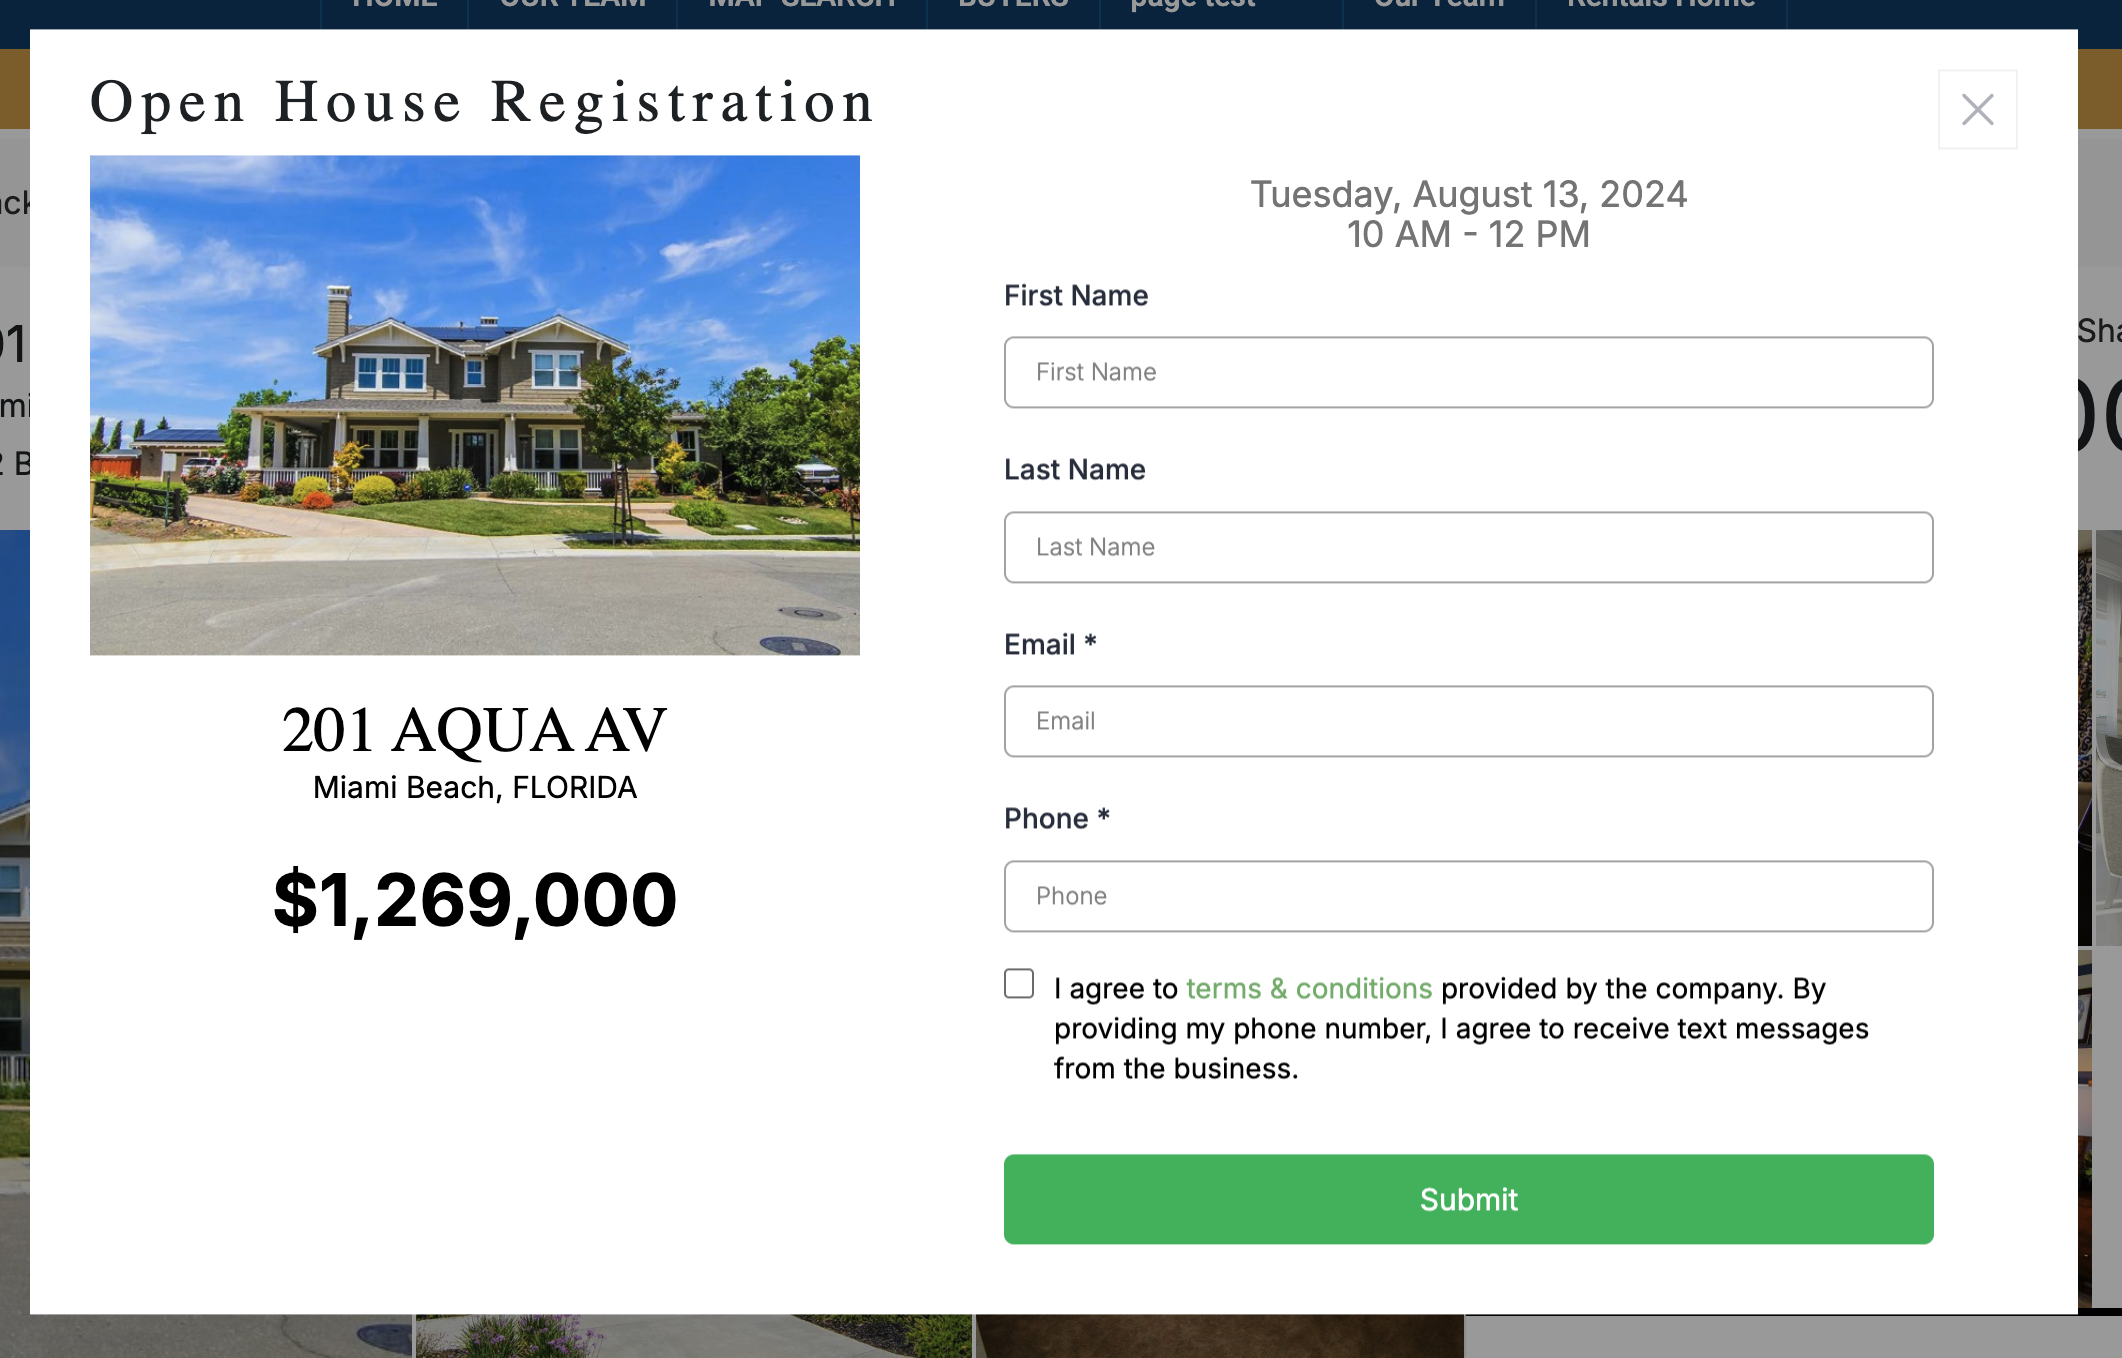
Once the Open House information is saved, a registration form will appear to collect the details of the people attending the Open House. This form is used regardless of the registration type you choose (Light or Full Registration).
- Both registration forms require the following visitor information:
- Name
- Phone Number (optional)
Light Registration
Full Registration
-
Open Houses Tab
After creating an Open House, it will appear in the Open Houses tab. You will see a list of all active Open Houses, sorted from most recent to oldest.
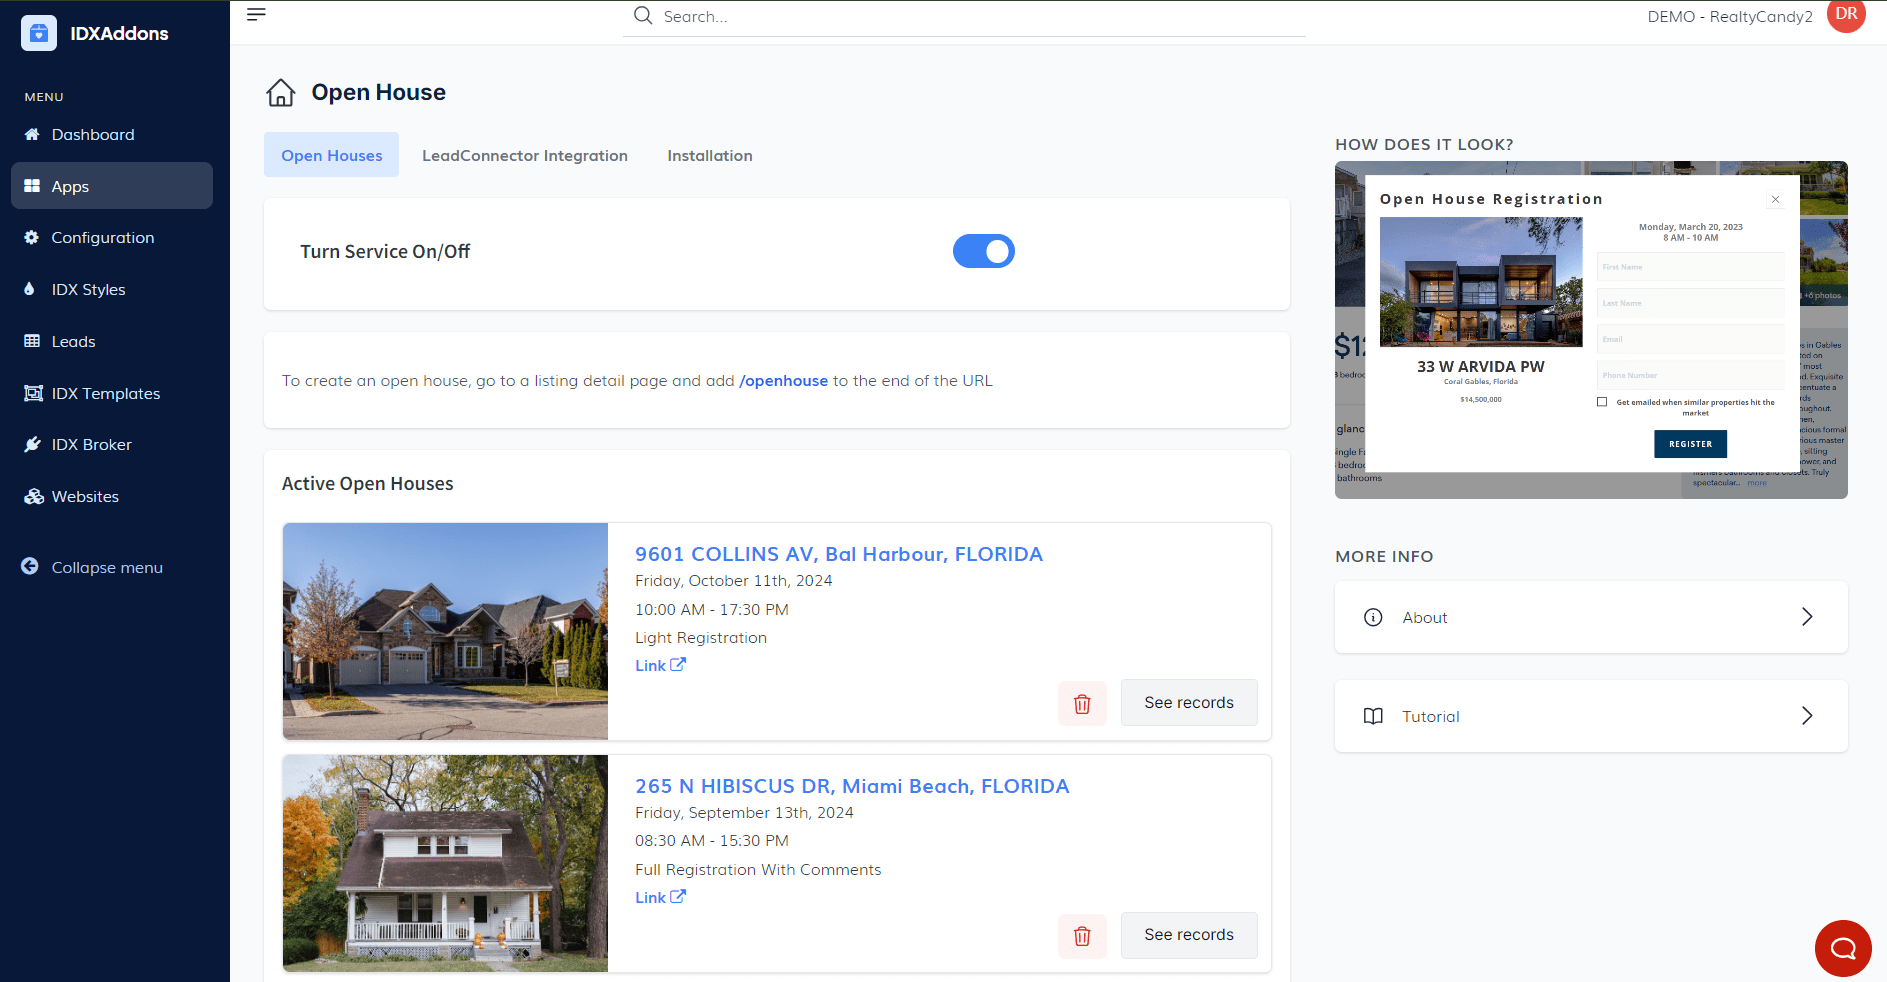
Each listing includes key information, such as
- Open House details (date, time, etc.)
- Delete button to remove the Open House
- View Records button to see attendee details
- Link to the listing to view the property page where the Open House is set up
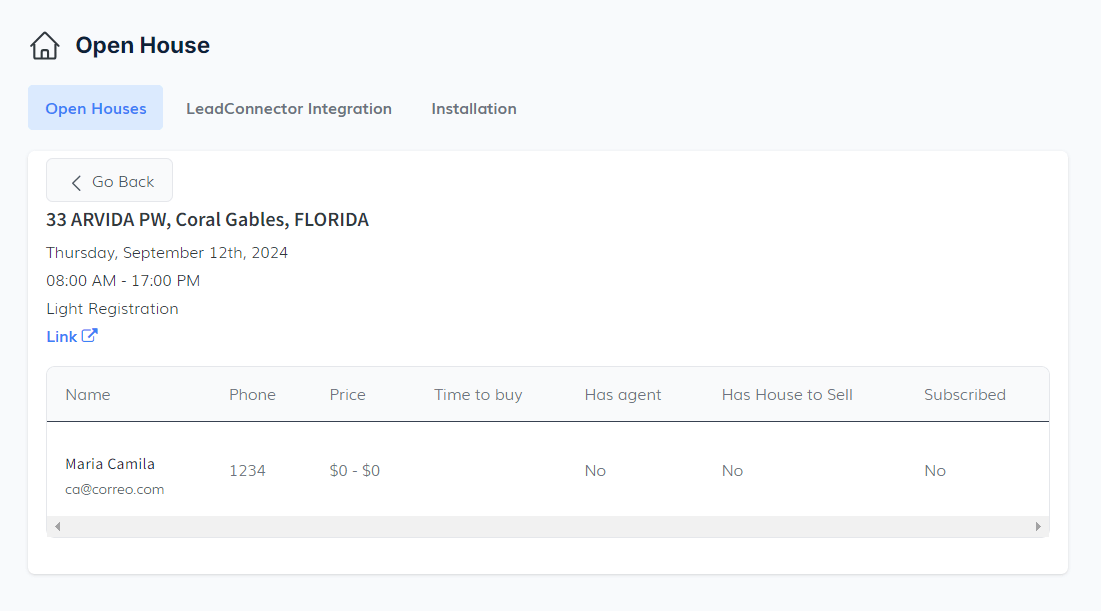
When clicking the "See Records" button, you will be able to see the details of the attendees who registered, including:
- Name
- Phone
- Price
- Time to buy
- Has Agent
- Has House to Sell
- Subscribed
-
HighLevel Integration
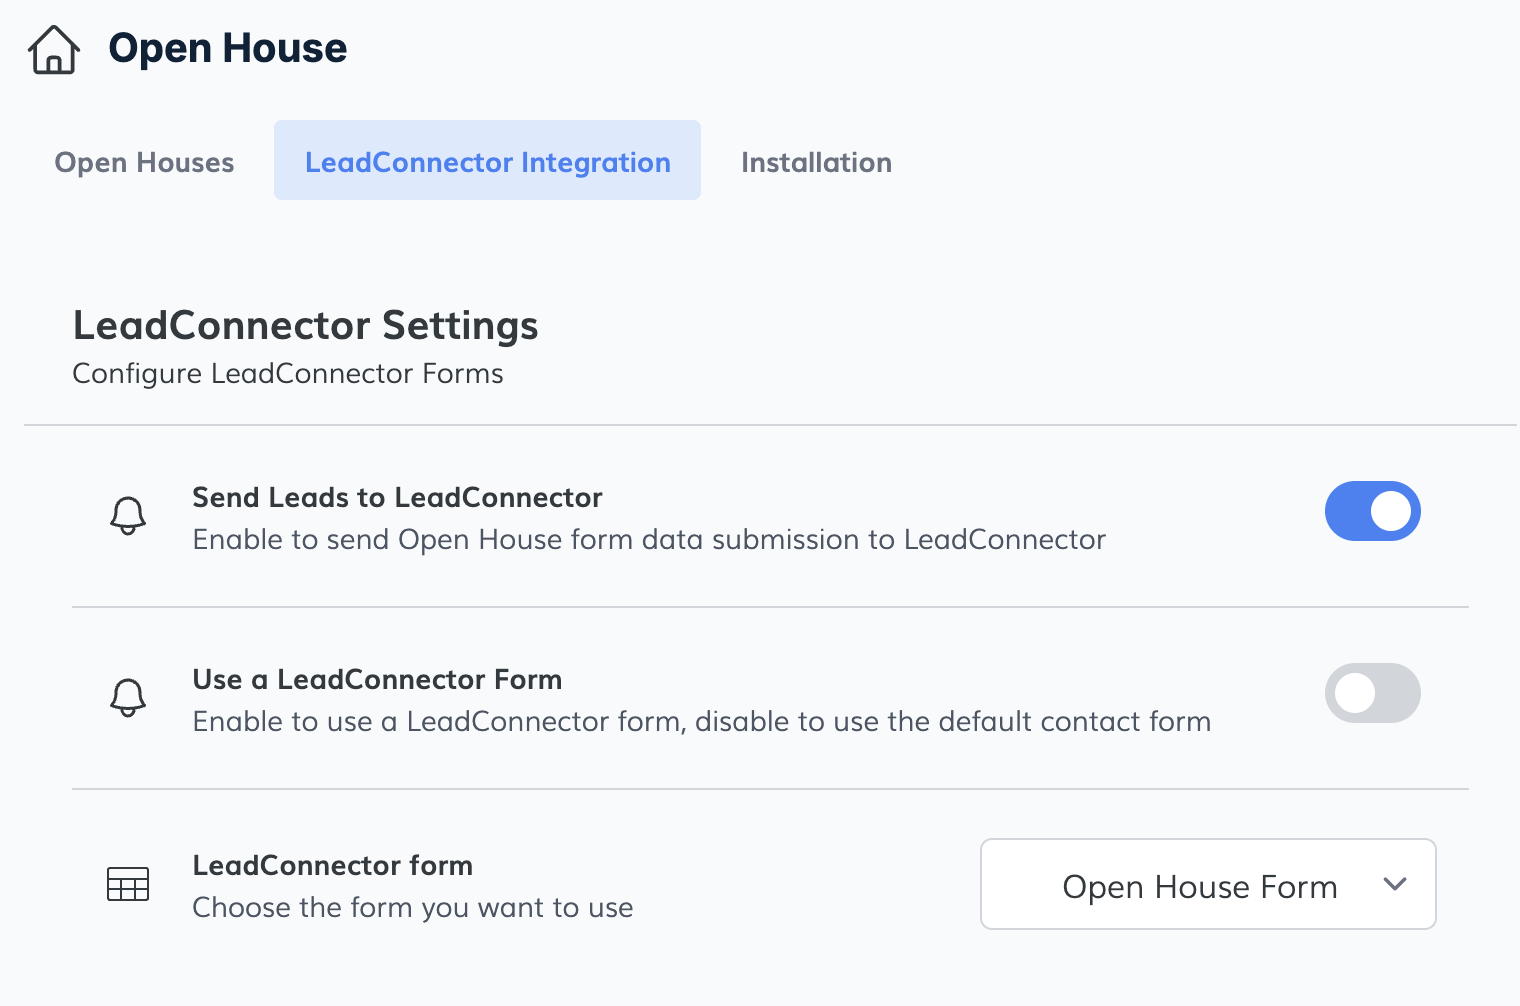
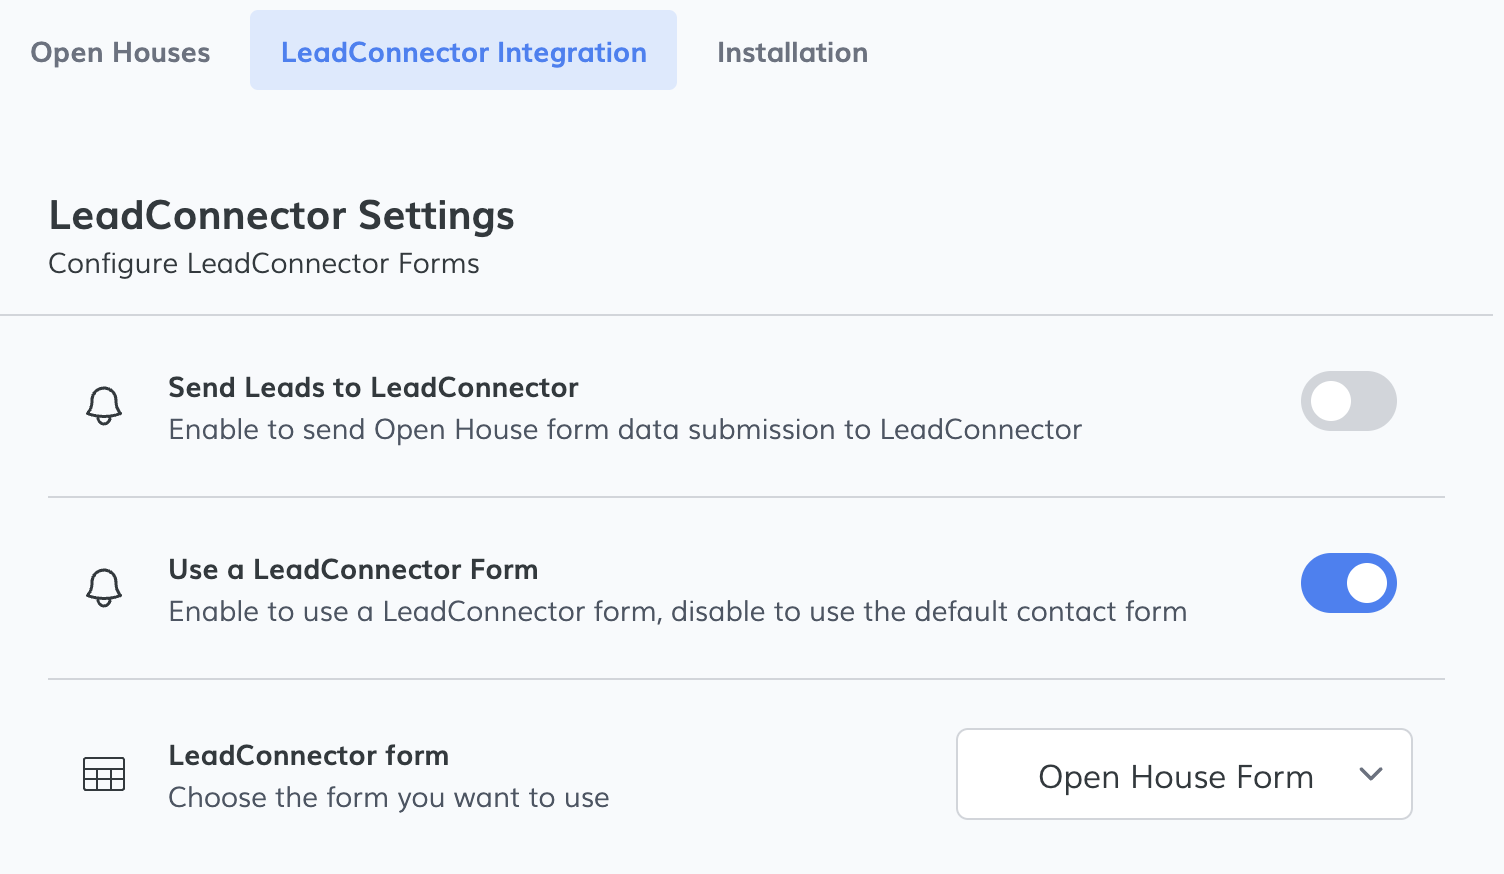
In the LeadConnector Integration tab, you have two options to connect to HighLevel
- Using Our Forms: This option allows you to use our pre-built forms (Light Registration or Full Registration) integrated directly with HighLevel. You only need to enable the option "Send Leads to LeadConnector"
- Using Your Own Forms: If you prefer to use your own HighLevel forms, you can embed it directly on the Open House popup. This provides flexibility to maintain your existing form structure while still connecting to HighLevel for data processing.
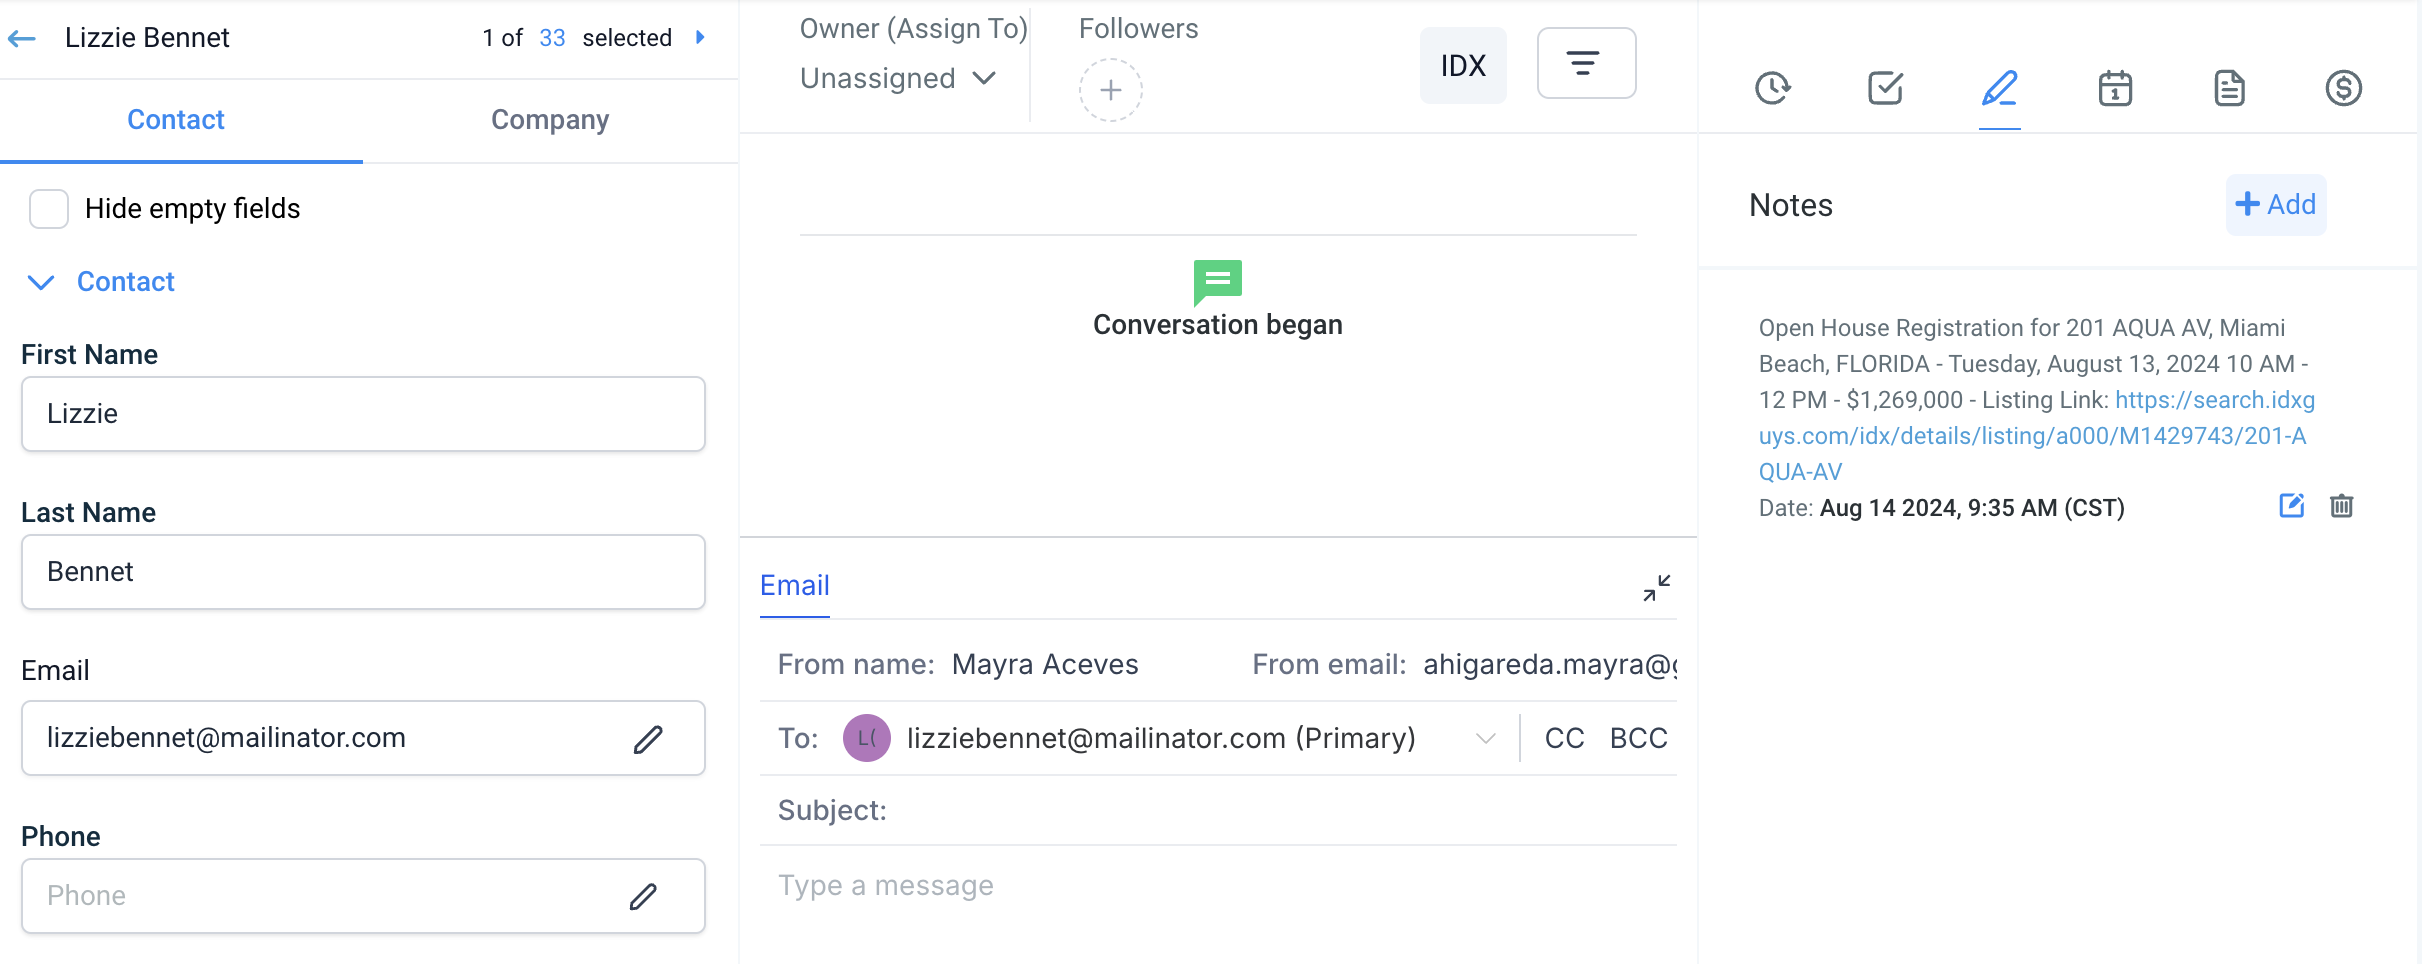
When a lead submits the form, a new IDX account will be created for them. They will be added as a new contact in GHL, and a note like the following will be included:
You only need to enable the option "Use a LeadConnector Form". Then, select one of your existing forms from the dropdown list. This form will be displayed on the Open House popup by default.
This would make the Open House Registration look something like this instead:
If you have an IDX Broker Platinum account, you have a special feature that allows you to select a different form for each Open House. This way, you can have a unique form for each property.
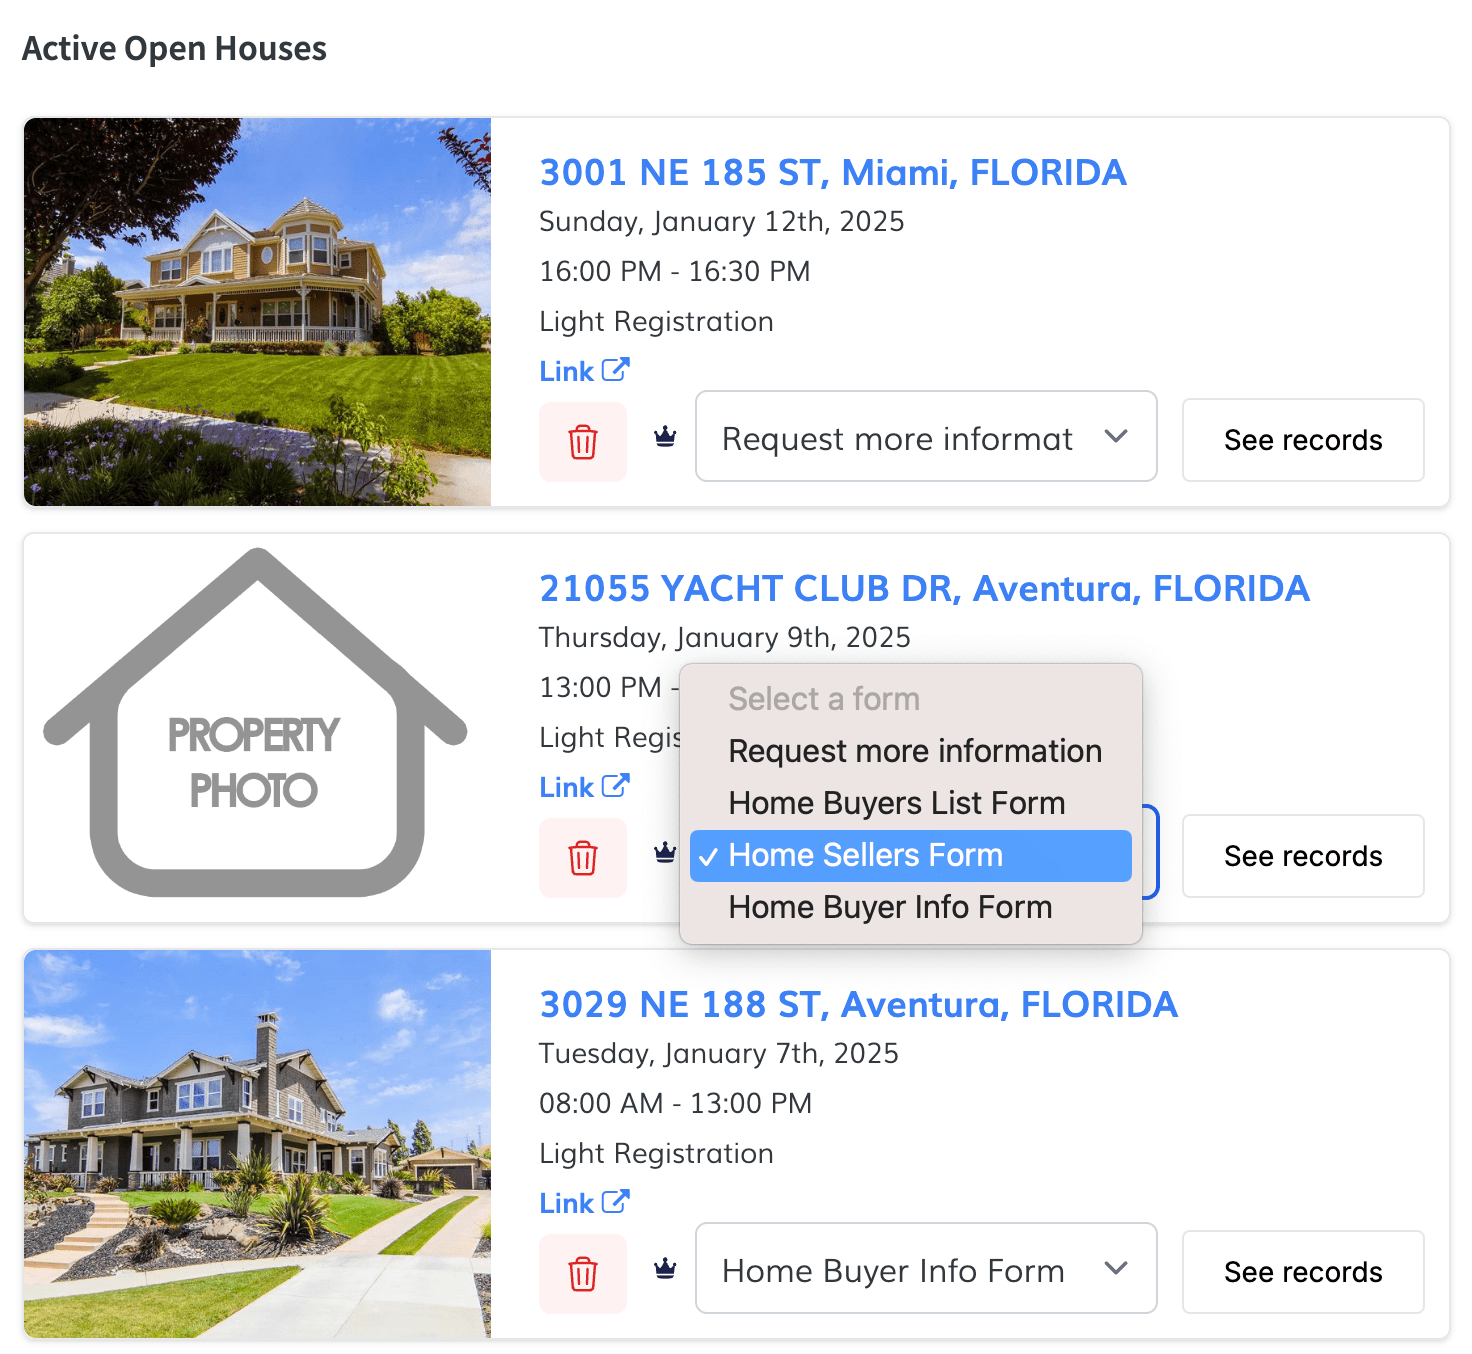
With the HighLevel form you can add as many questions as you want and trigger the workflows after filling this particular form.