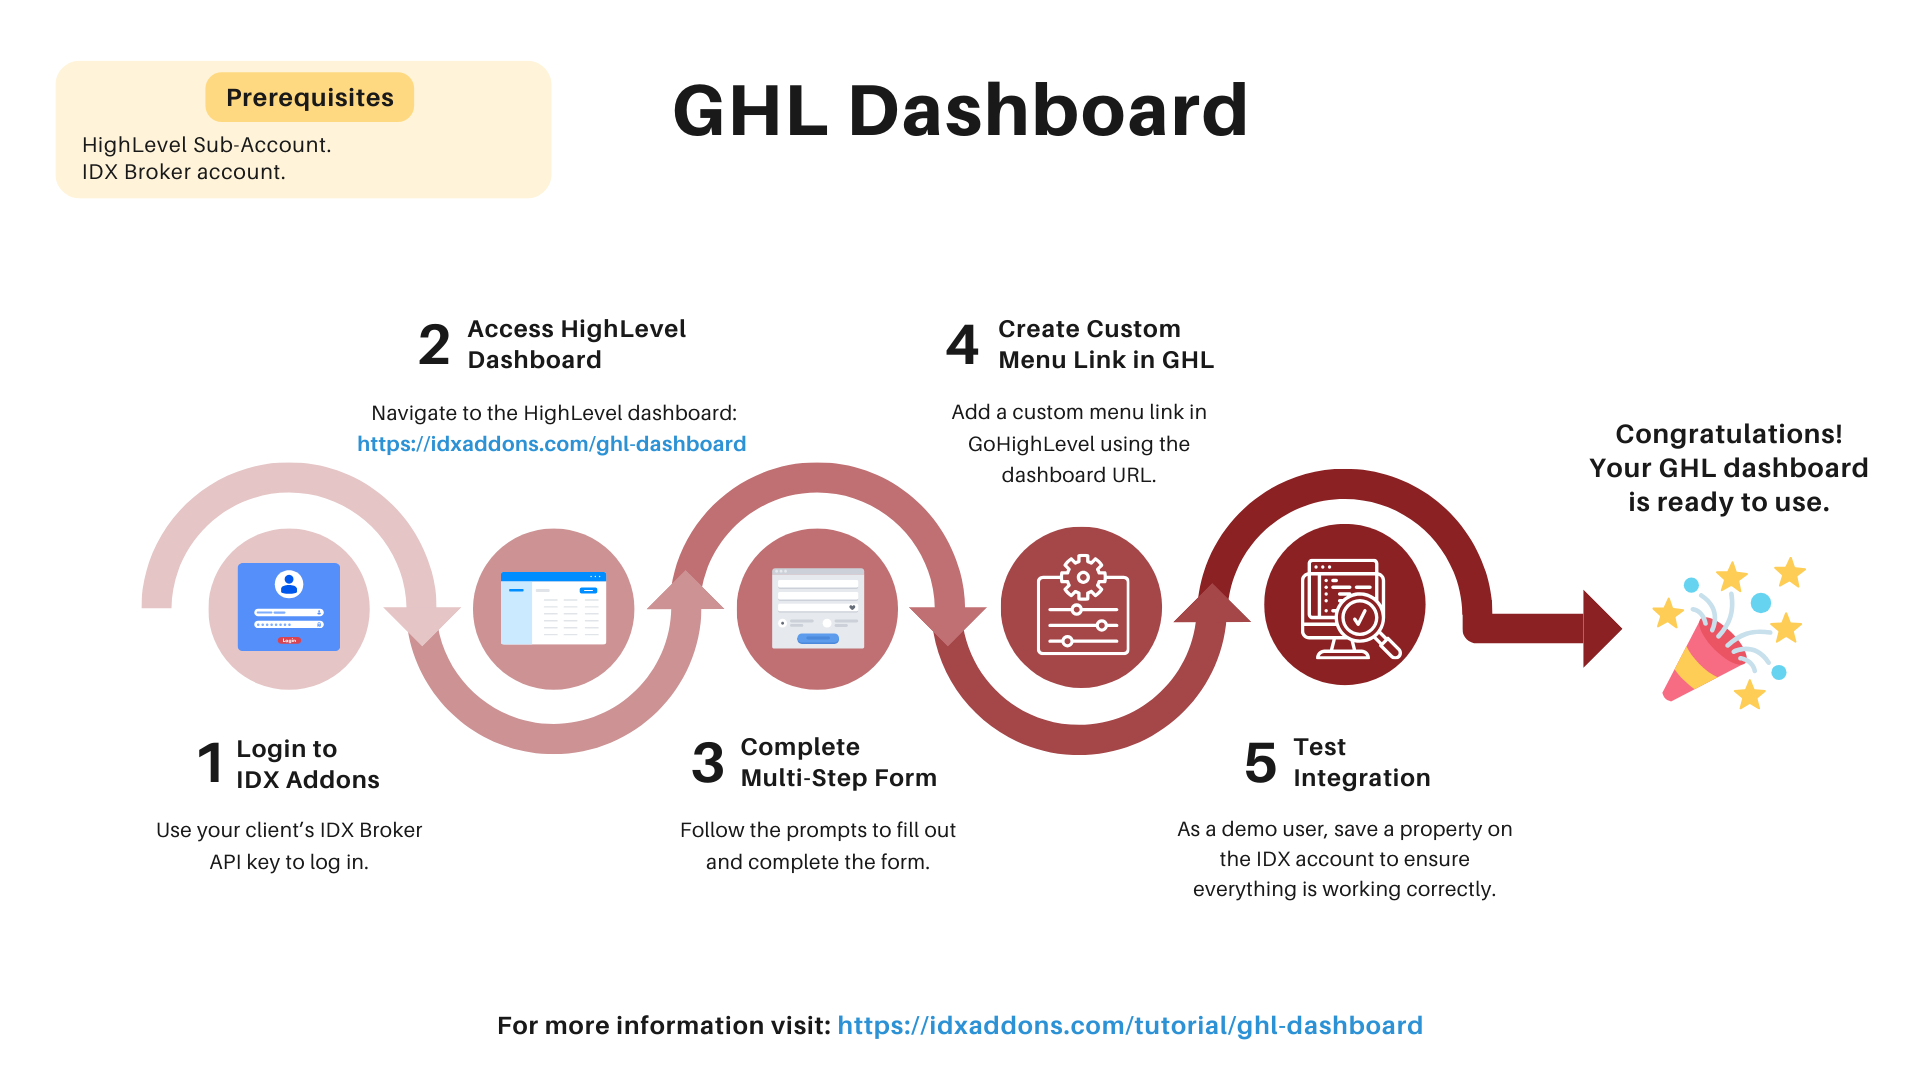
Prerequisites: Ensure the following before you begin:
- IDX Broker Account: Verify that your client has an active account.
- HighLevel Sub-Account: Make sure your client has a sub-account set up in HighLevel.
-
Log in to IDX Addons
To get started, log in using your IDX Broker API key.
You can find this API key on your IDX Broker Middleware panel under Home > Access Control, or in your IDX Broker welcome email.
-
Access HighLevel Dashboard
Visit the HighLevel Dashboard on IDXAddons. On your first visit, you'll be guided through the setup process with a multi-step form.
-
Complete the Multi-step Form
-
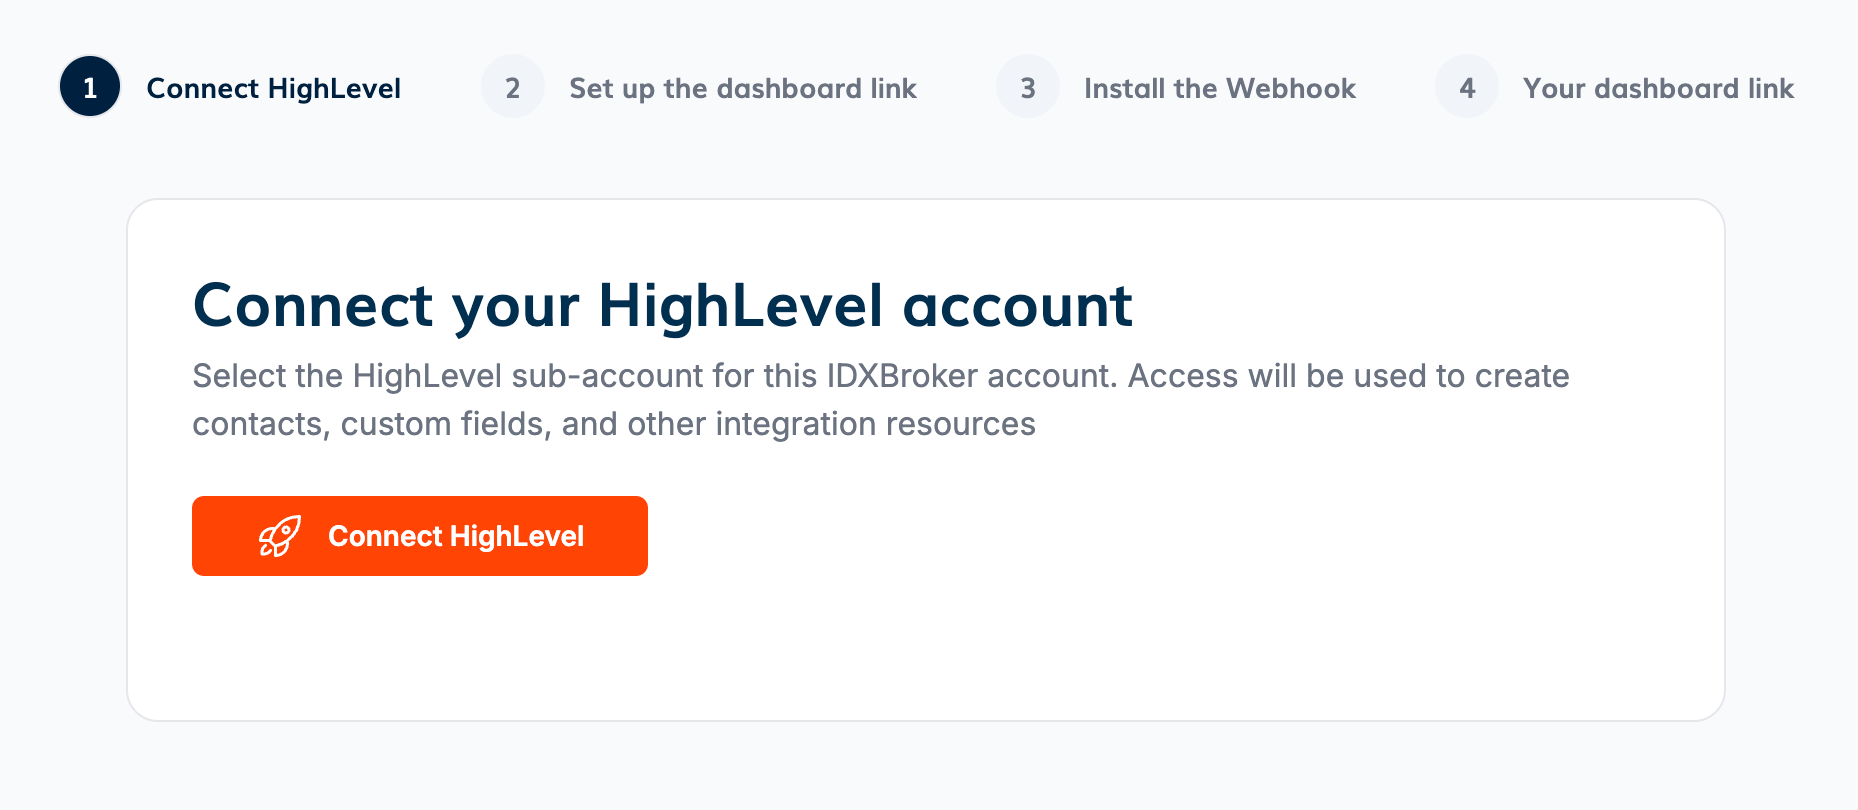
Connect HighLevel
Connect your HighLevel account to enable the creation of custom values in your sub-account. Click on "Connect HighLevel" to proceed.
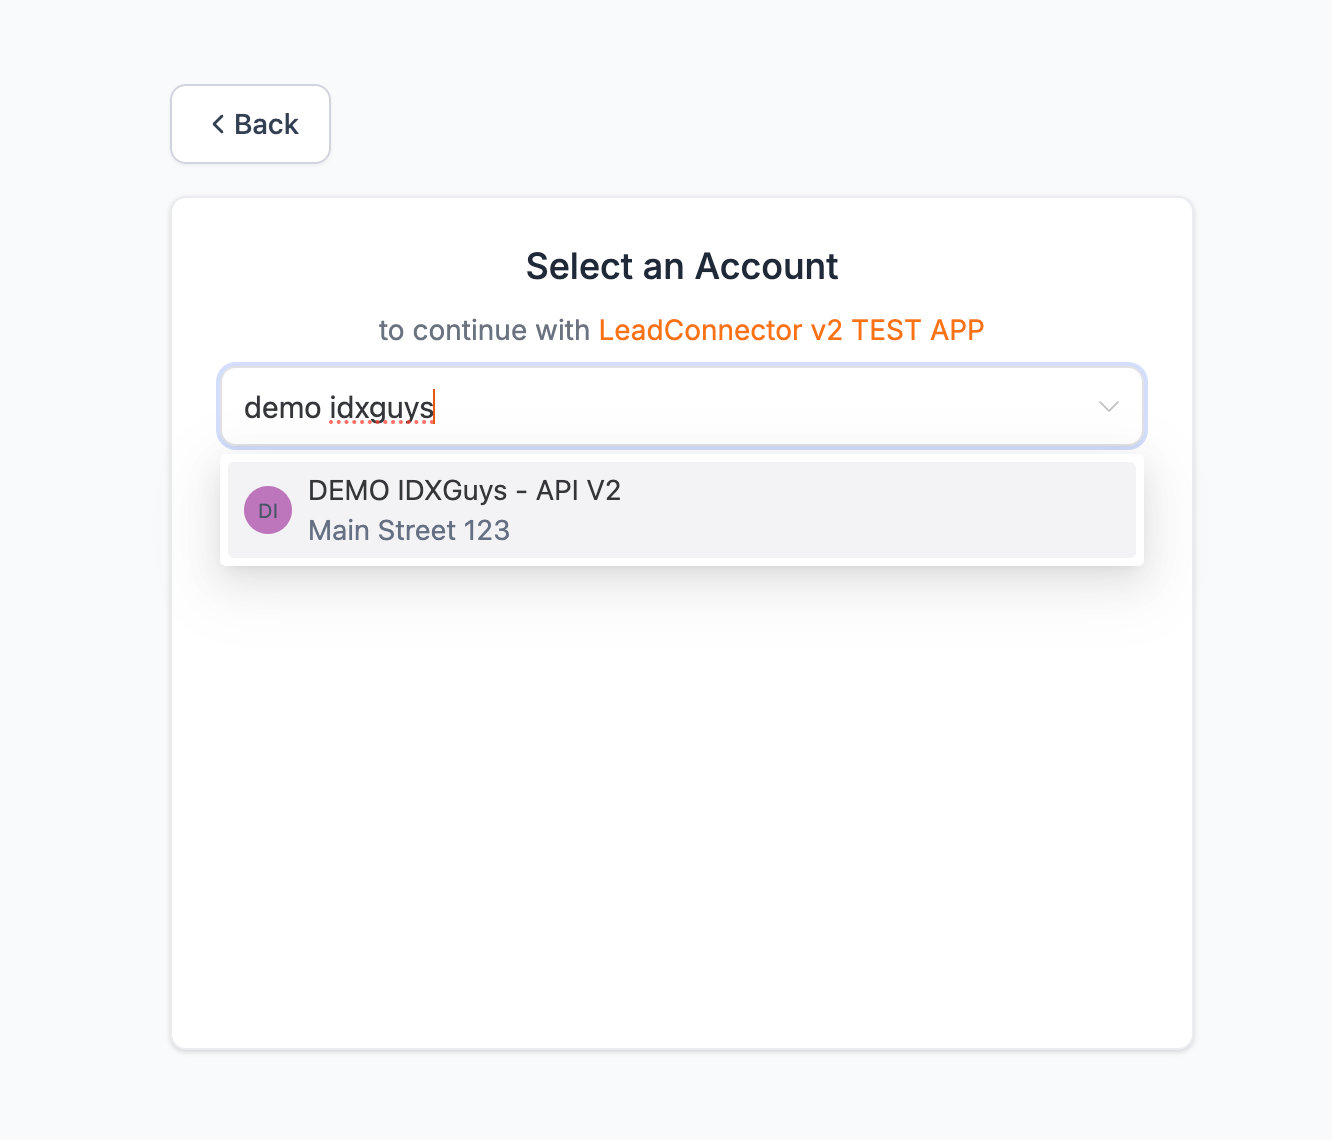
Then select the GHL subaccount you want to use for the Principal IDX Broker account.
-
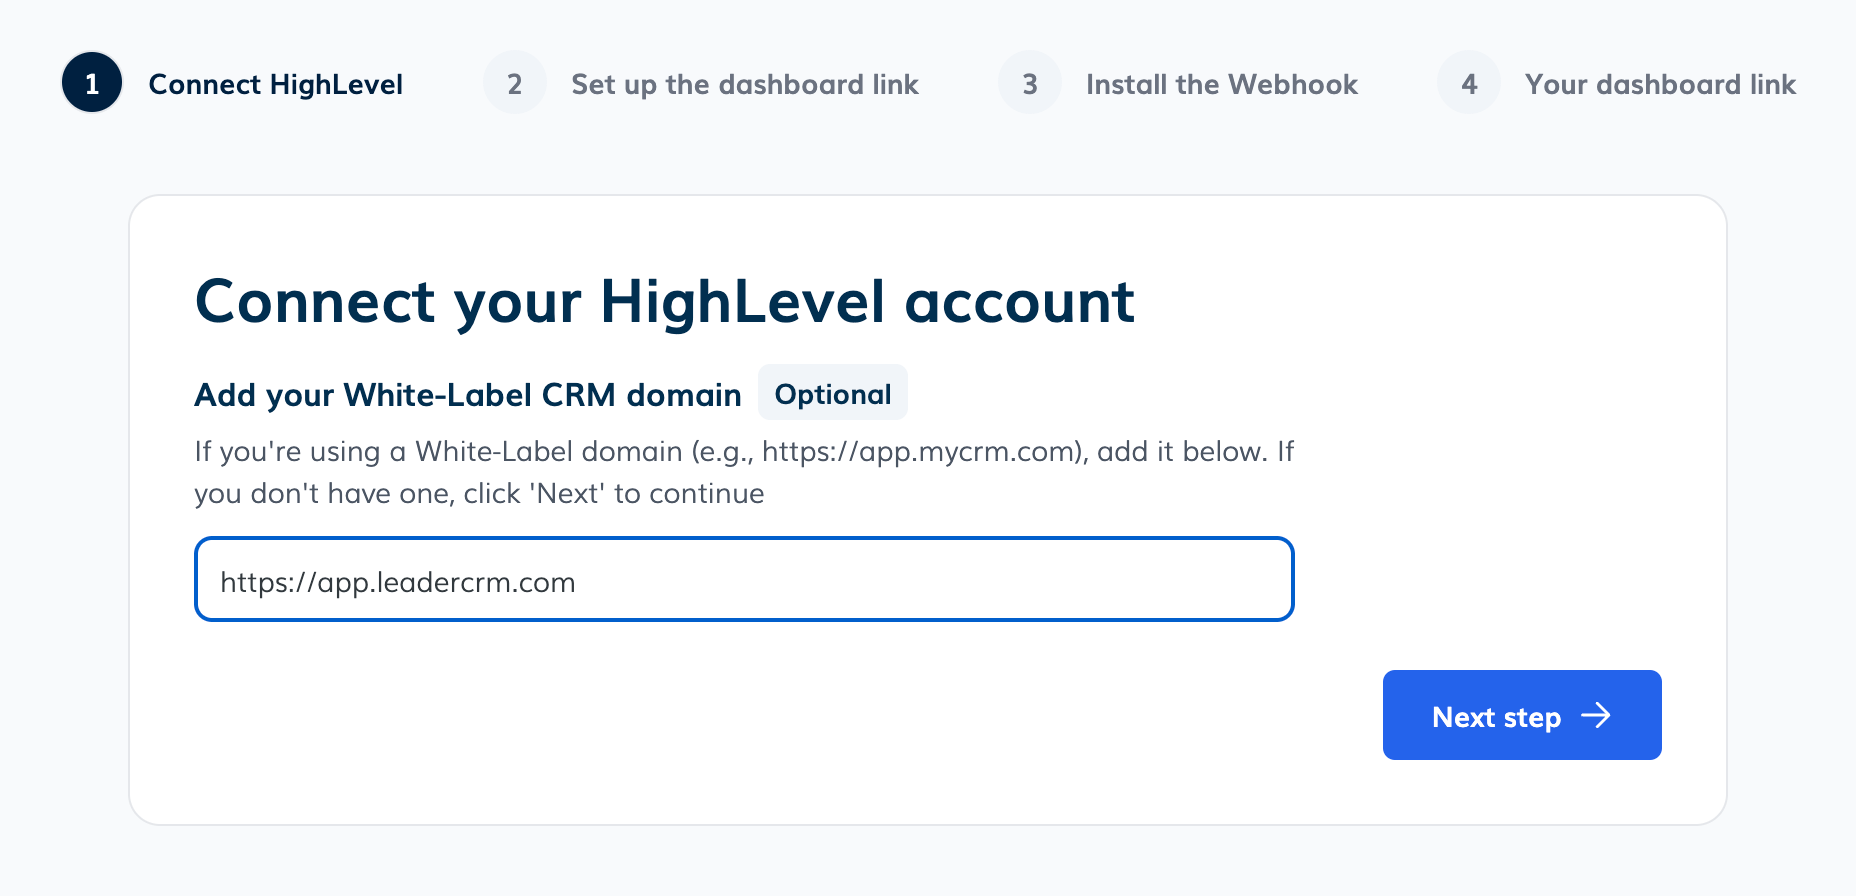
Add Your White-Label CRM Domain
If you're using a White-Label domain, add it in this step. This ensures the correct URL is used when accessing options like sending SMS messages to leads. If you don't have a White-Label CRM domain, simply click "Next step" to skip this part.
-
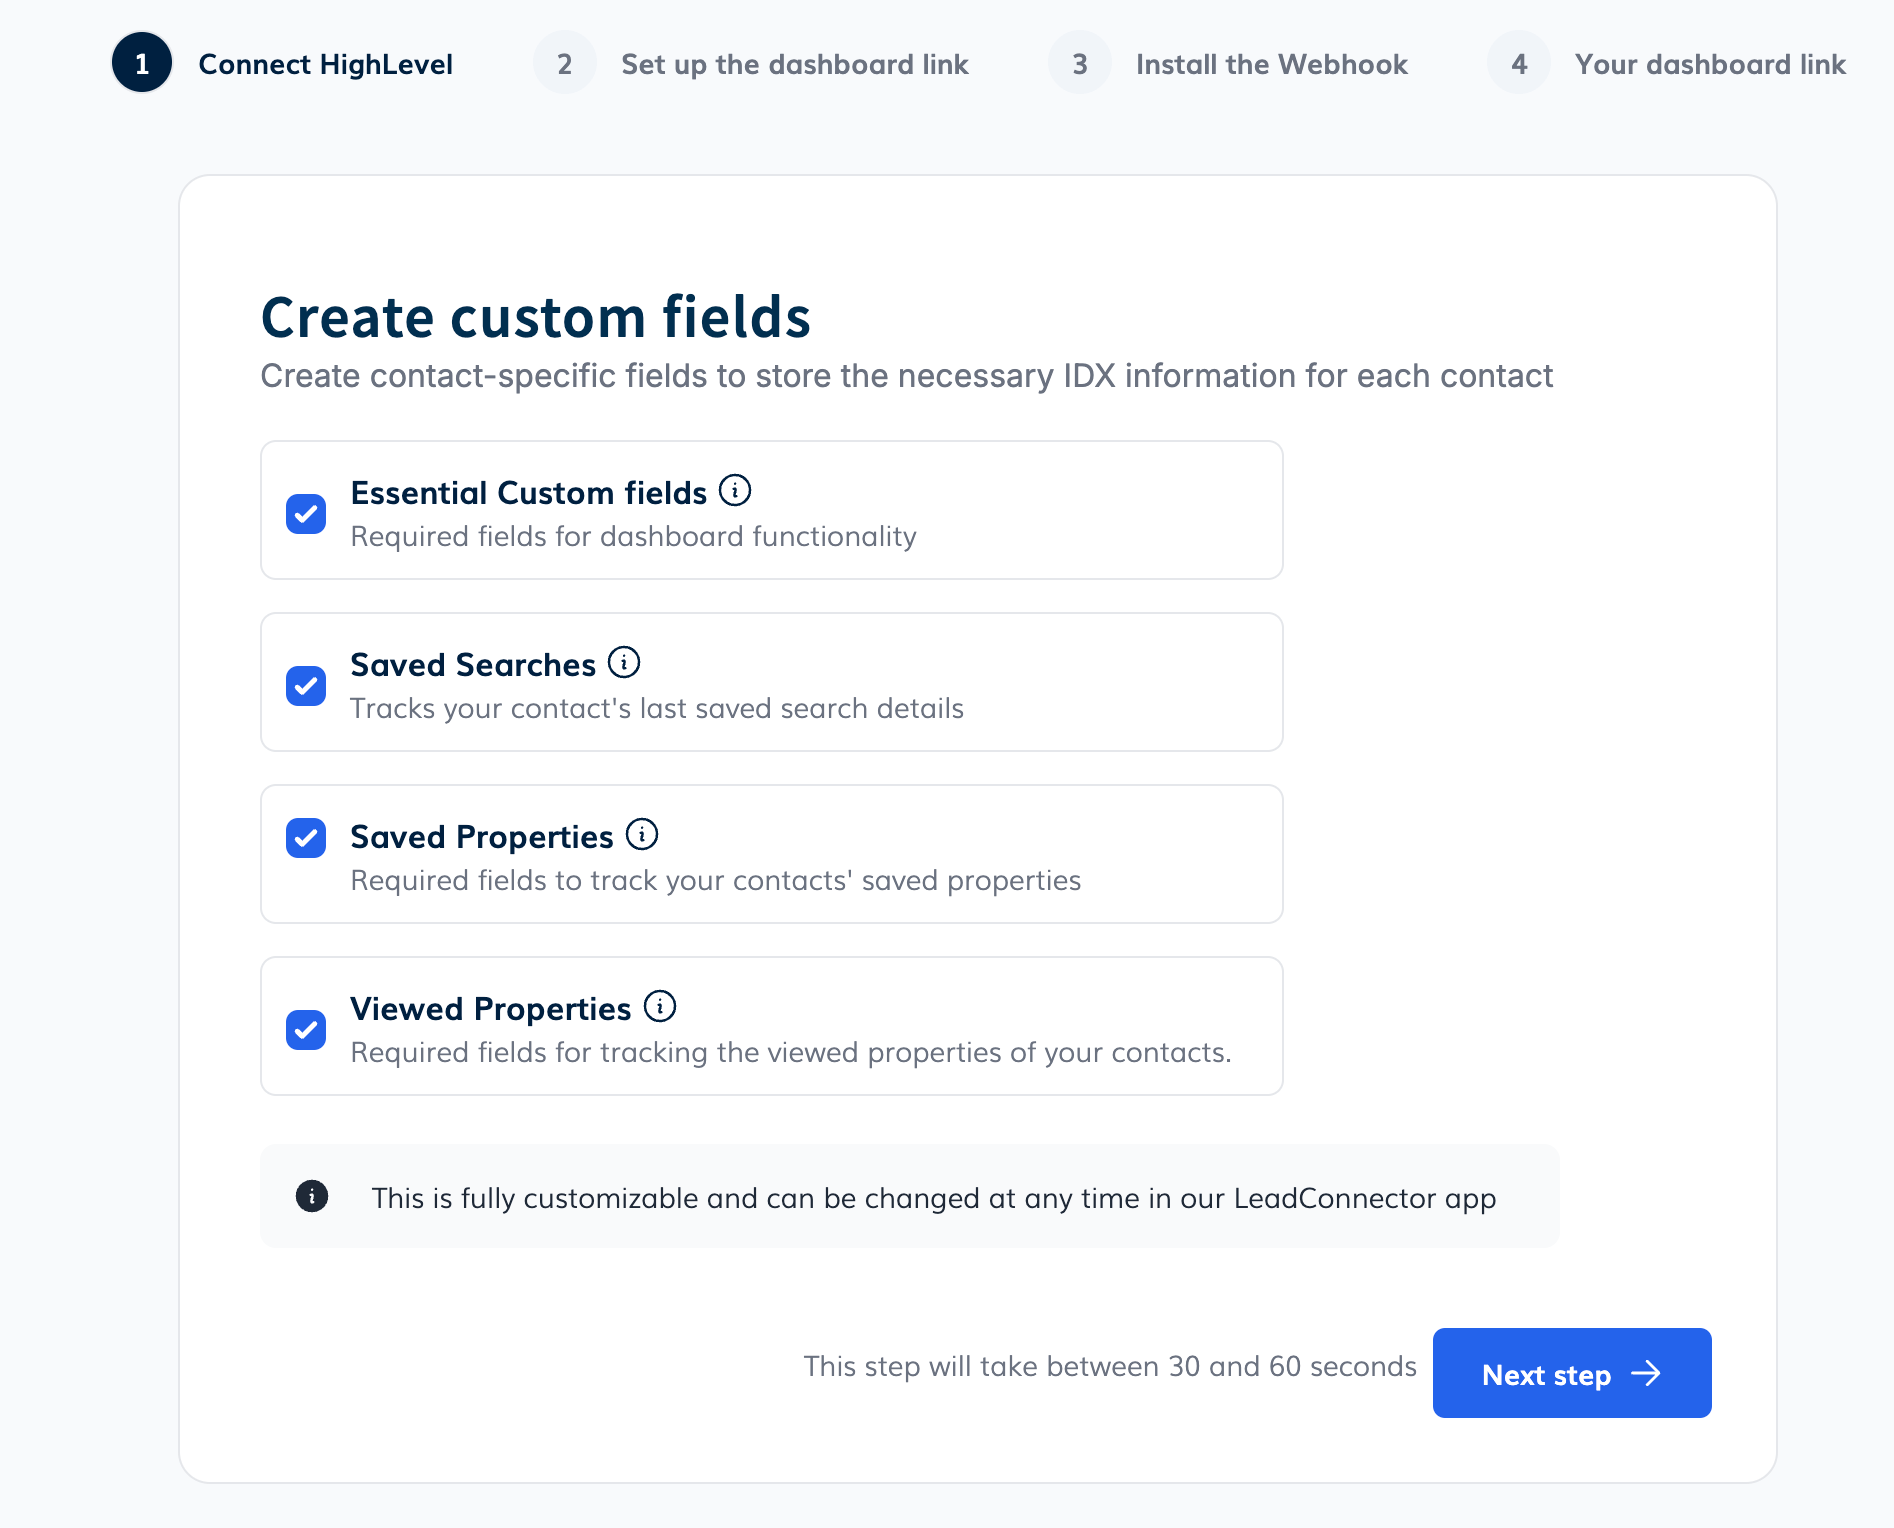
Select Custom Fields
In this step, you'll see a list of custom fields that will be added to your sub-account to track lead activity. We recommend selecting all fields for full functionality.
If you don’t need certain fields, feel free to unselect them. You can always modify your selections later by visiting this page.
-
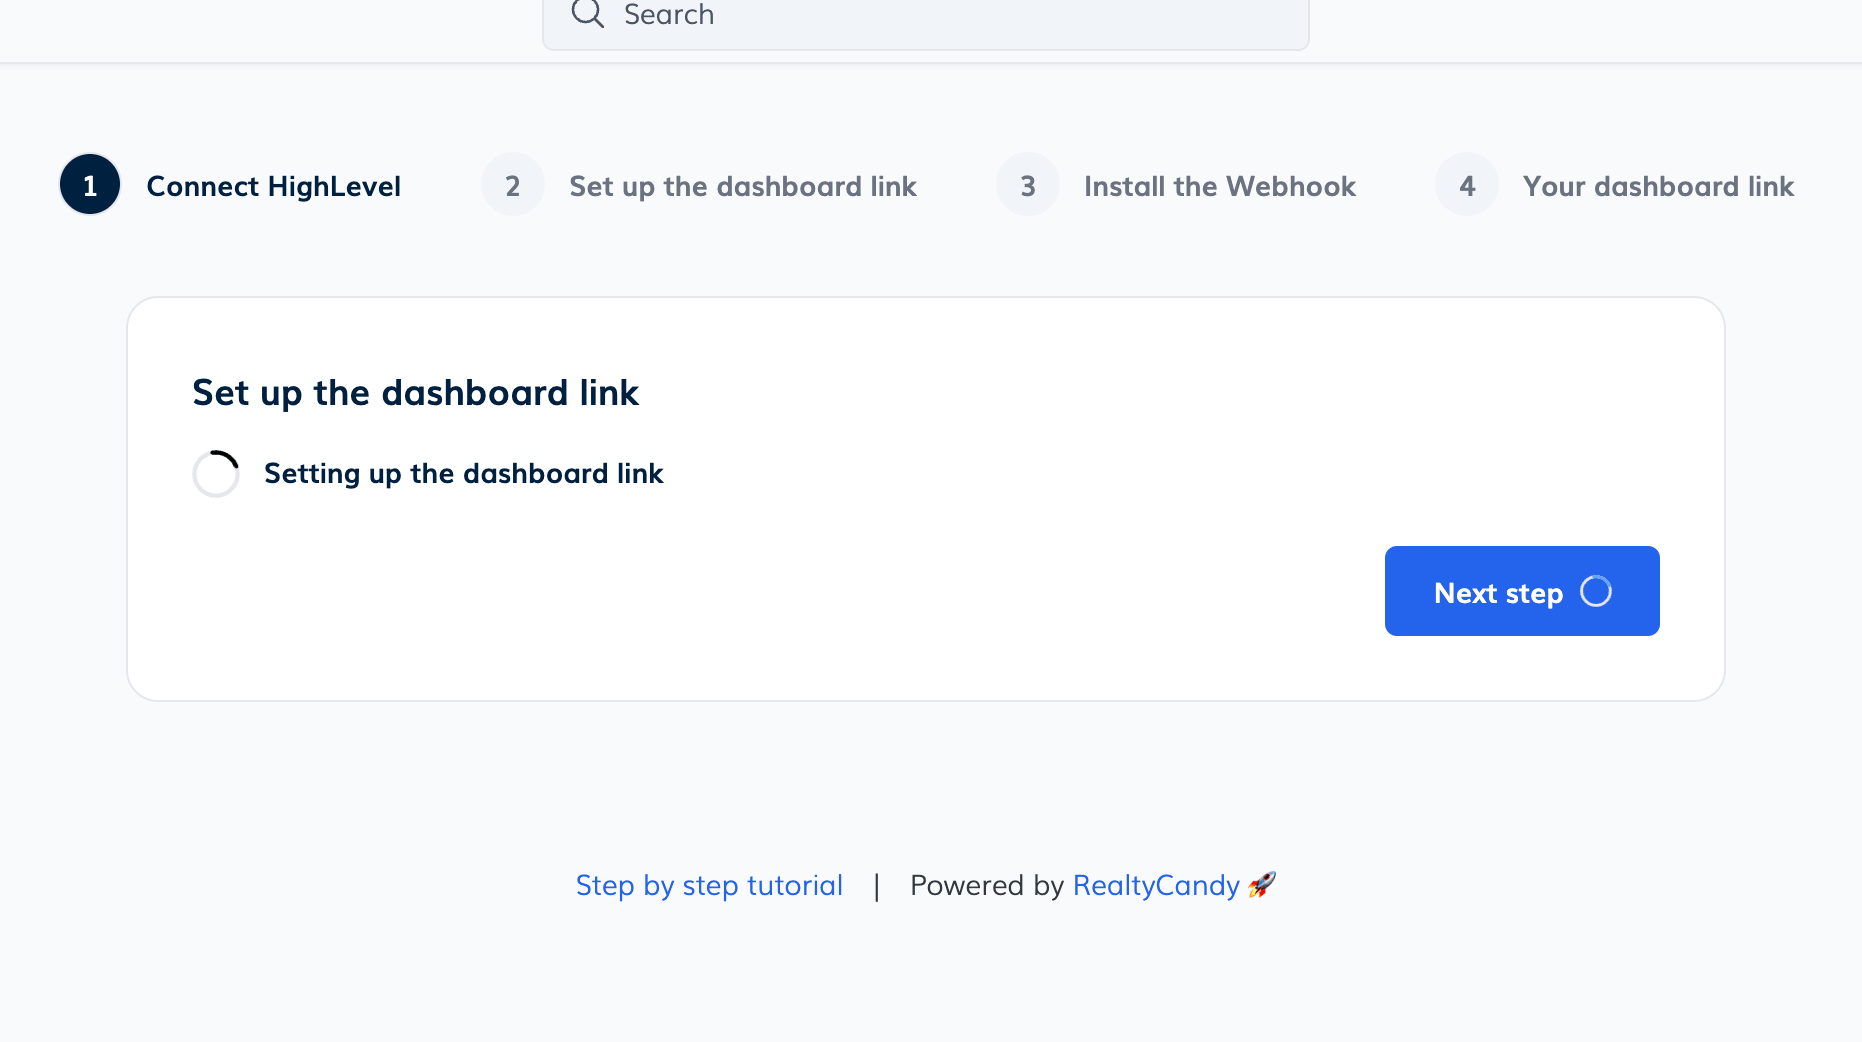
Generate Your Dashboard Link
In this step, your dashboard link will be generated automatically. You don't need to take any action—just wait for the process to complete, then proceed to the next step.
-
Webhook Installation
This is an automatic step. A tracking code will be installed on all your IDX pages to track lead activity. No action is required on your part—simply wait for the process to finish before moving to the next step.
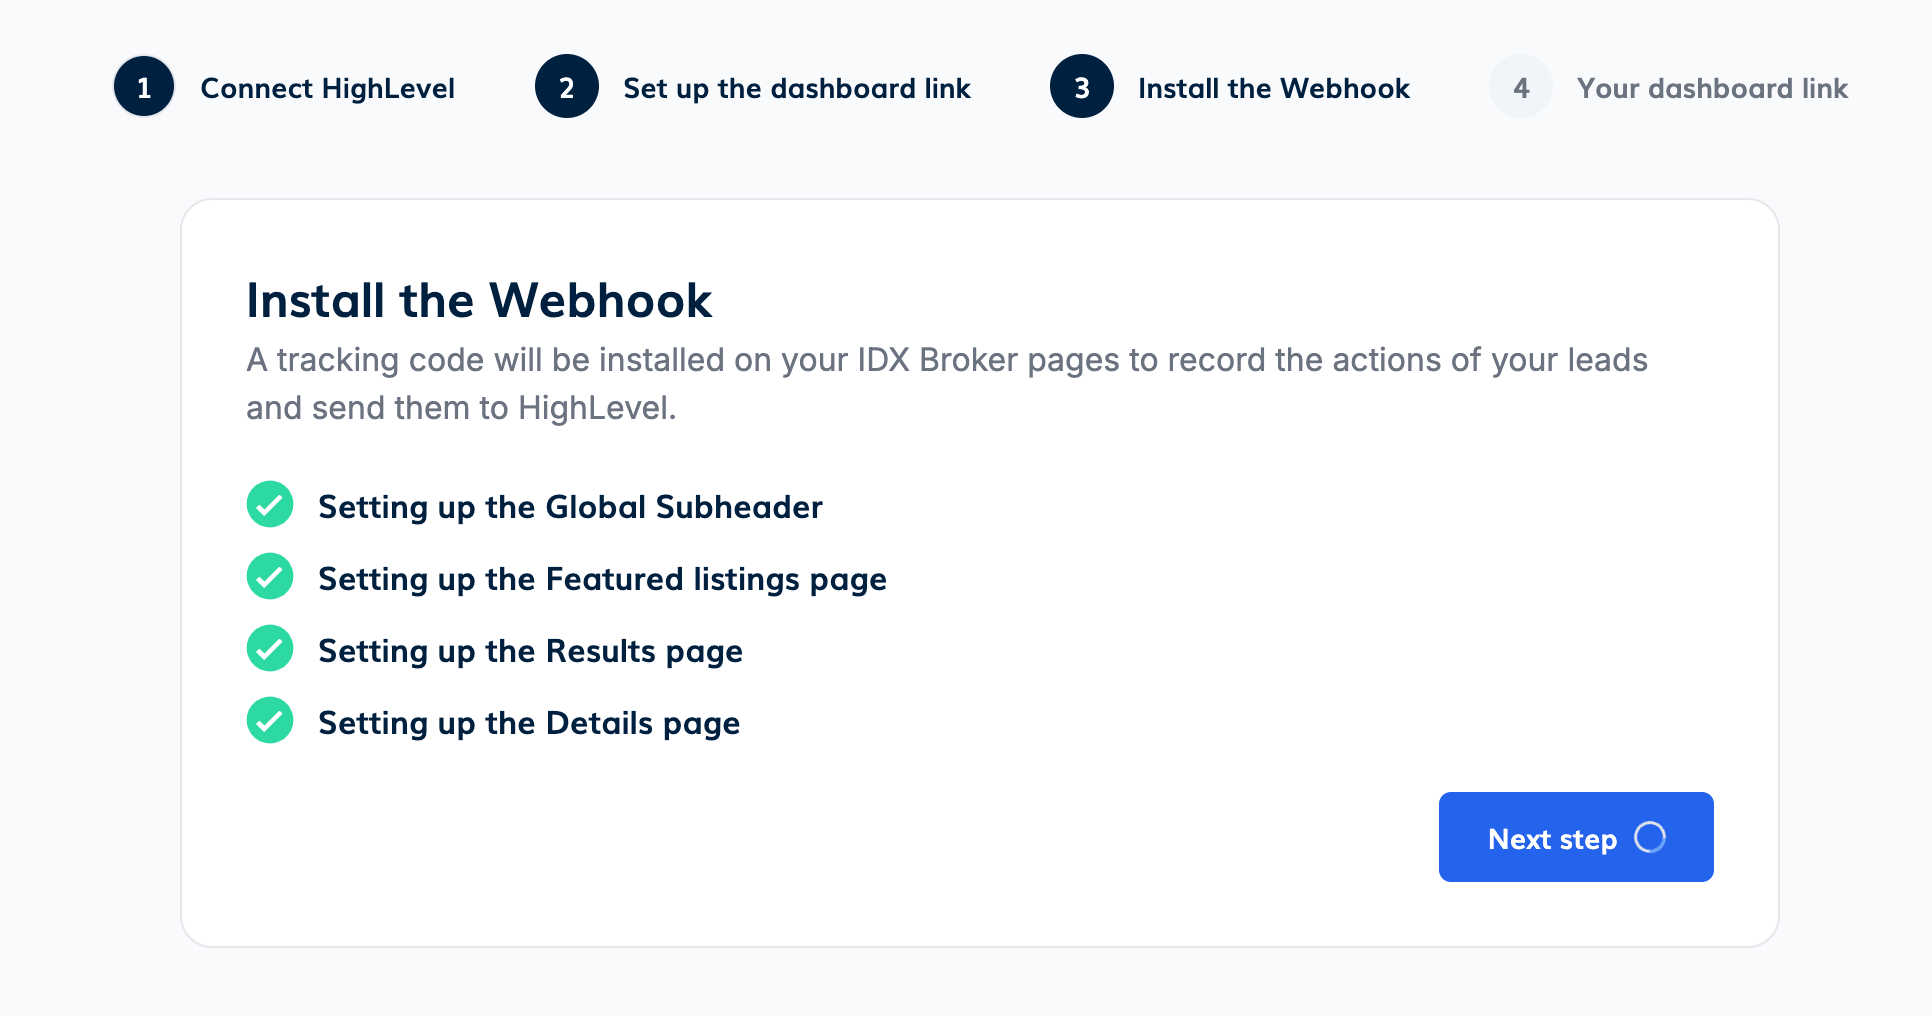
If the webhook cannot be added to an IDX Broker sub-header, a red cross will appear next to the page name. This means the sub-header already has content, and you'll need to manually insert the webhook.
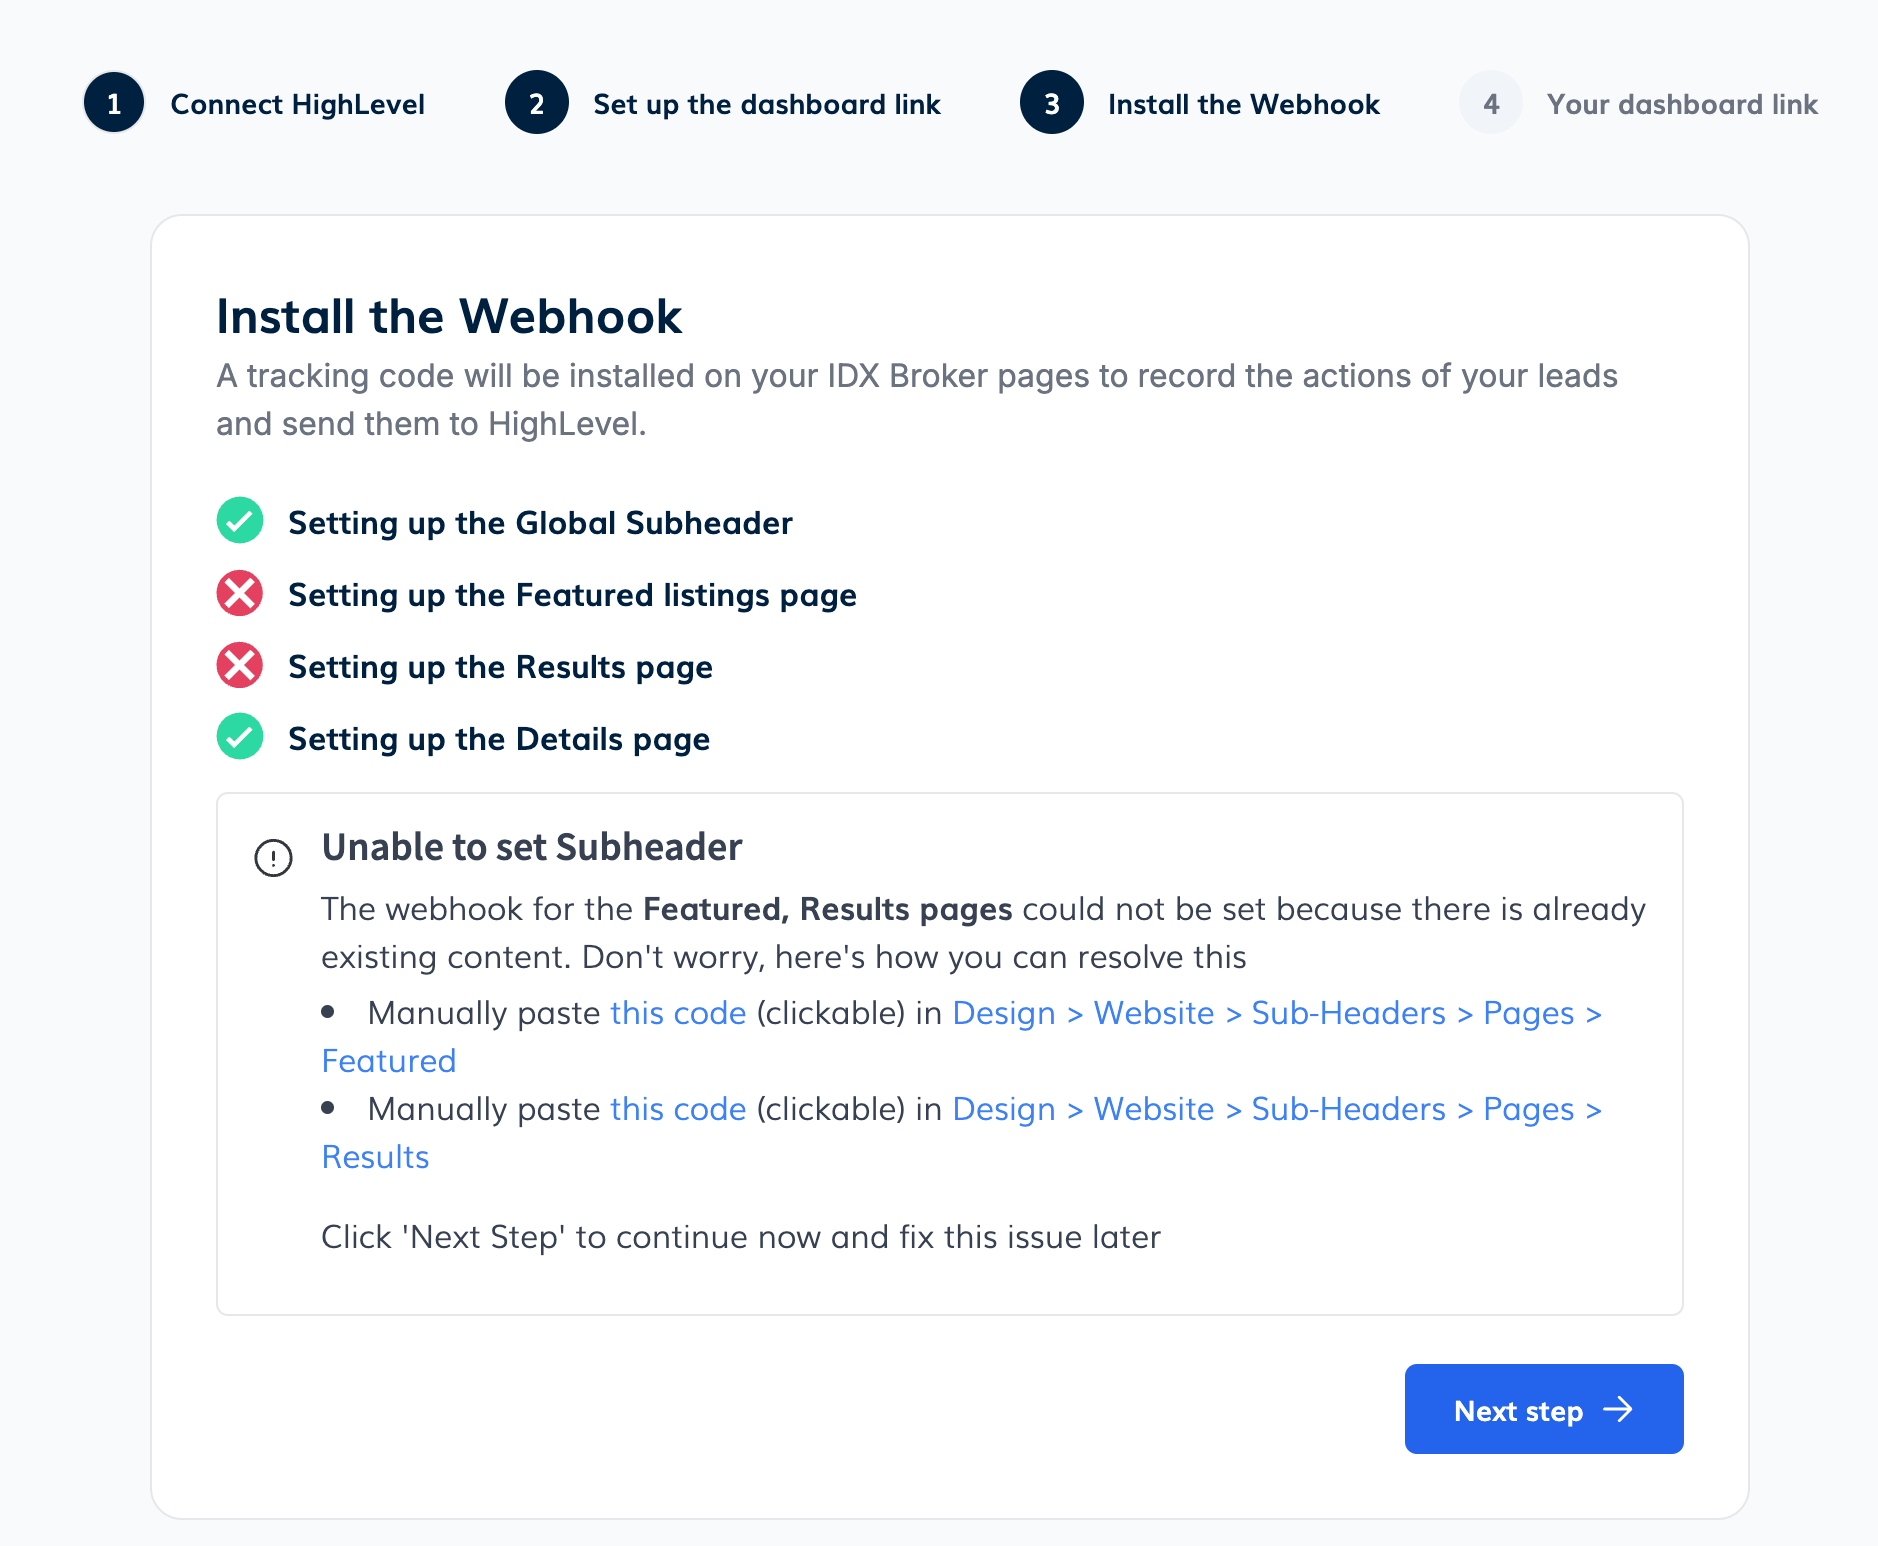
To fix any error, Visit this page and copy the script inside that page.

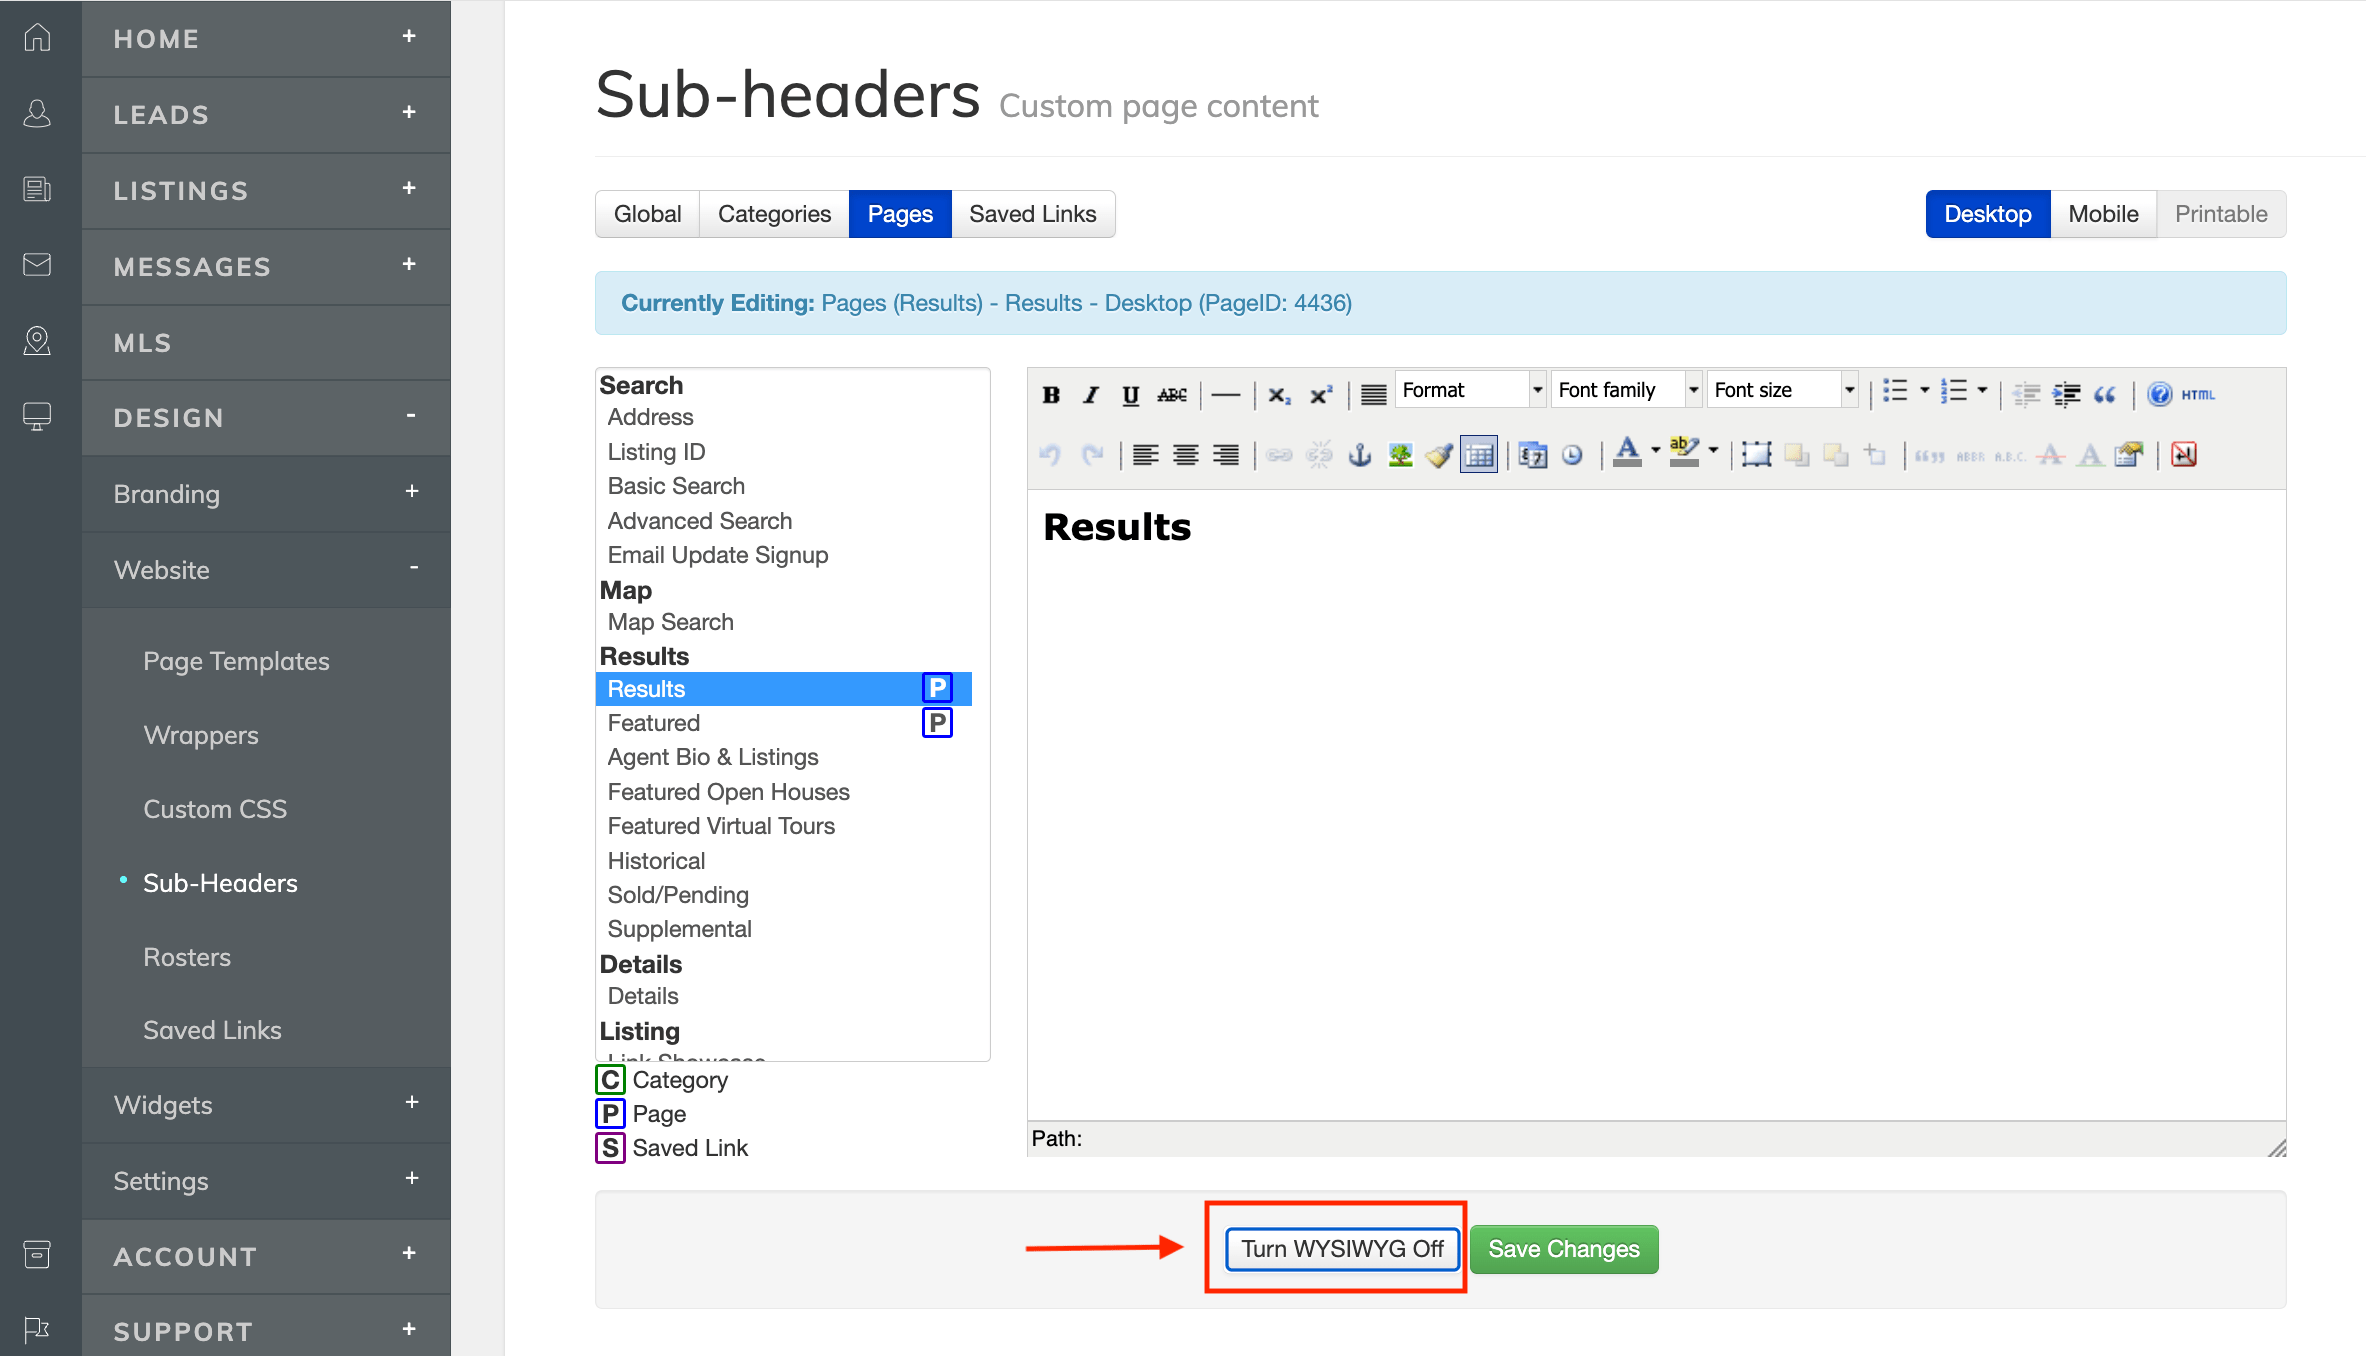
Next, visit your IDX Broker sub-headers and locate the page where the webhook couldn't be added, such as the results page.
Make sure to turn off "WYSIWYG" mode; otherwise, the content will be inserted as text rather than code, which may prevent the webhook from functioning correctly.
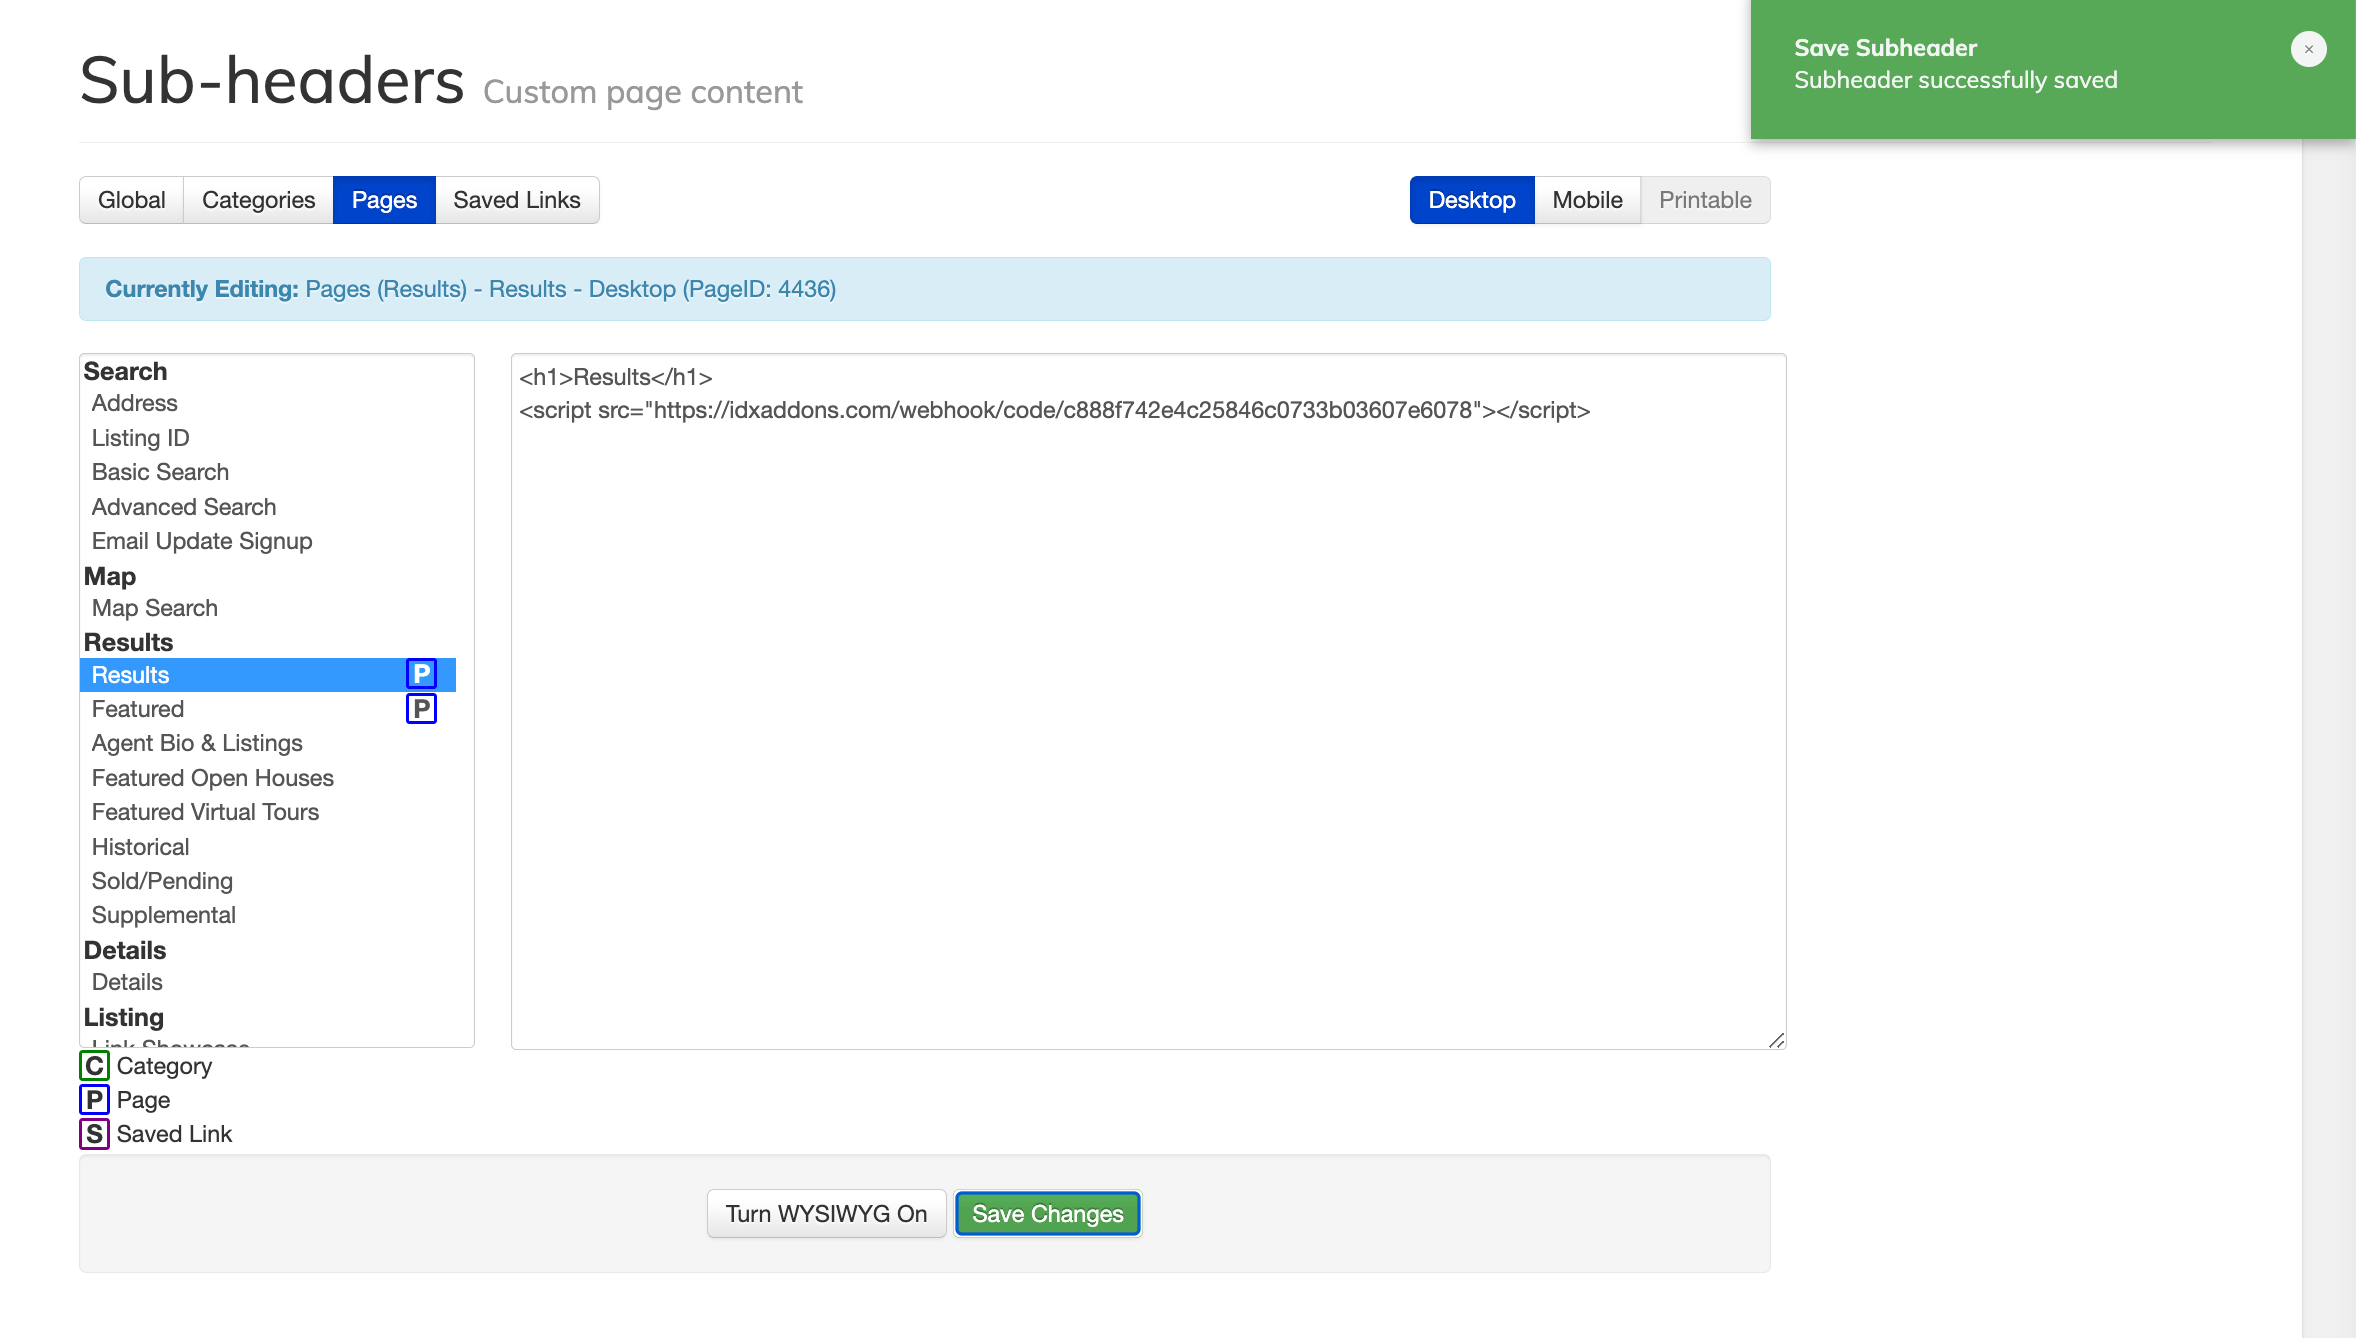
Paste the code below the existing content and then click "Save Changes." A green popup at the top of the page will confirm that the sub-headers have been updated successfully.
-
Connect HighLevel
-
Create a custom menu link
After successfully adding the webhook to the IDX Broker sub-headers, you will see the instructions to add your dashboard as a custom menu link in GHL.
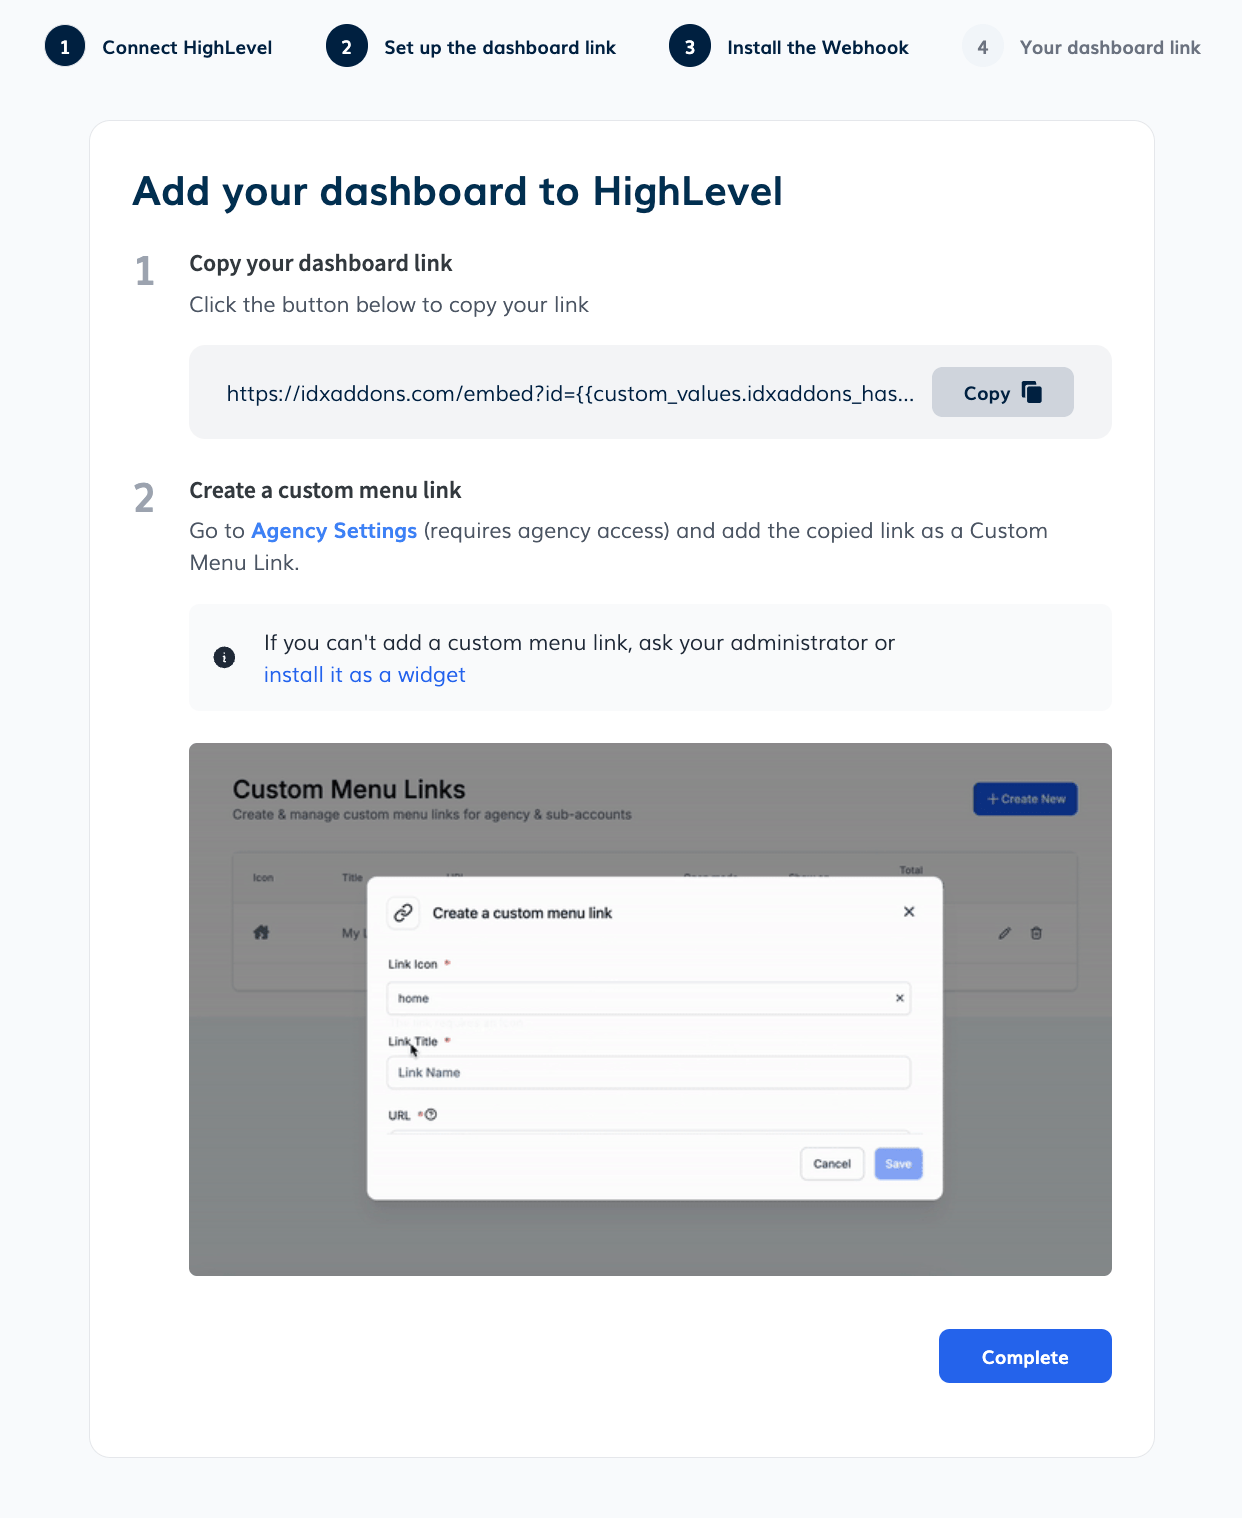
This is the link that you will need to add to your GHL account as a custom menu link.

As an agency on HighLevel go to Agency Settings > Custom Menu Link, click on "Create New".

Select an icon, enter a name, and paste the URL in the provided field.

Select the sub-accounts where you want to display the HighLevel Dashboard link. You can choose to display it on all sub-accounts or just a few.

Ensure that the option "Open in iFrame inside the platform" is enabled. After completing all fields, click "Save" to apply your changes.
-
Test the integration
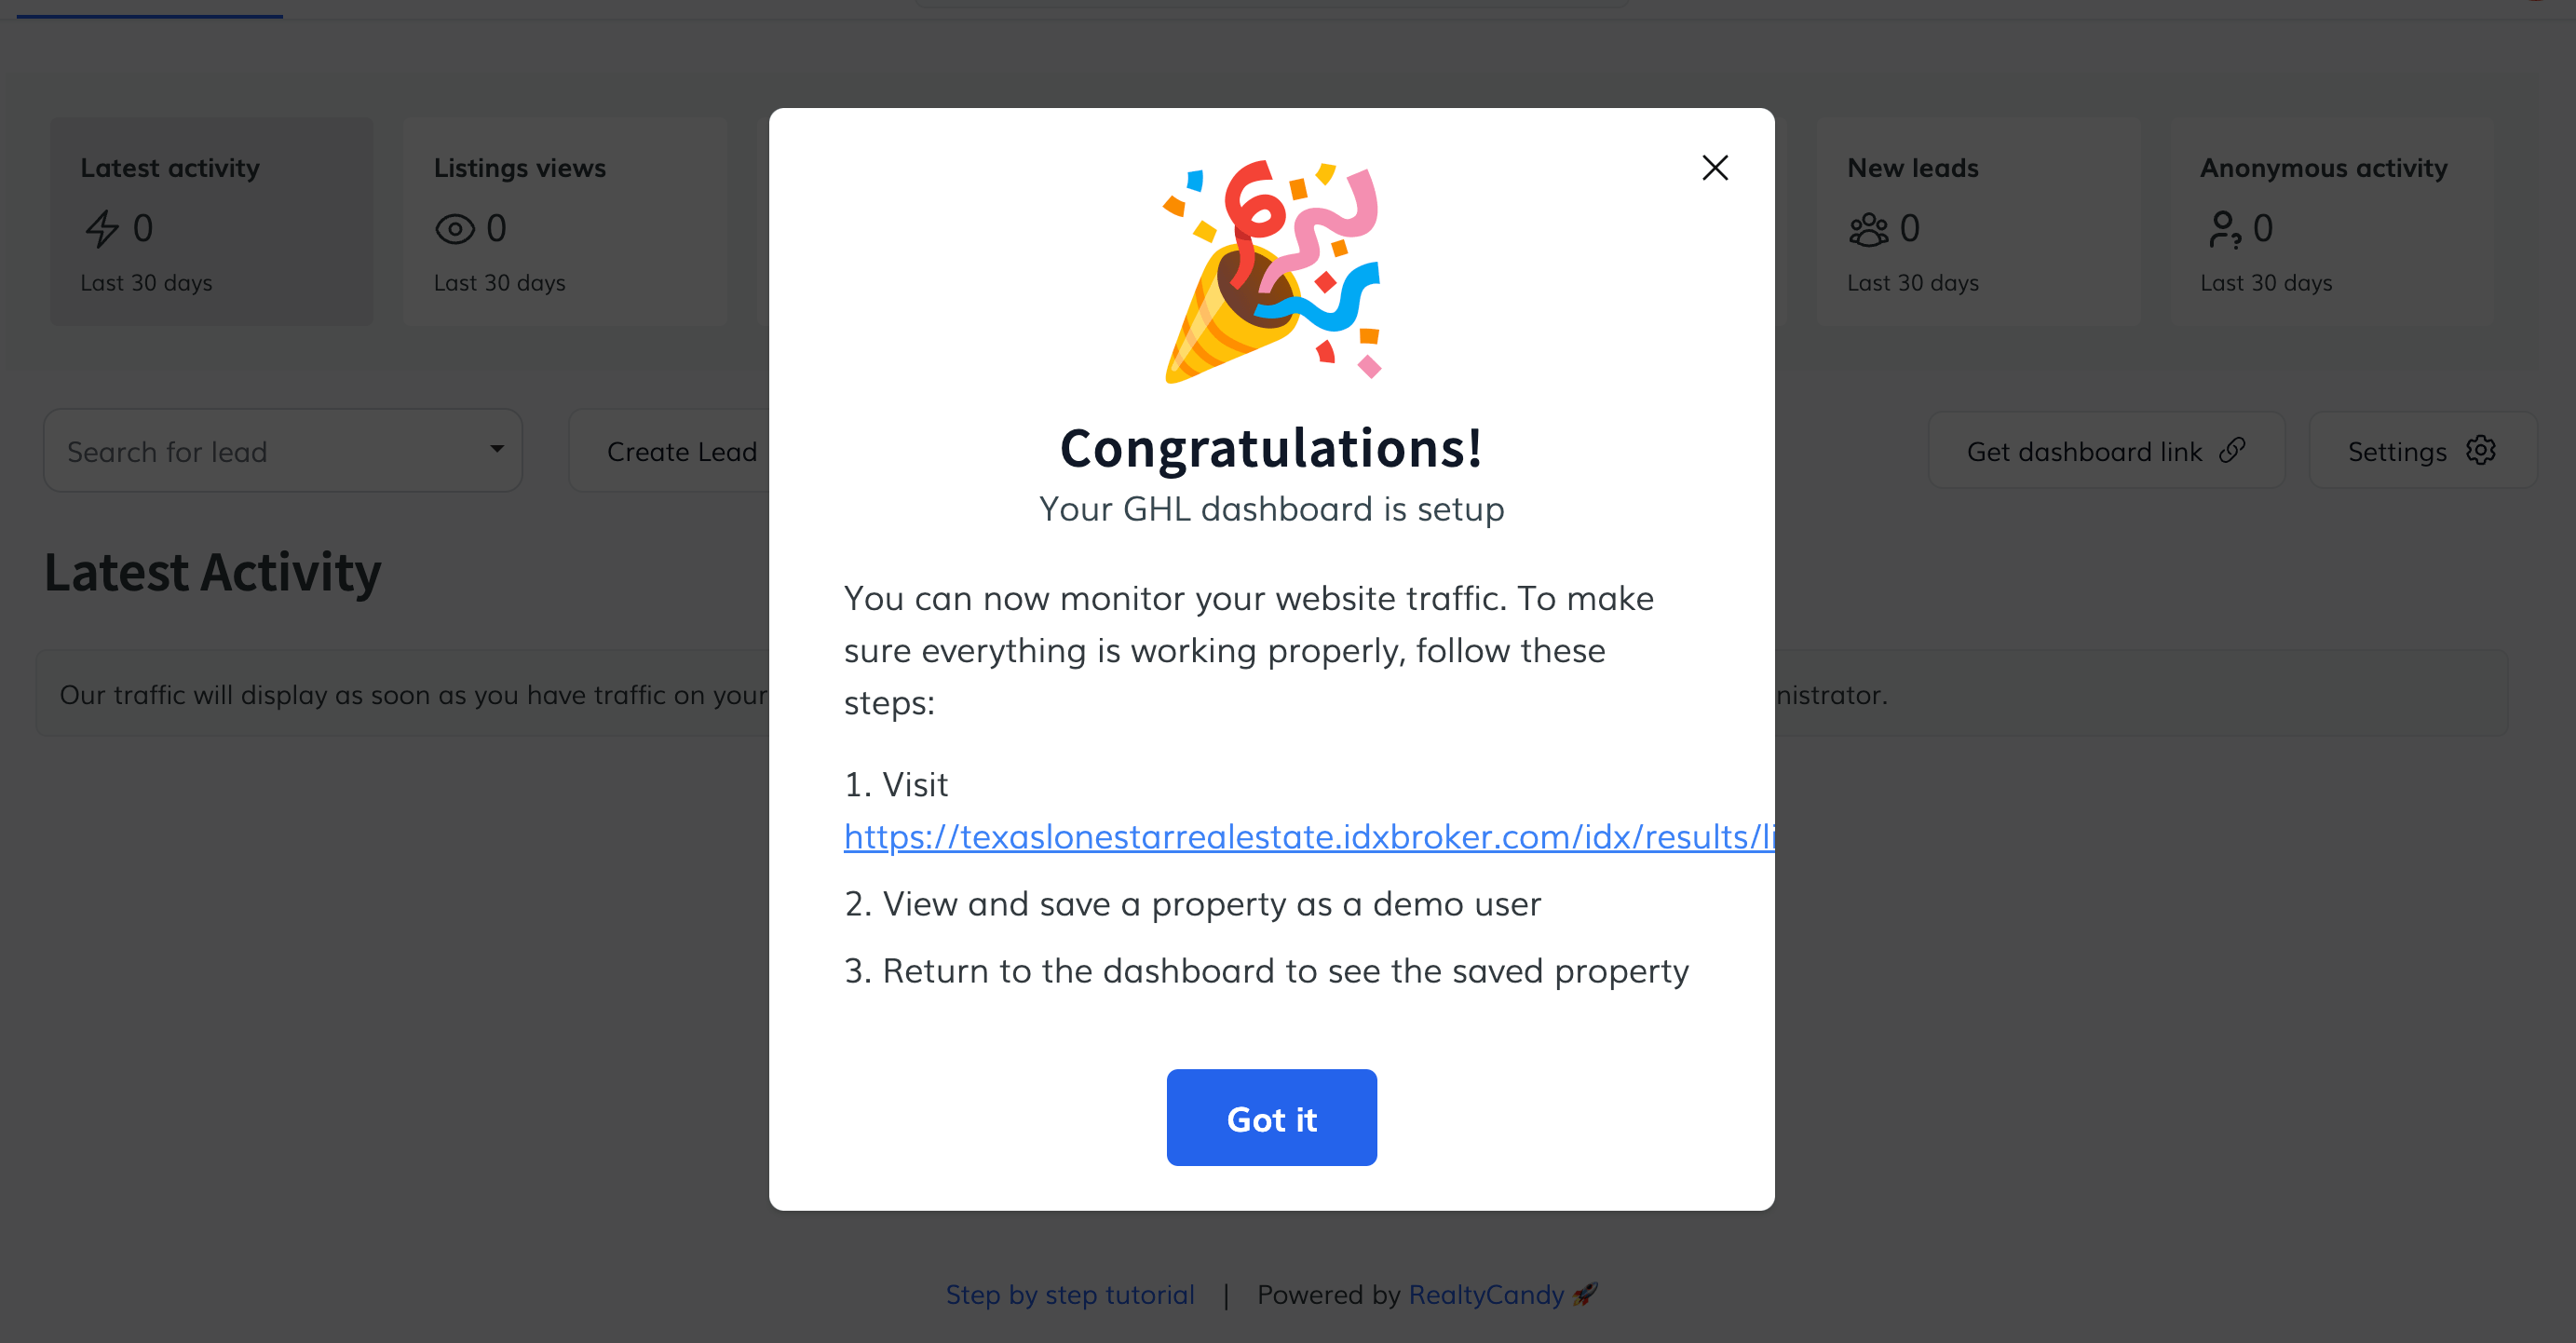
After you have successfully set up the HighLevel Dashboard, you can test the integration by following the instructions that appear on the last step of the setup.
Basically you will need to go to your IDX pages and create a new demo lead. After that, you will see the lead's activity in the dashboard.
