Creating and Customizing Saved Searches for Your Leads in IDXAddons
- Last Updated May 09, 2025
🌟 Welcome to the Saved Searches Guide. In this article, you’ll learn how to create and manage different types of saved searches for your leads inside IDXAddons. We'll walk you through each type step by step to ensure your leads receive the most relevant property updates.
🔍 Saved Searches Overview
In IDXAddons, you can manage different types of saved searches for your leads. To access these options:
-
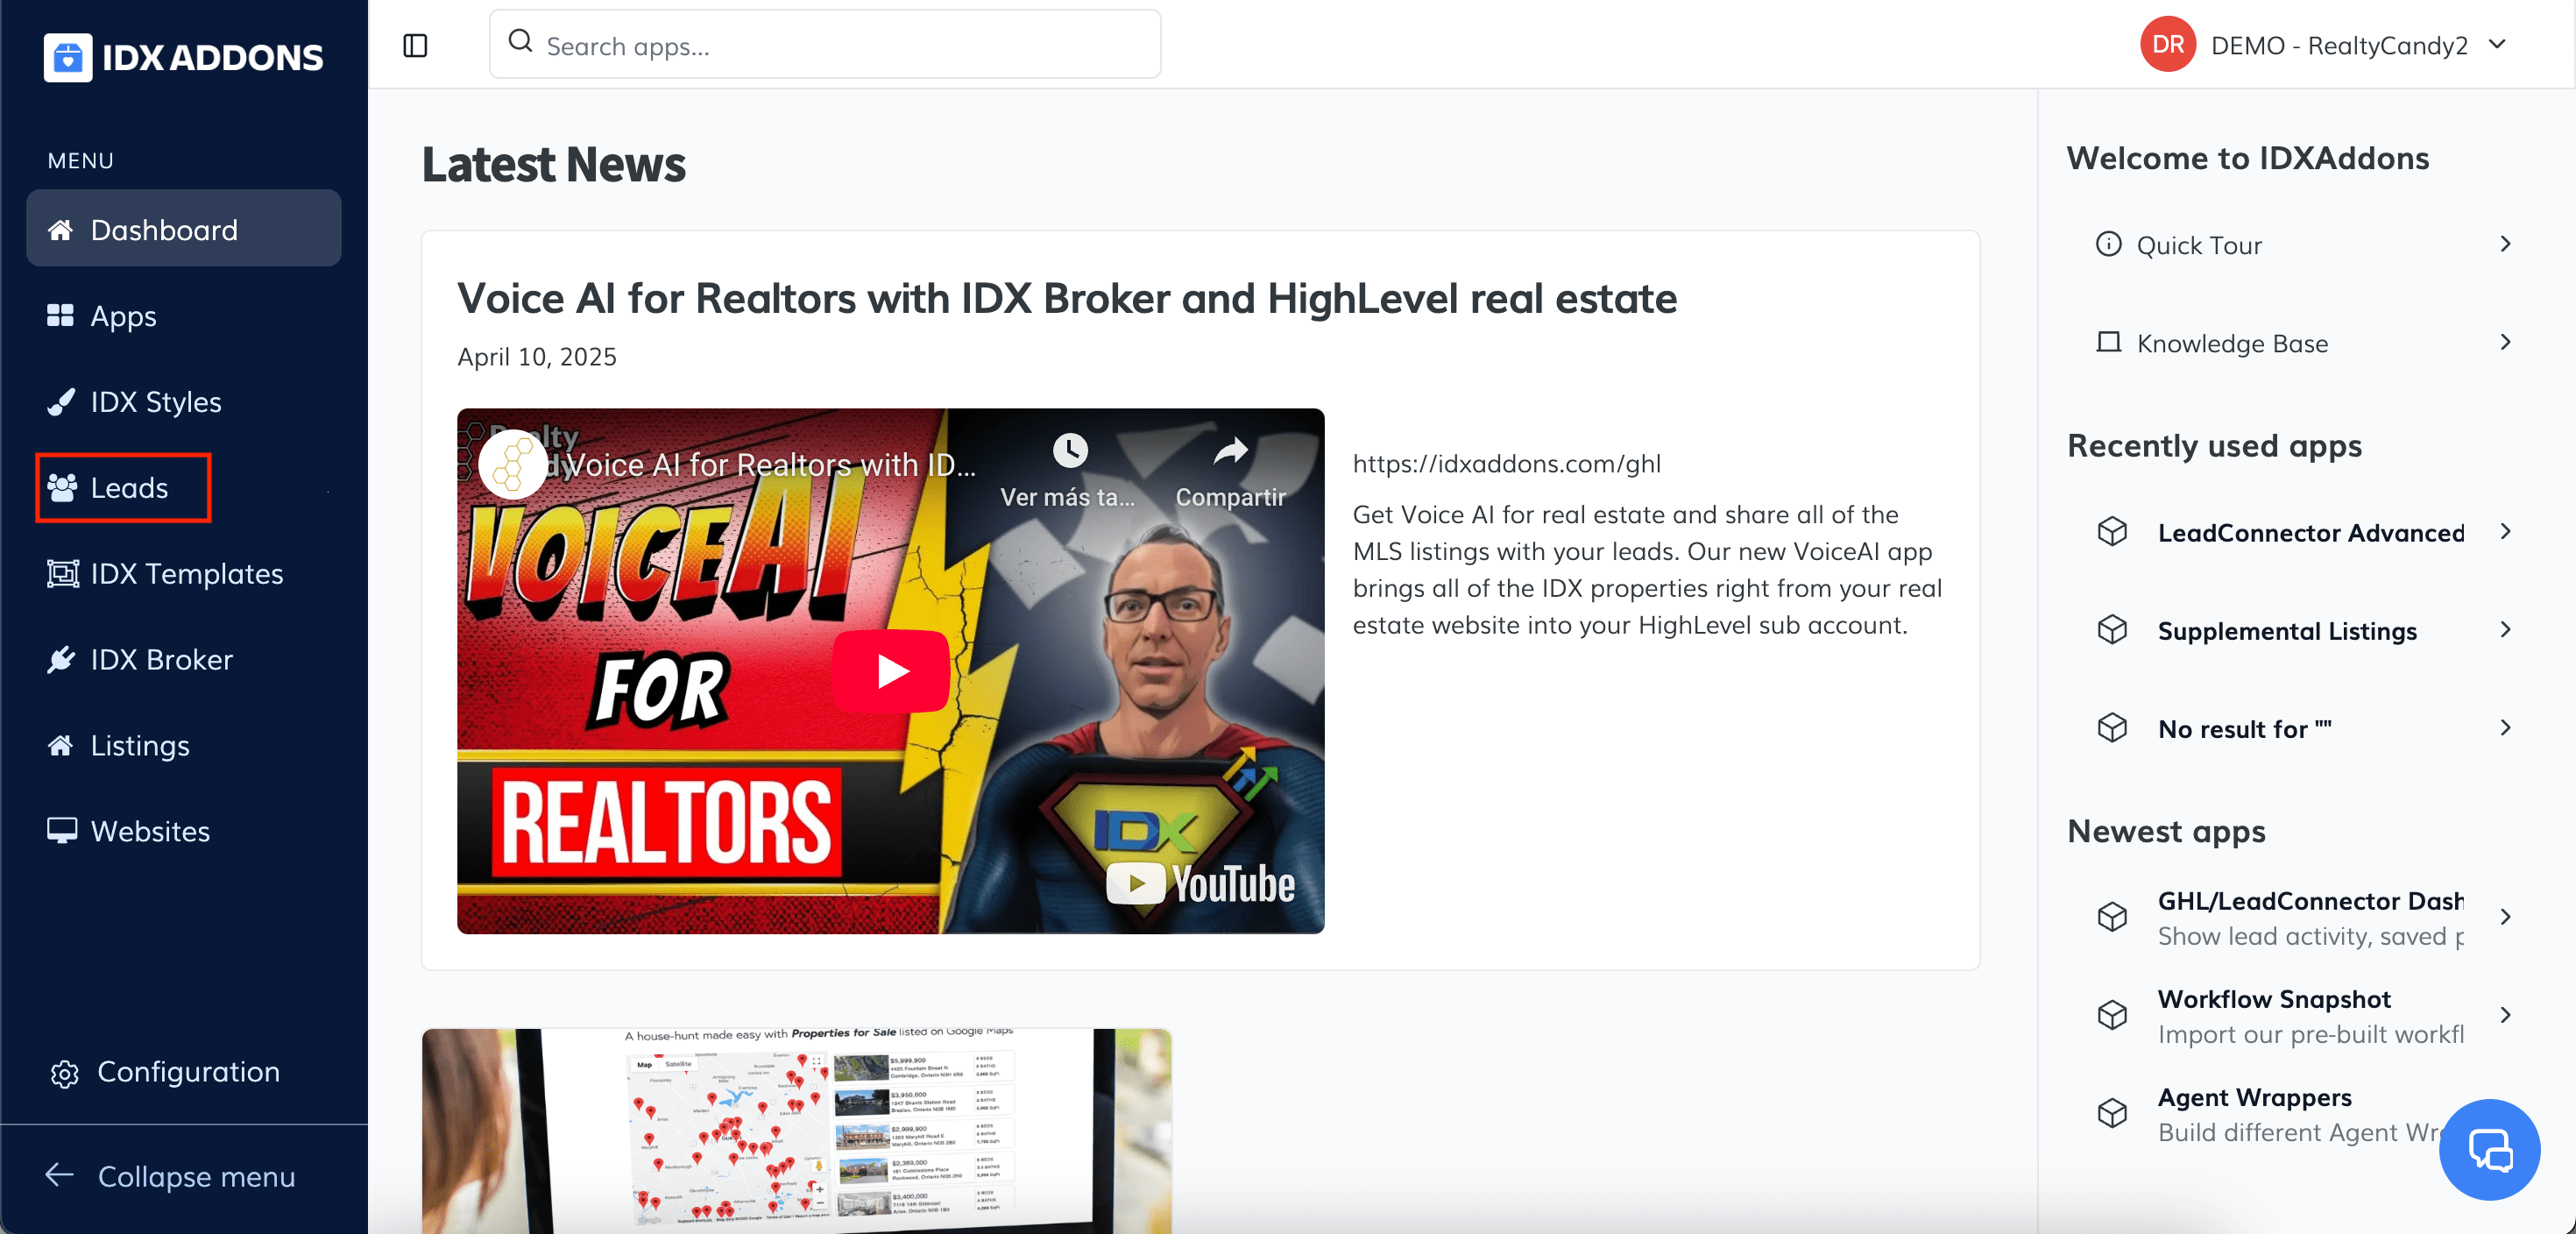
Navigate to the Leads section from the main menu.
-
Click on the name of the lead in the dashboard to open the detailed view.

In the new window, you'll see multiple saved search options available:
- Basic Search
- Advanced Search
- Polygon Search
- Property Alerts
- Select Listings
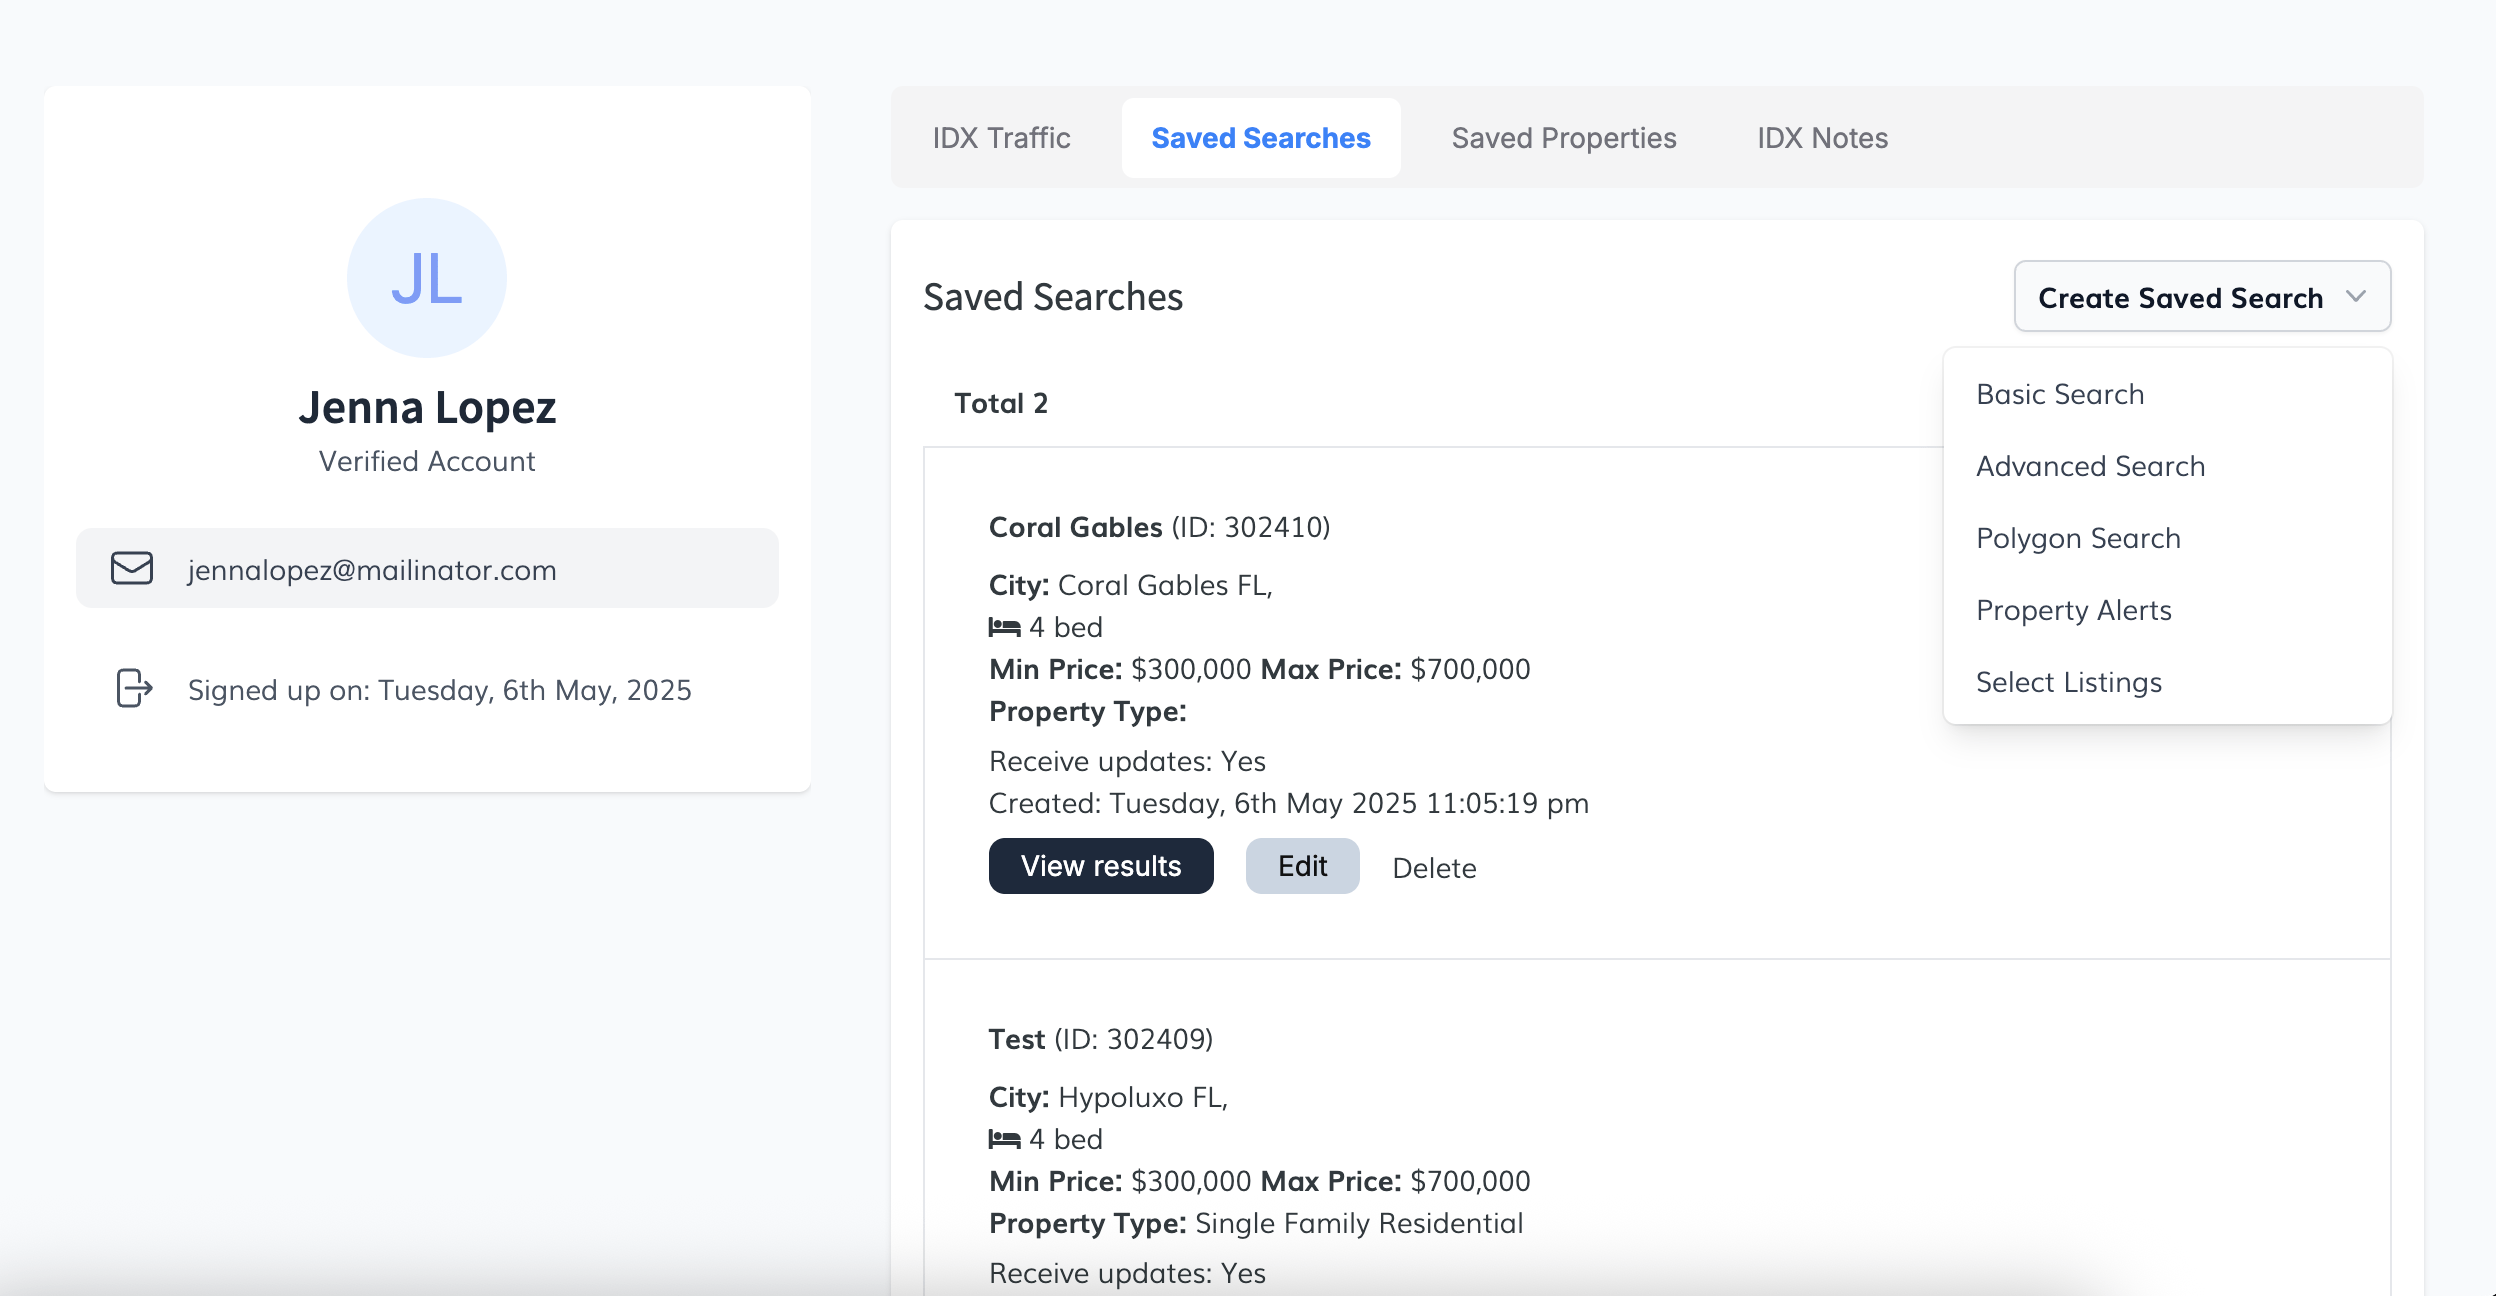
To create a new saved search, click the Create Saved Search button.
📝 Basic Search
The Basic Search option allows you to create simple searches with commonly used fields. This is ideal when you want to set up straightforward criteria for your leads.
- In the Saved Searches section, select the Basic Search tab.
-
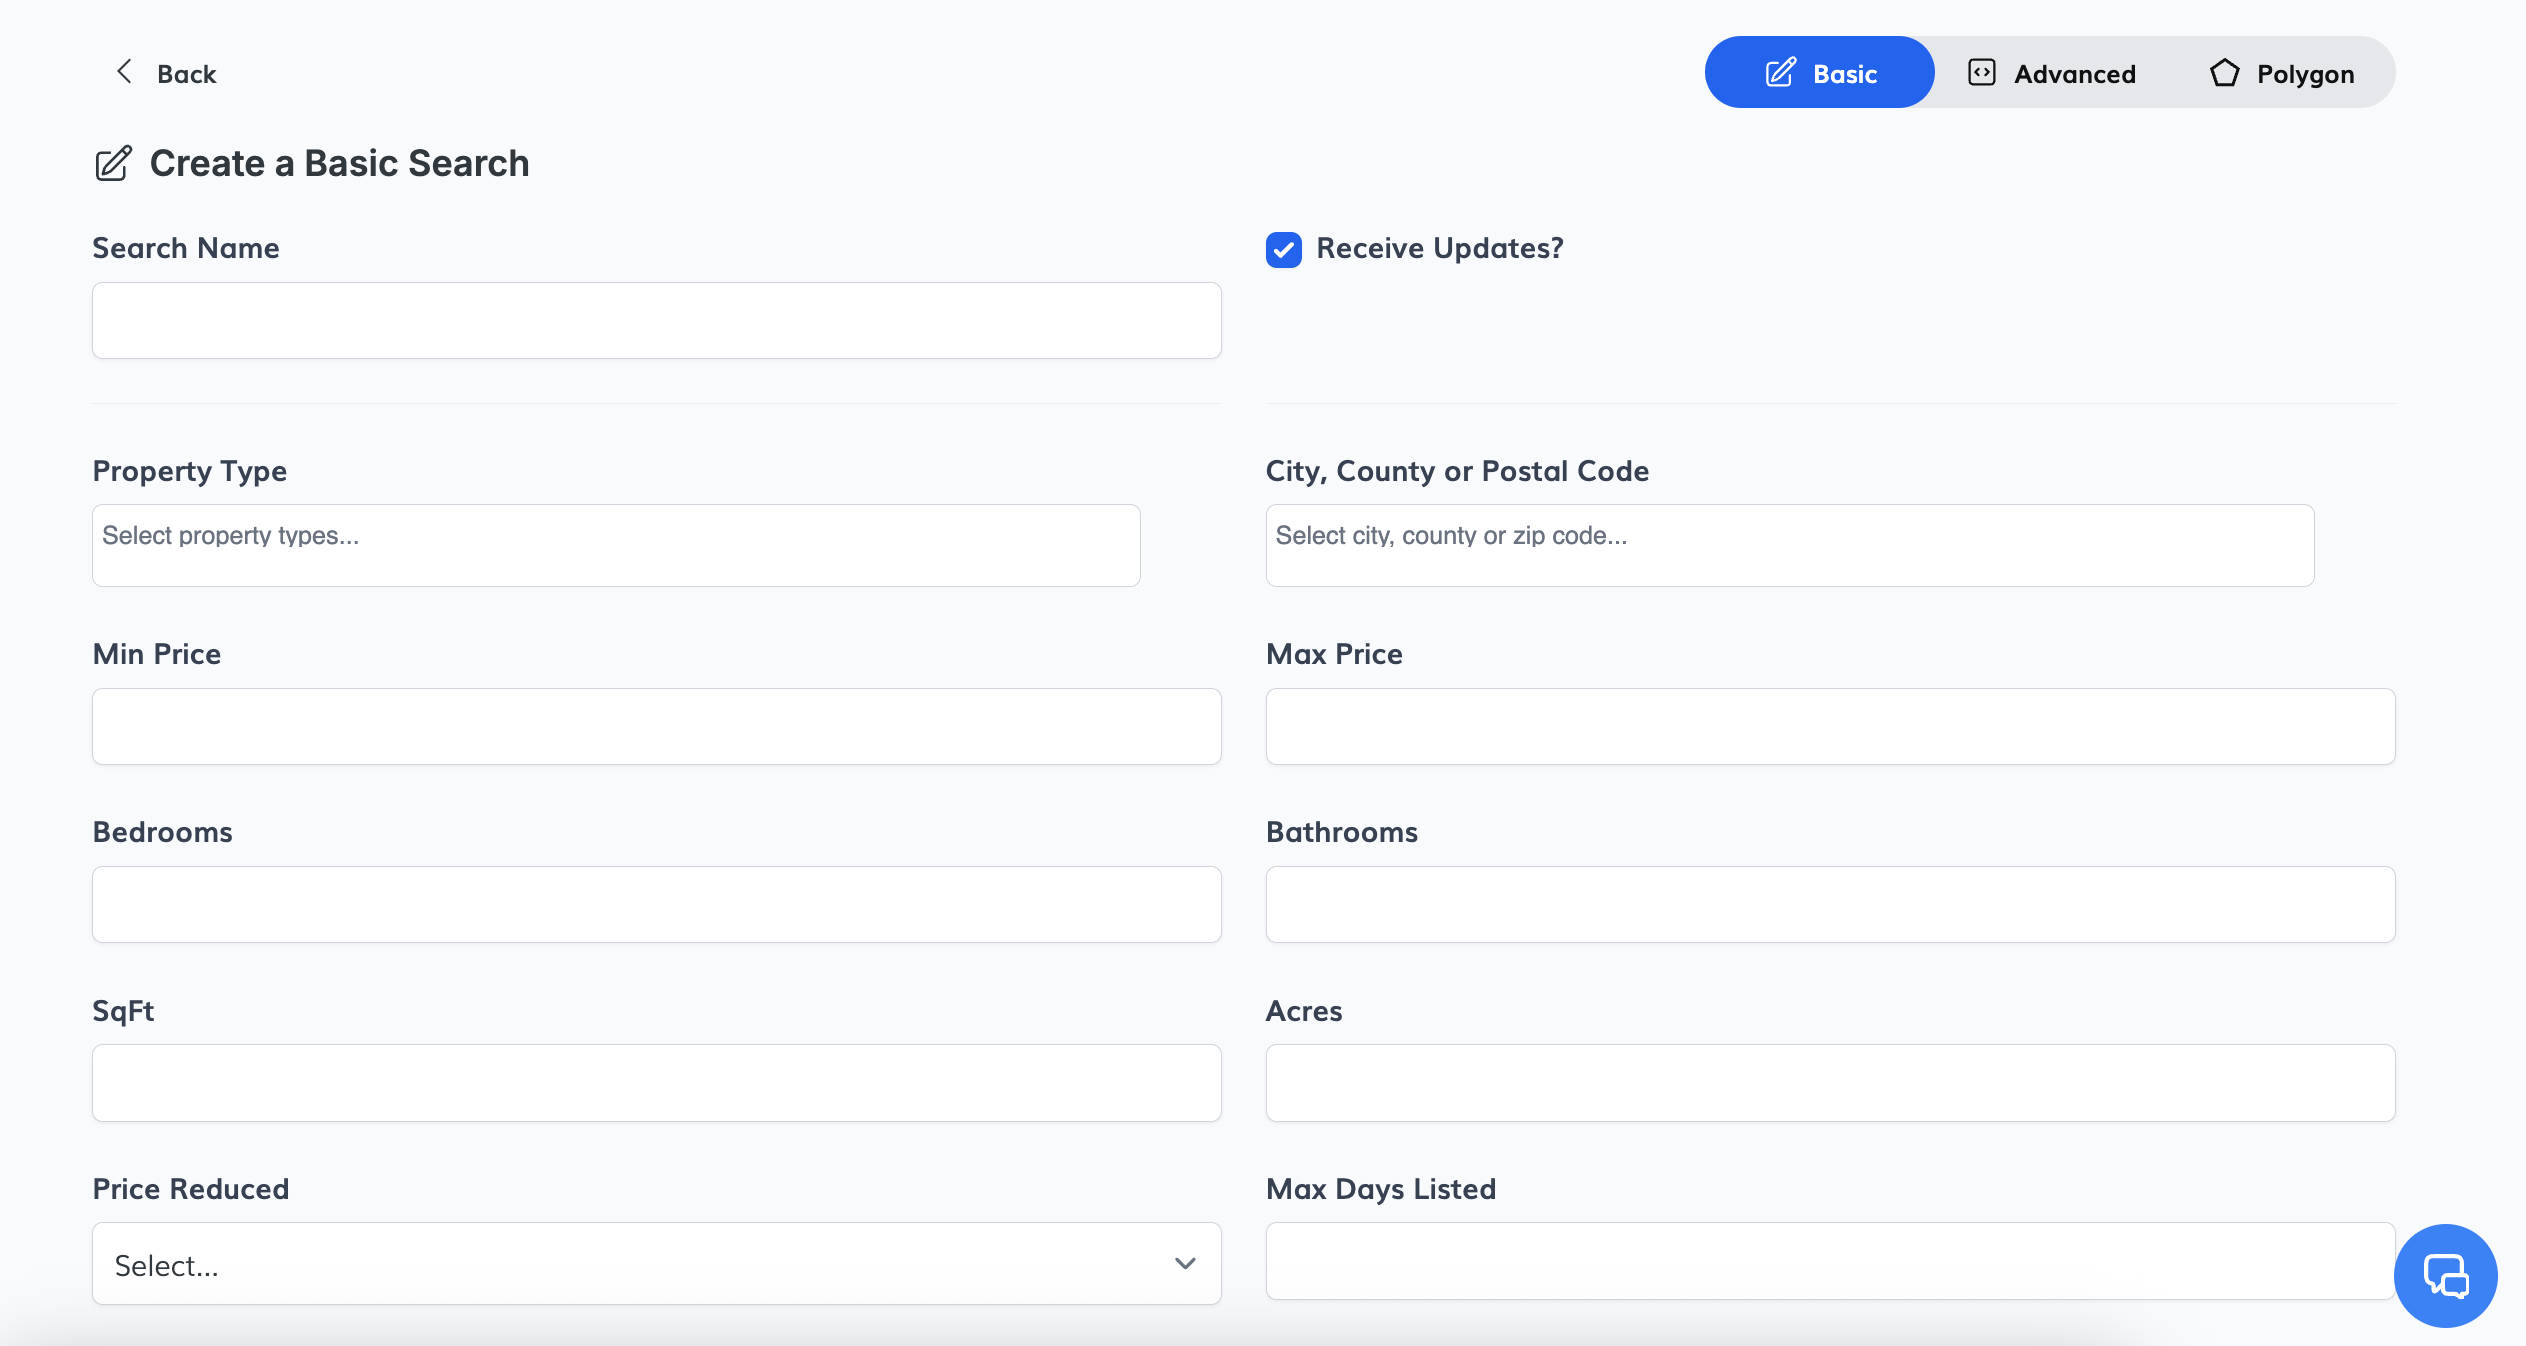
Fill out the required fields in the form:
- Search Name
- Receive Updates? (checkbox)
- Property Type
- City, County or Postal Code
- Min Price / Max Price
- Bedrooms / Bathrooms
- SqFt / Acres
- Price Reduced (dropdown)
- Max Days Listed
- Results Per Page (options: 5, 10, 25, 50, 100)
- Sort By (dropdown)
-
You can also use checkboxes to refine results:
- Has Image
- Has Virtual Tour
- Has Open House
- Has Virtual Open House
- Featured Listings
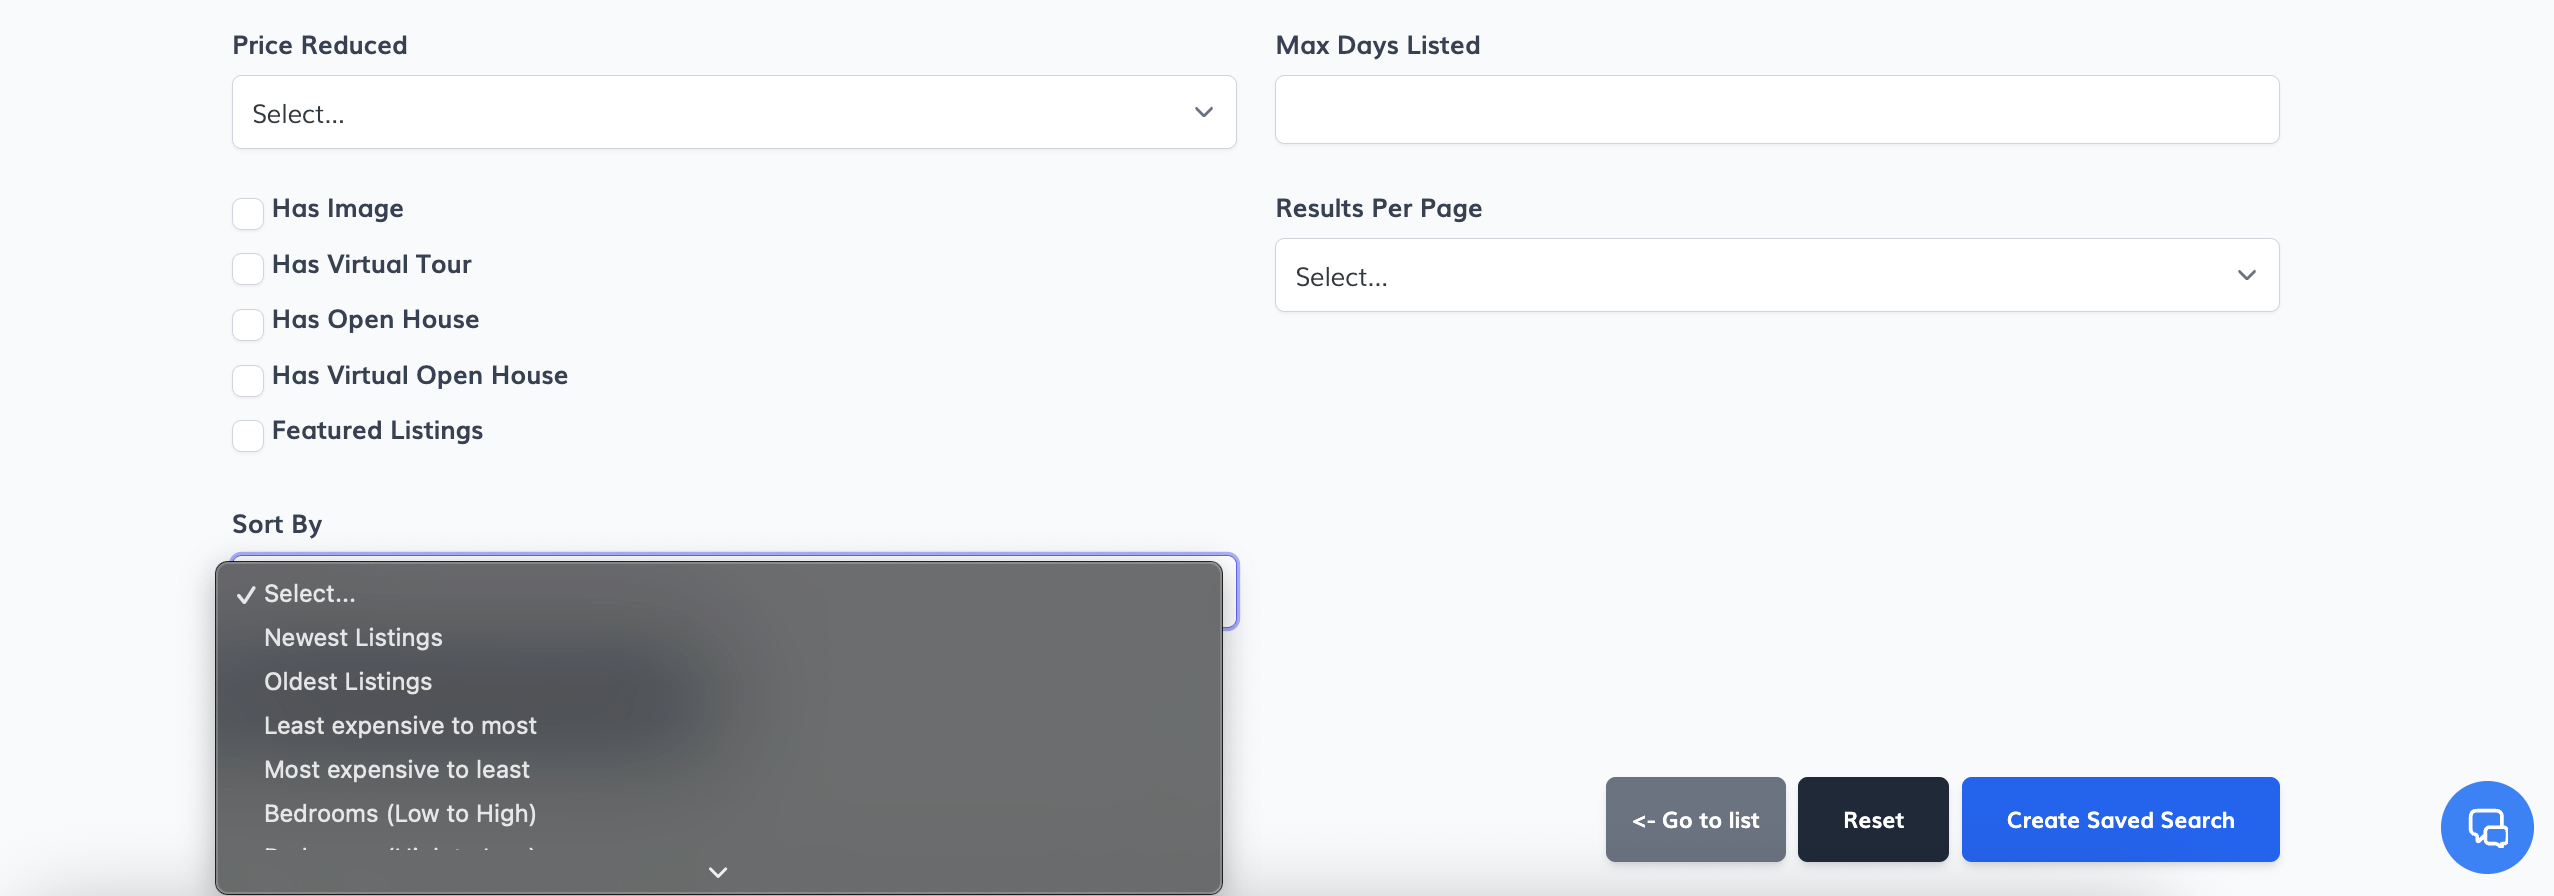
- After filling in the necessary fields, click the Create Saved Search button.
⚙️ Advanced Search
The Advanced Search option offers more precise filters compared to the Basic Search. It allows you to fine-tune the search criteria to better match the lead’s specific needs.
-
In the Saved Searches section, click on the Advanced Search tab.

-
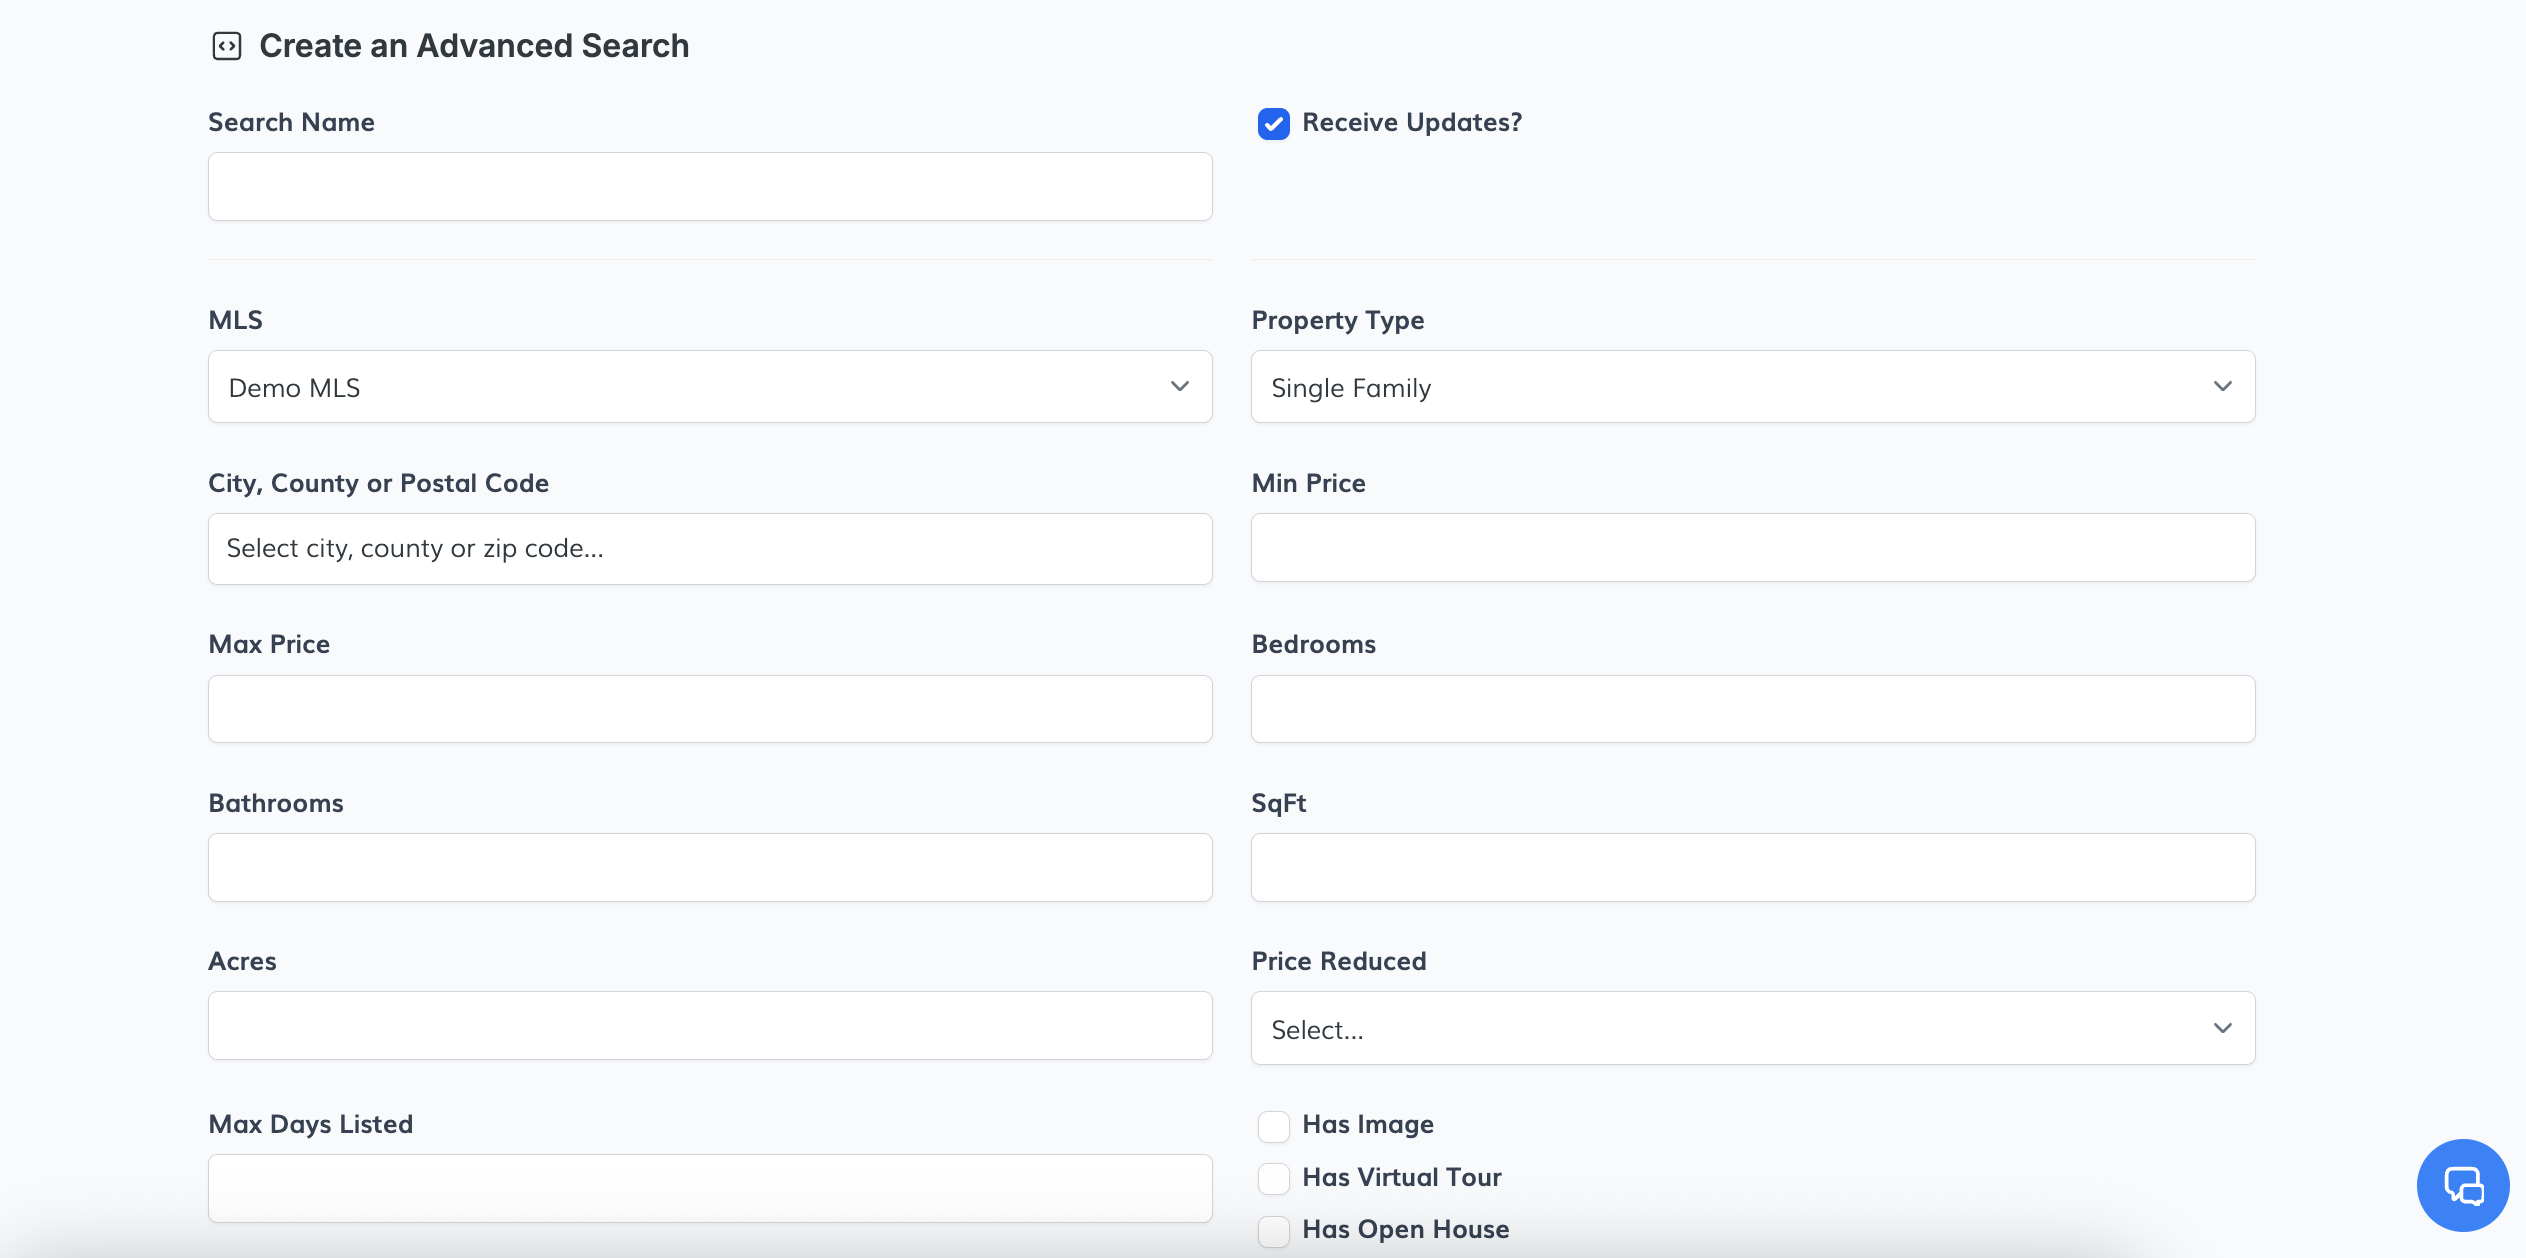
Fill out the required and optional fields, including:
- Search Name
- Receive Updates? (checkbox)
- MLS (dropdown)
- Property Type
- City, County or Postal Code
- Min Price / Max Price
- Bedrooms / Bathrooms
- SqFt / Acres
- Price Reduced (dropdown)
- Max Days Listed
-
Additional filters are available via checkboxes:
- Has Image
- Has Virtual Tour
- Has Open House
- Has Virtual Open House
- Featured Listings
-
Results Per Page:
Choose how many listings to display per page (e.g., 5, 10, 25, 50, 100). -
Sort By:
Select how the results will be ordered (e.g., Newest Listings).
To create an Advanced Field, follow these steps:
-
Select a Property Type: Start by choosing a property type from the dropdown (e.g., Single Family, Condo).

-
Add Fields: Scroll down to the Advanced Fields section and click on the Add Fields button.

-
Choose Advanced Fields: A dropdown will appear with available advanced fields. For example, you can select Address and County Name.

- Save the Fields: After selecting your desired advanced fields, click the Save Fields button to apply your changes.
-
View Your Fields: To verify or manage the new fields you’ve added, click on the Select Fields option. Your newly created fields will now be available in the advanced search form.

🗺️ Polygon Search
The Polygon Search option allows you to create a highly customized search area by drawing a shape directly on the map. This is ideal when the lead is interested in a very specific region that doesn’t match standard city or ZIP code boundaries.
- In the Saved Searches section, select the Polygon Search tab.
- Enter a Search Name to identify the search.
-
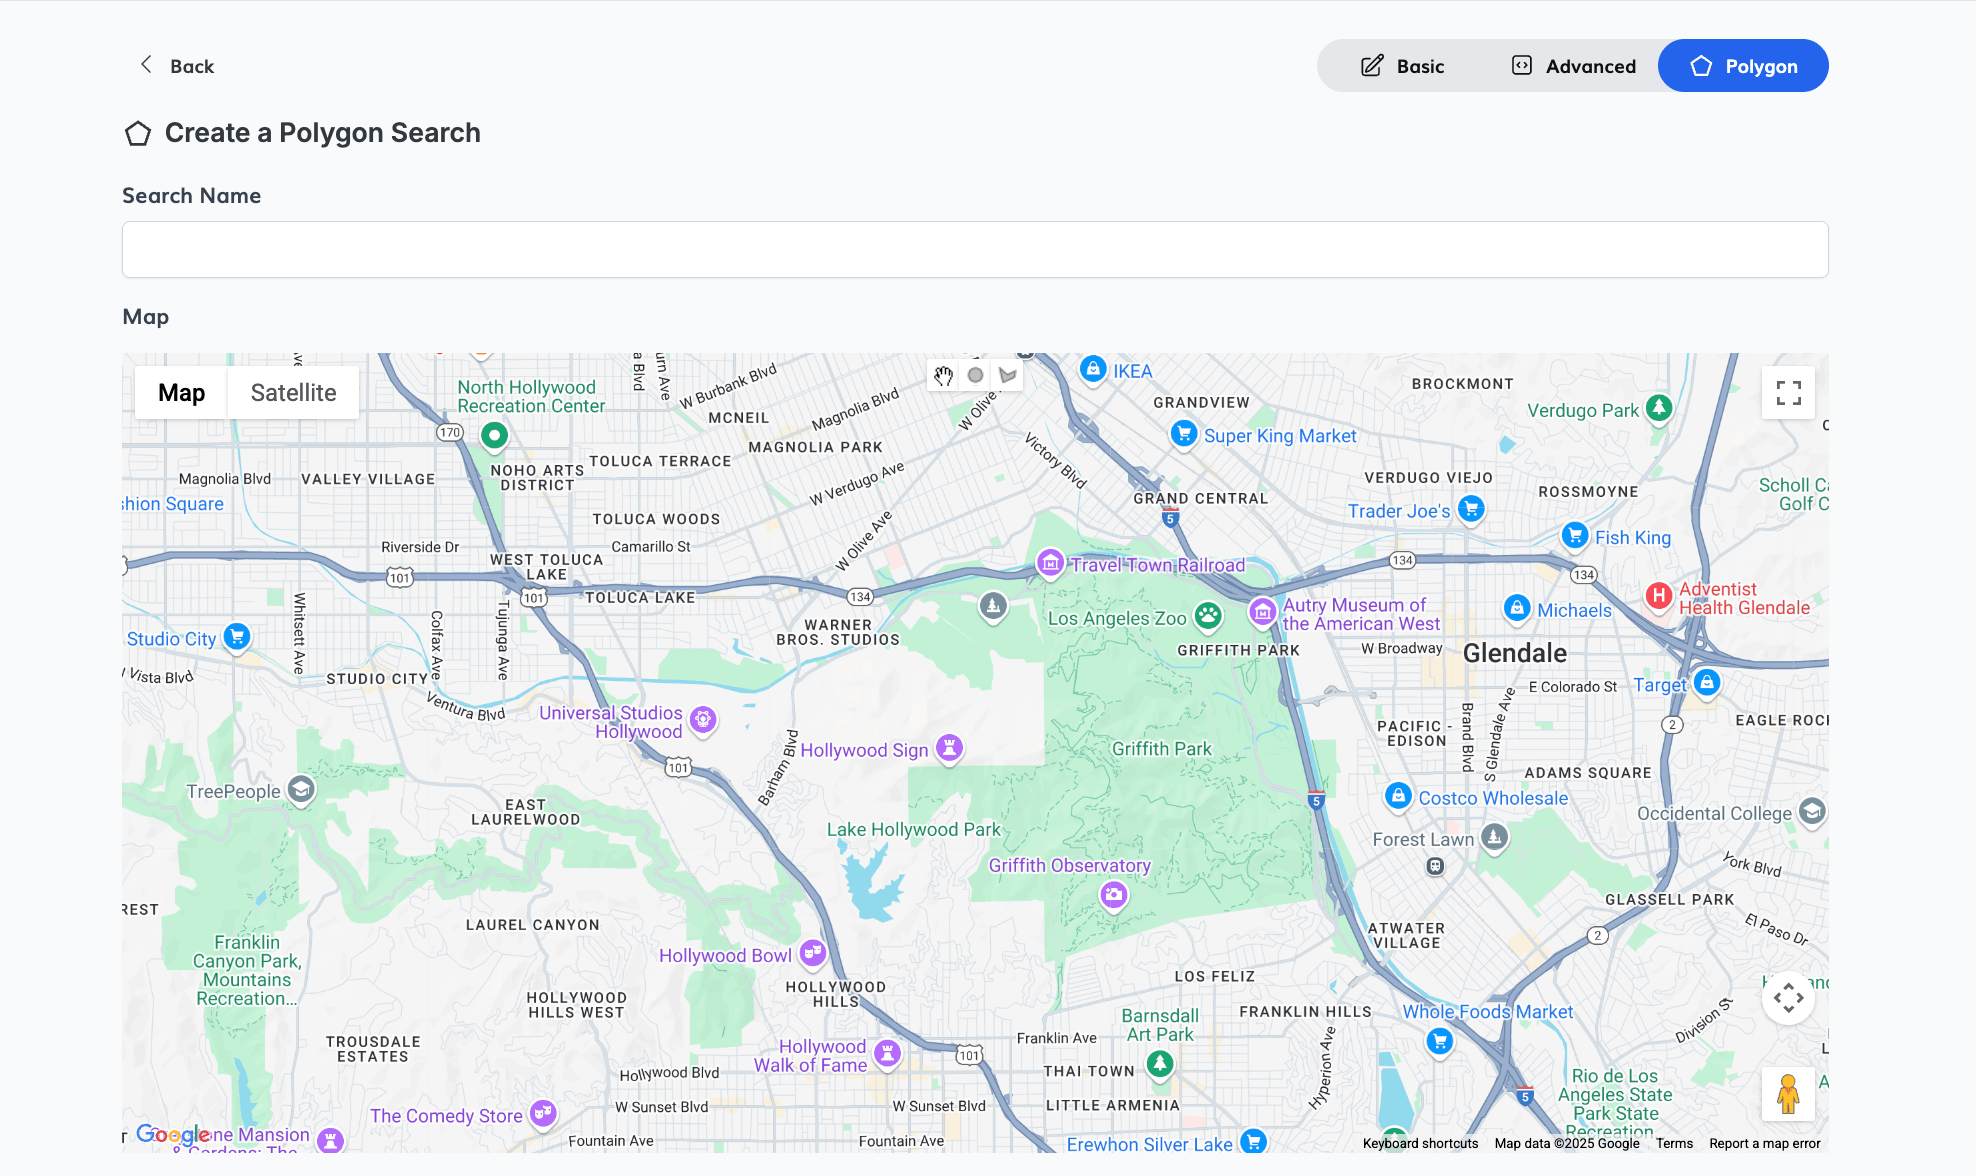
Use the interactive map to:
- Click around the map to draw your desired area.
- Complete the polygon by connecting the last point to the first.
- Once your shape is complete, review it to ensure the area is correct.
- When you're ready, click the Create Saved Search button.
The search will now appear under the lead’s saved searches, displaying results that fall strictly within the drawn polygon.
- MLS (dropdown)
- Property Type / Sub Property Type
- Min Price / Max Price
- Bedrooms / Bathrooms
- SqFt / Acres
- Price Reduced (dropdown)
- Max Days Listed
- Results Per Page (options: 5, 10, 25, 50, 100)
- Sort By (e.g., Newest Listings)
You can also check additional boxes to filter results further:
- Has Image
- Has Virtual Tour
- Has Open House
- Has Virtual Open House
- Featured Listings
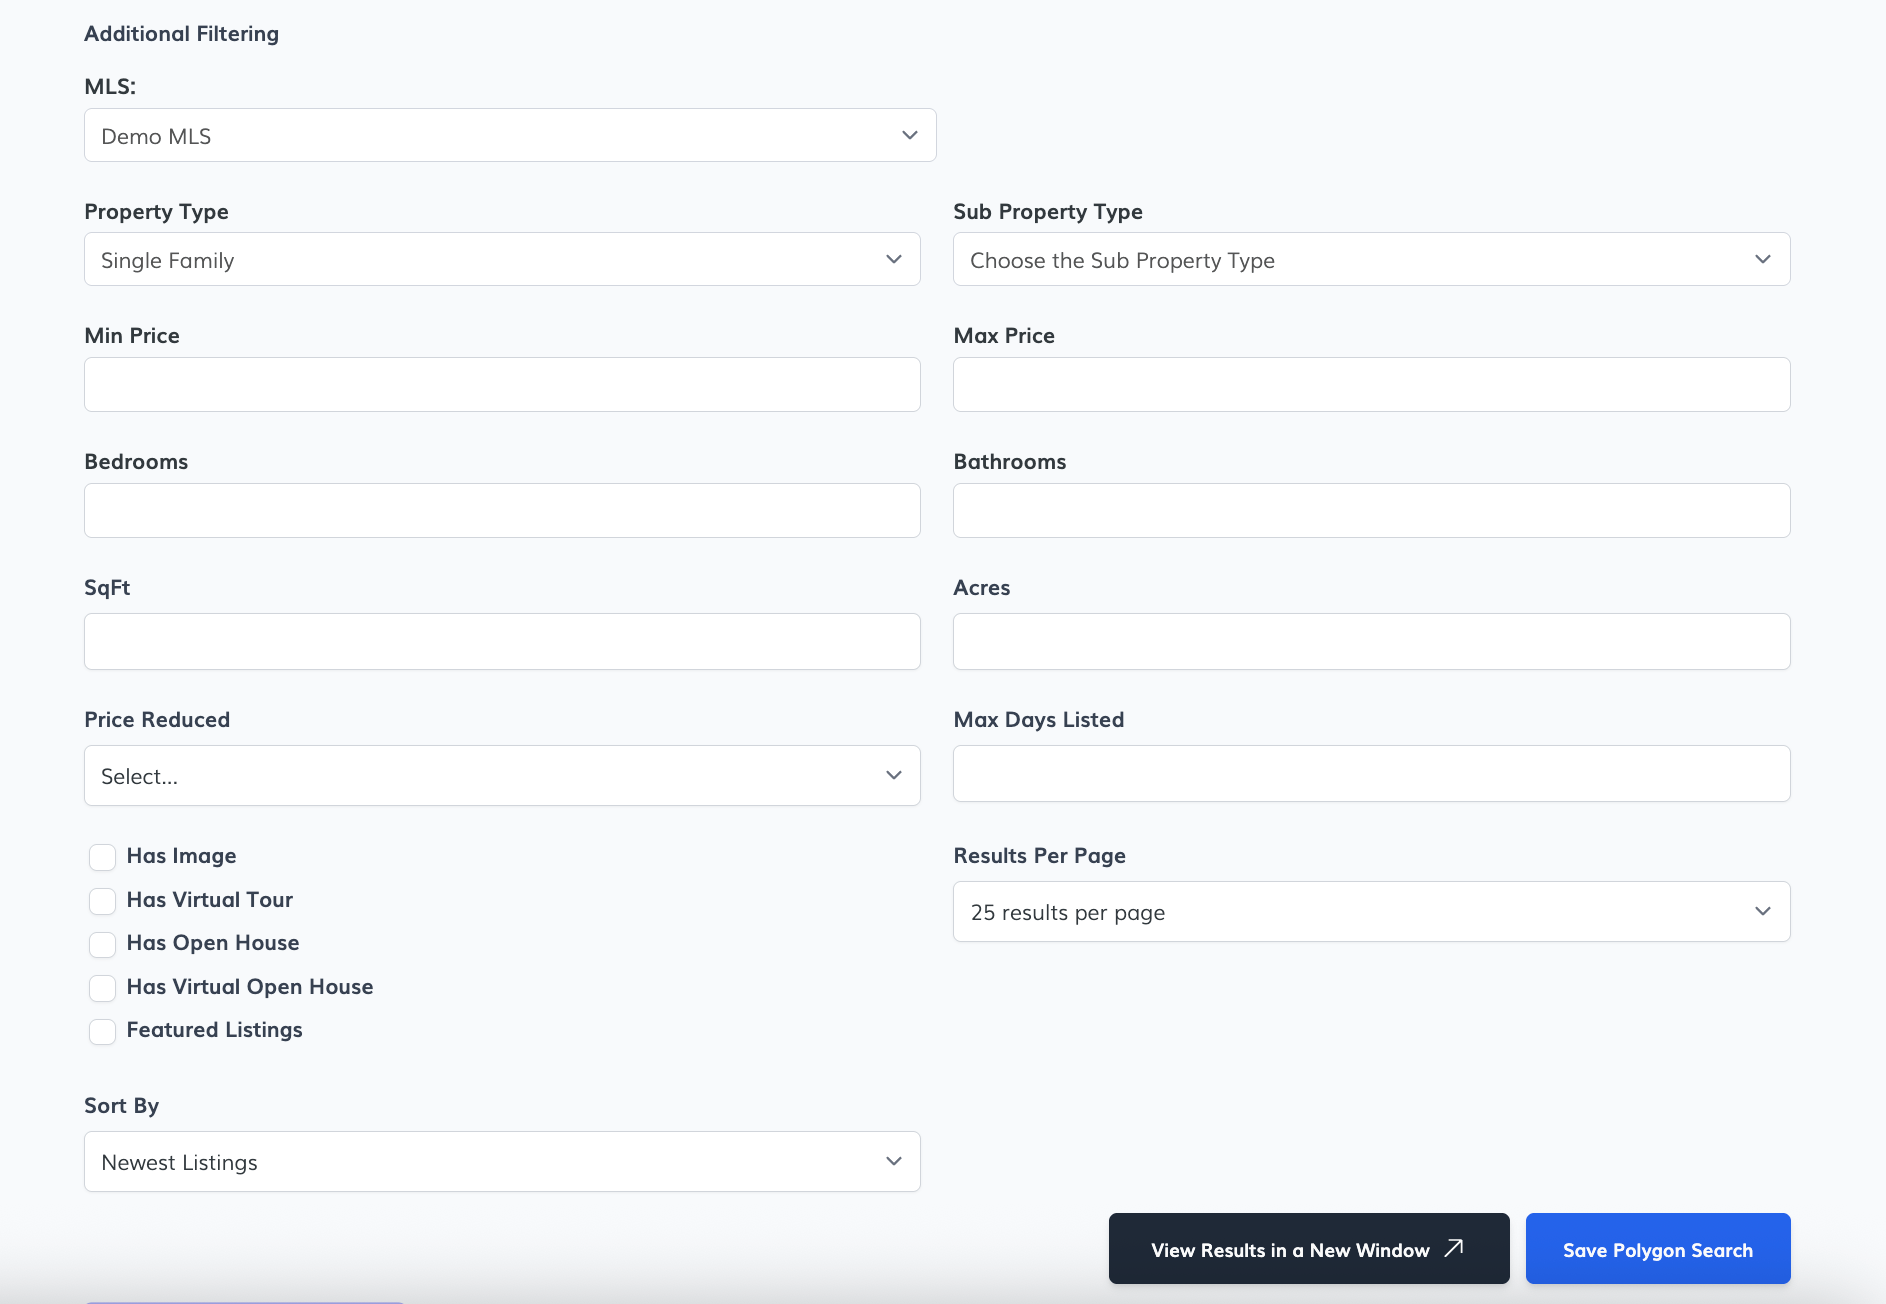
When everything is ready, click the Save Polygon Search button. The search will now be listed under the lead’s saved searches and can be edited or deleted as needed.
📢 Property Alerts
The Property Alerts option allows you to quickly assign an existing IDX saved link to a lead. This is useful when you already have a custom search set up and want the lead to receive updates based on that saved link.
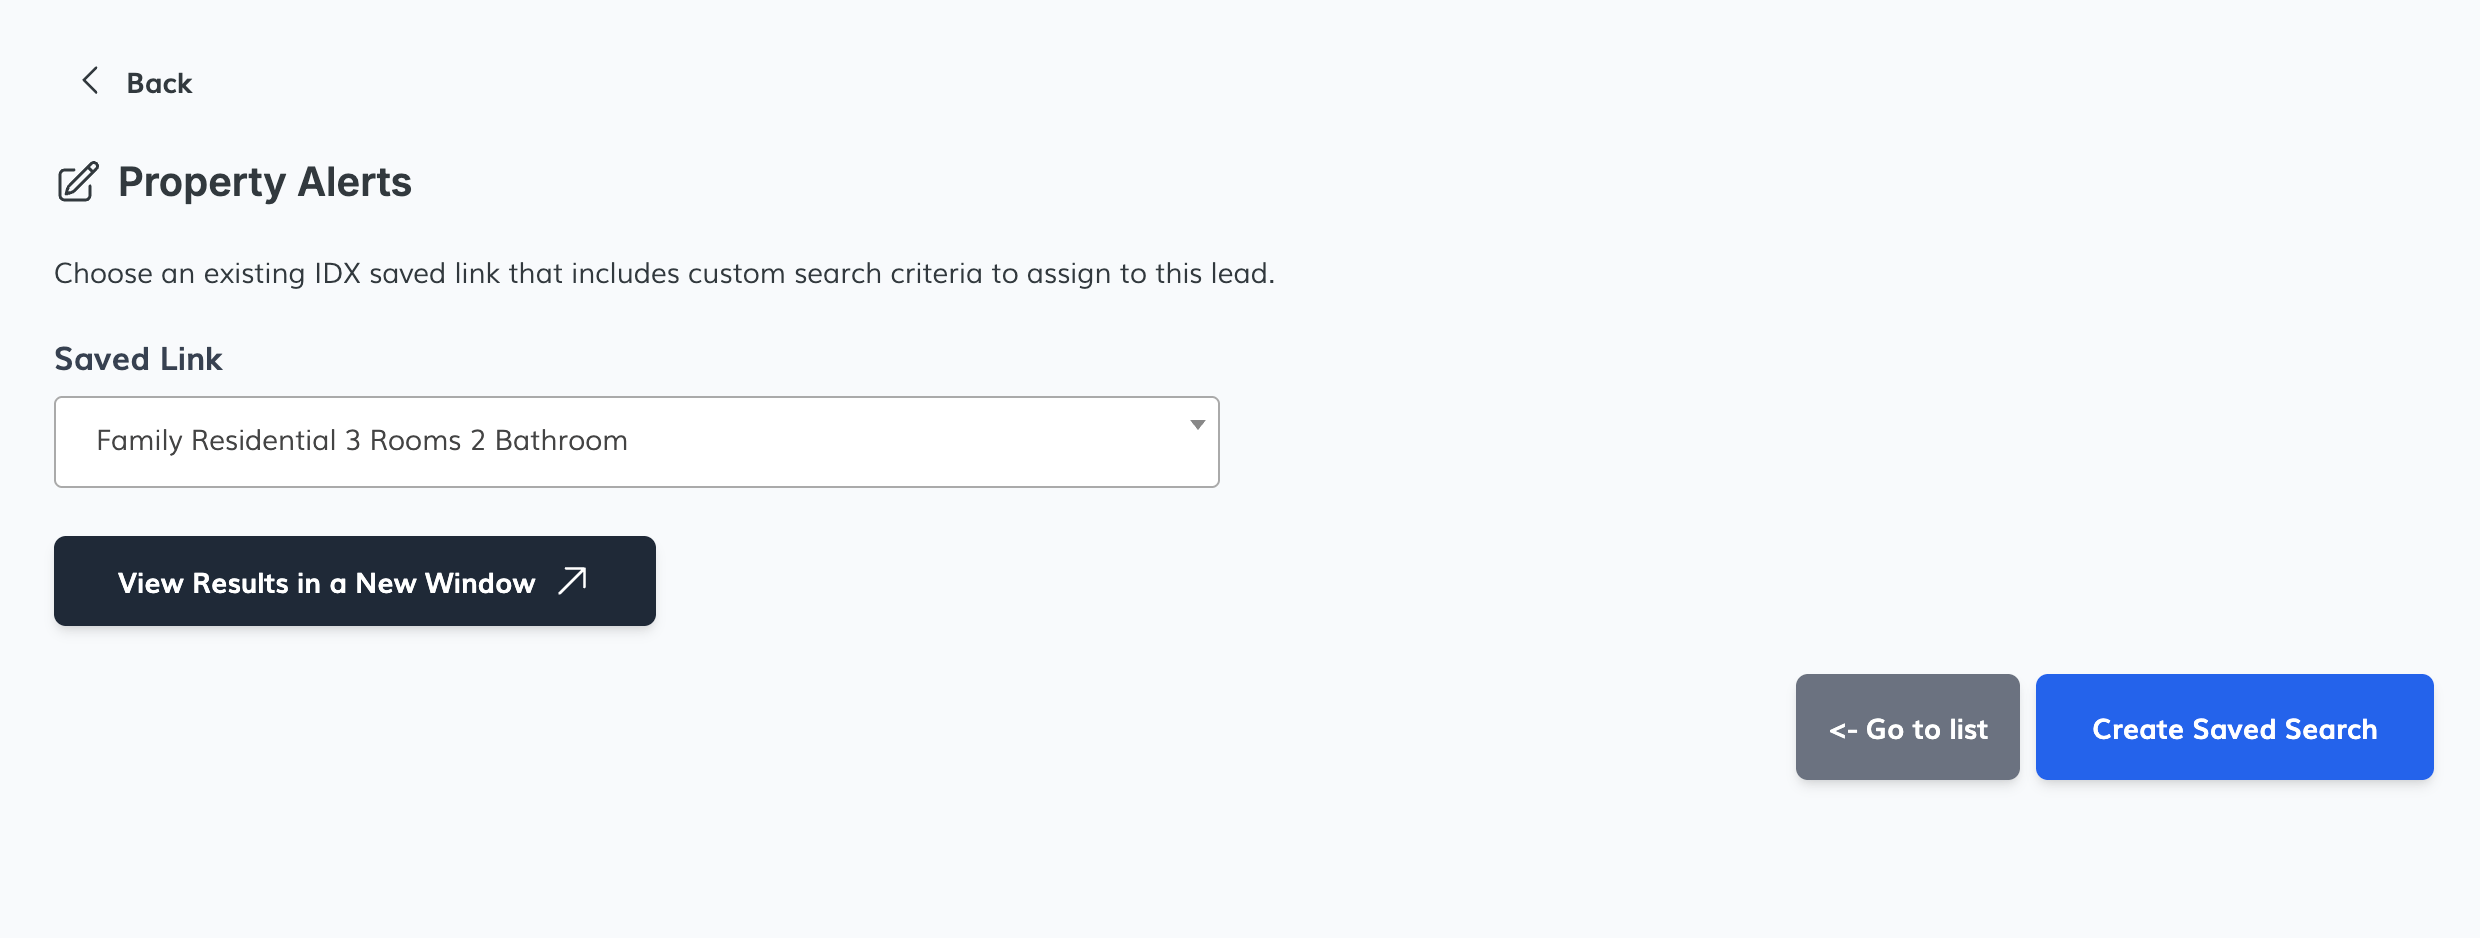
- In the Saved Searches section, click on the Property Alerts tab.
- Use the Saved Link dropdown to select one of your existing IDX Broker saved links.
- (Optional) Click View Results in a New Window to preview the listings that the lead will receive.
- Once selected, click the Create Saved Search button to assign the alert to the lead.
That’s it! The lead will now be subscribed to updates based on the criteria of the selected saved link.
🏡 Select Listings
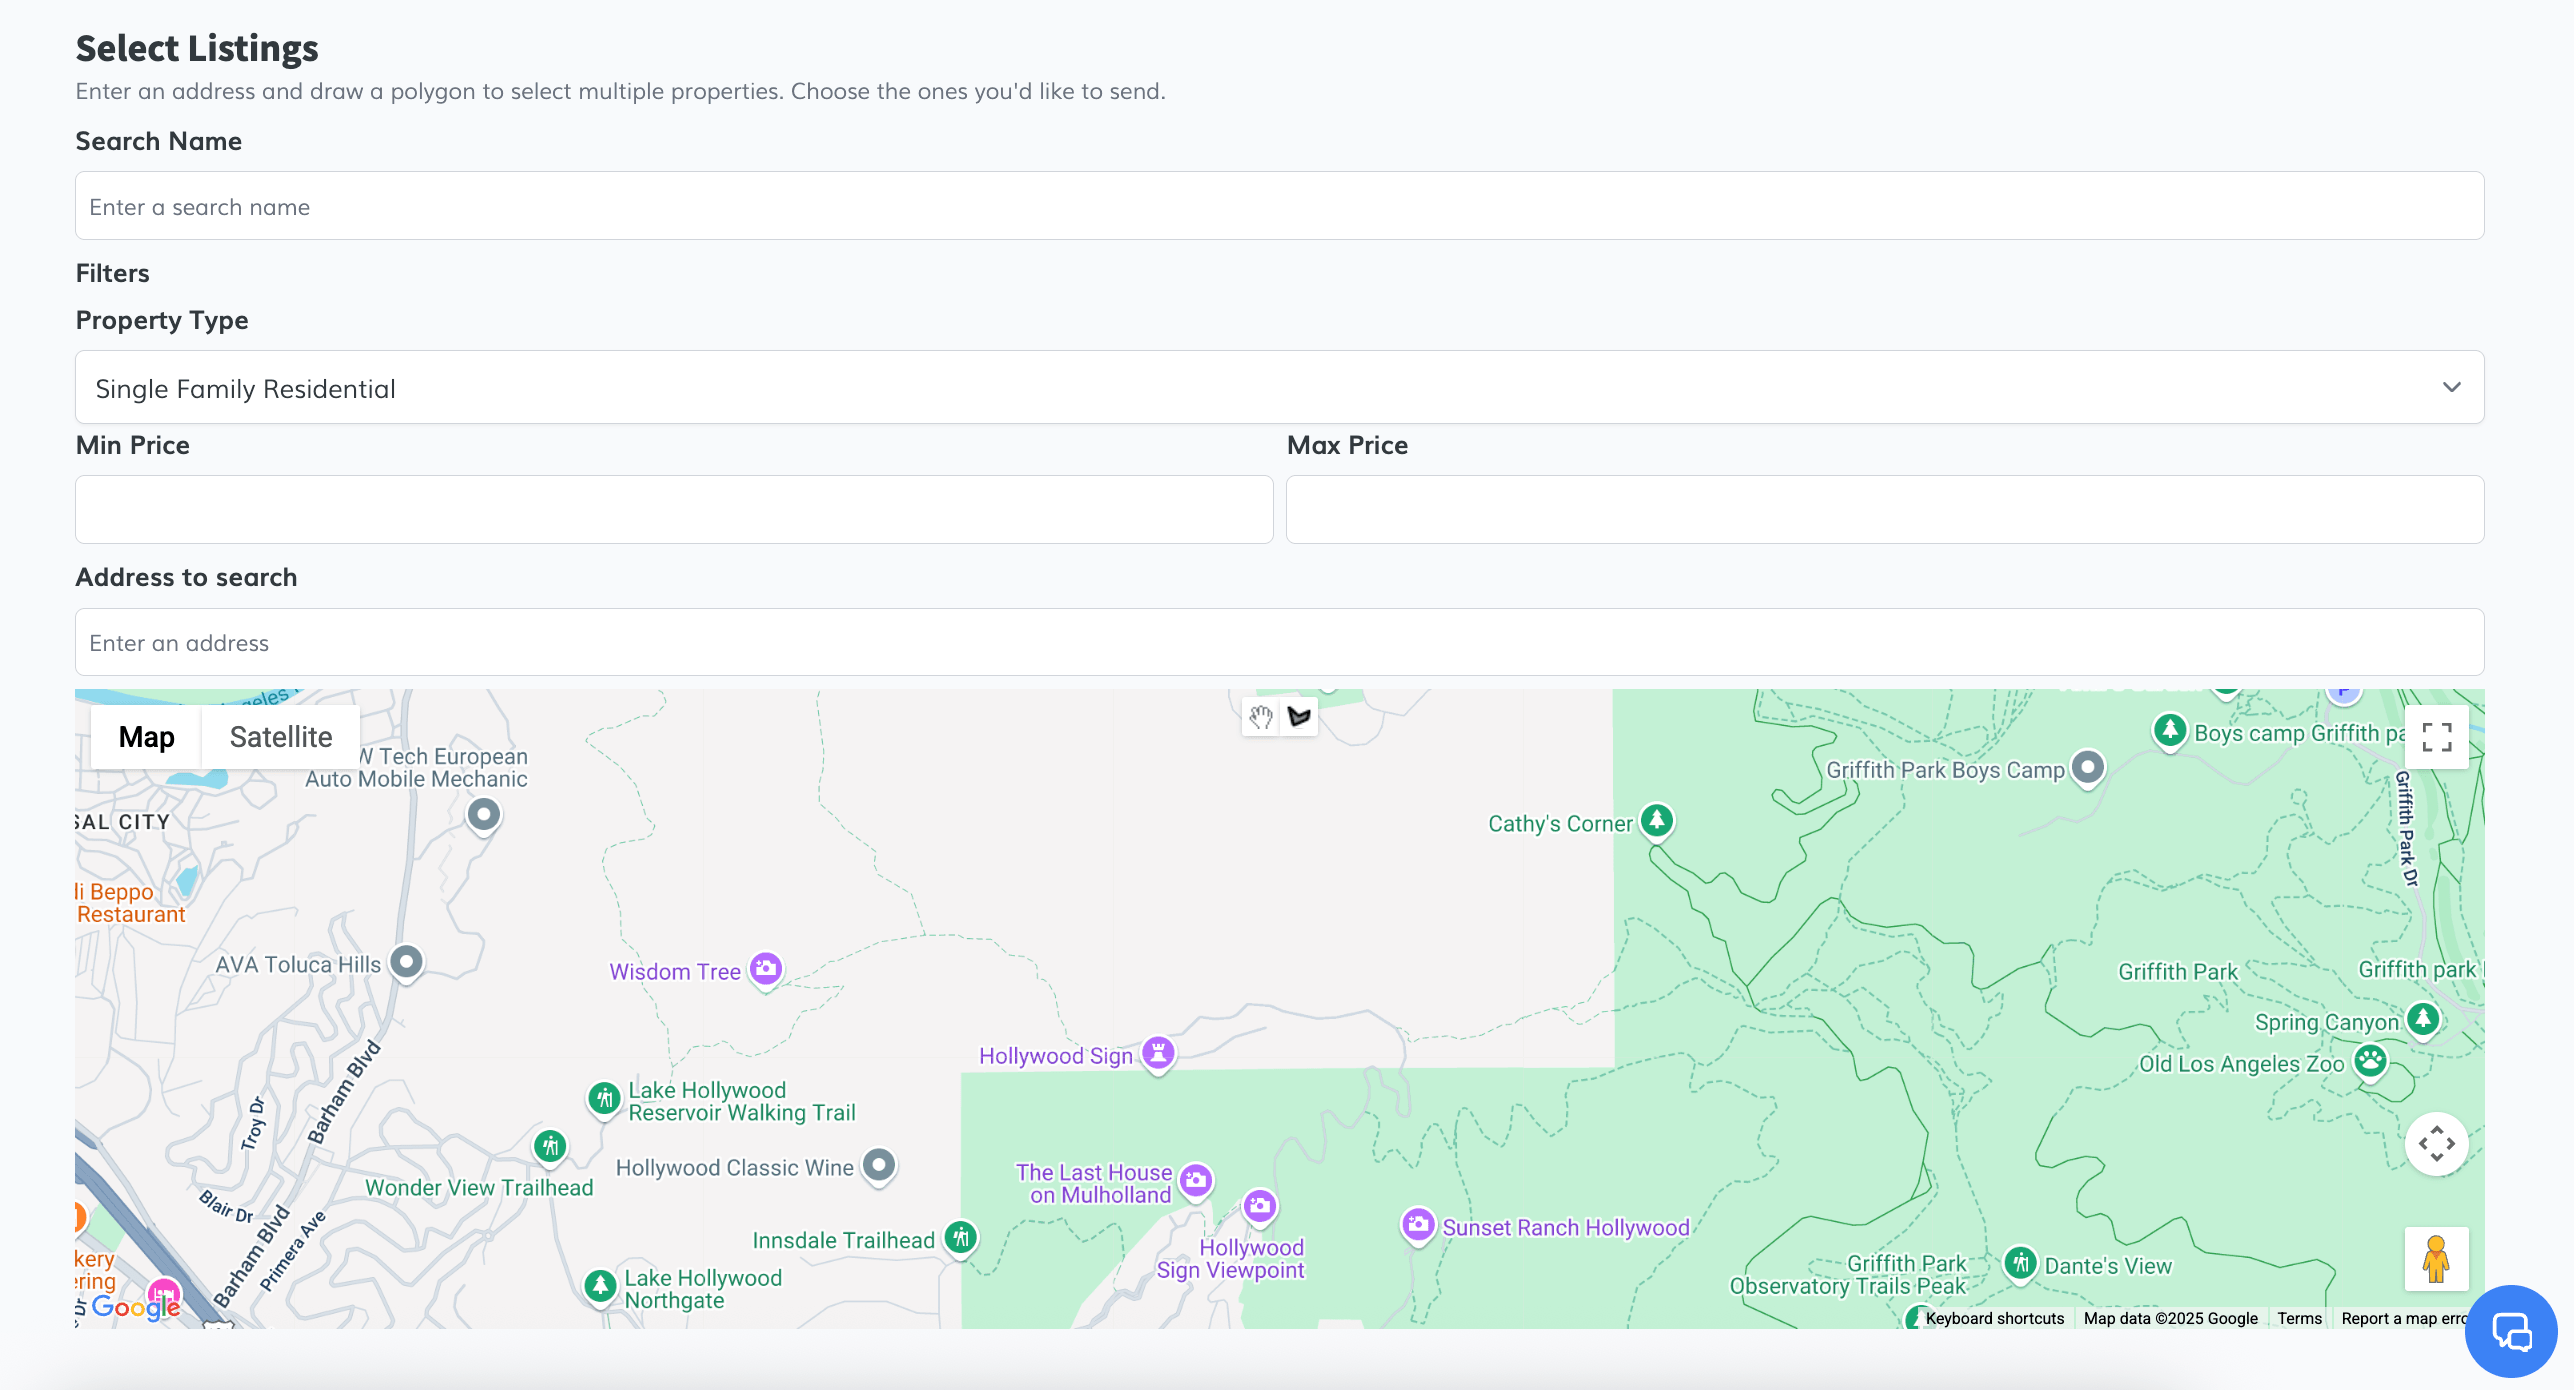
The Select Listings feature lets you manually pick specific properties to send to a lead. This is ideal when you want to handpick listings rather than use automated searches.
- Search Name: Enter a custom name for your search to easily identify it later.
-
Filters:
- Property Type: Choose the type of properties you want to include (e.g., Single Family Residential).
- Min Price / Max Price: Set a price range if needed.
- Address to Search: Enter an address to center the map on a specific area.
- Map Tool: Use the interactive map to draw a polygon around the area where you want to select properties.
- Once you've made your selections, click the Create Saved Search button to save and assign the listings to the lead.
This option is great when leads are focused on a specific area or when you want full control over which listings they receive.
📺 Video Overview:
🚀 Let’s Get Started!
By exploring the different types of saved searches available for your leads. Whether you’re setting up a basic search, an advanced filter, or a custom polygon search, this guide will walk you through each option step by step so you can manage and personalize property alerts with ease.