Lead Registration Setup: Force or Request Registration
- Last Updated Feb 25, 2025
🌟 Welcome ! IDX Broker provides a wide range of tools to manage the lead registration process on your website. The rules for Force or Request Registration can be configured in different areas of the IDX control panel. Below, we’ll guide you through the process
🌐 Global Lead Registration Rules by Category
To set lead registration rules that apply to all IDX pages, follow these steps:
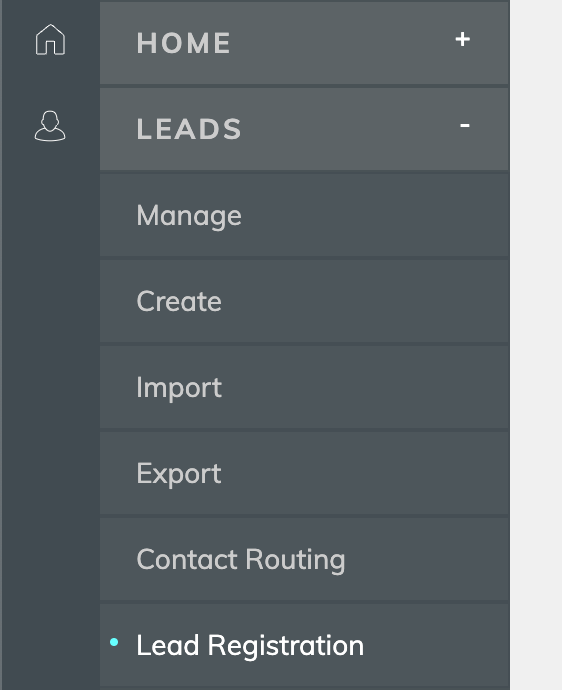
- Click on Leads in the main menu.
- Select Lead Registration in the submenu.

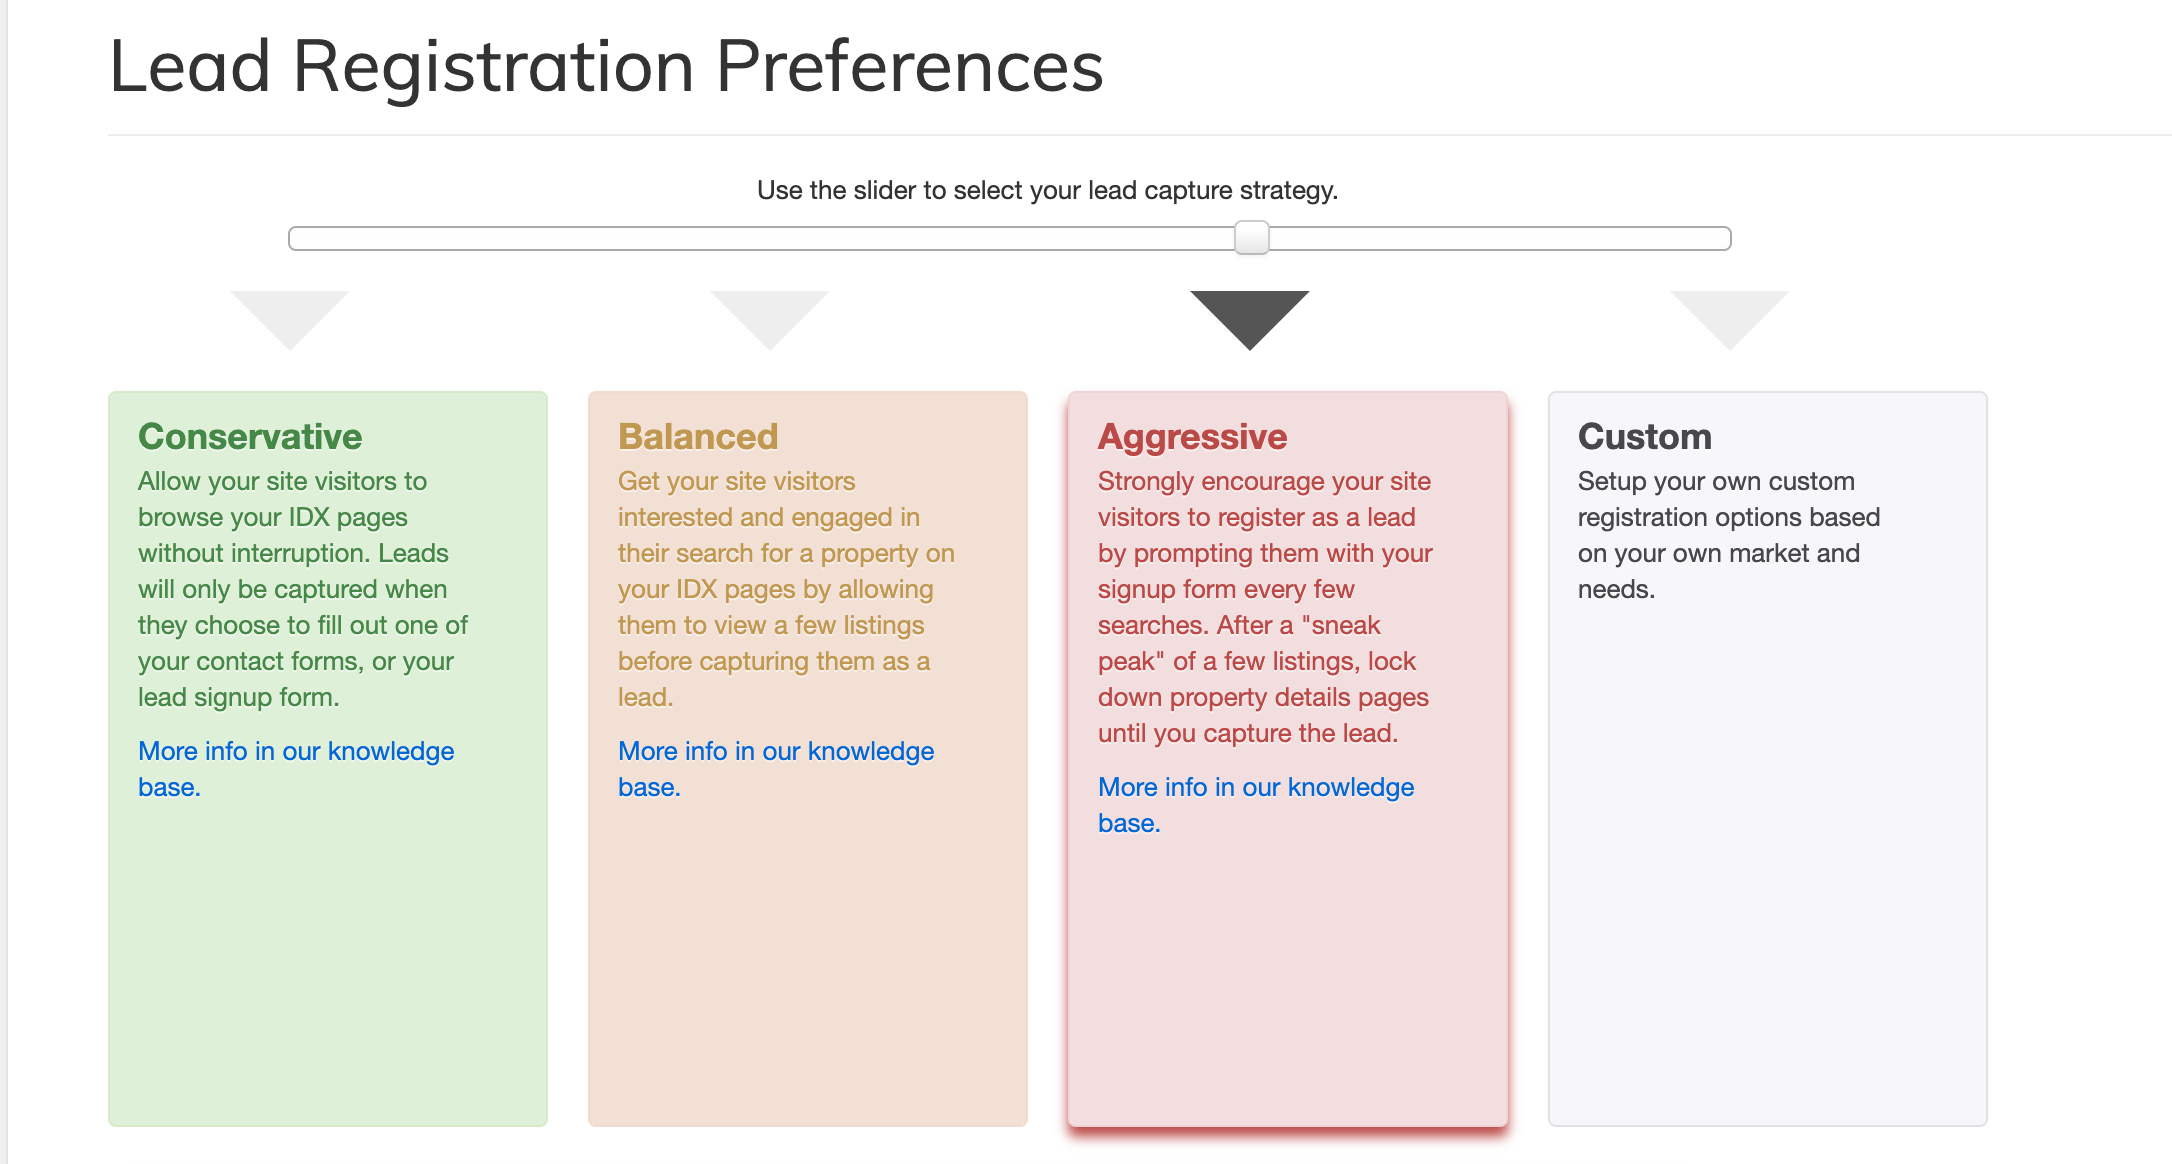
On this screen, you’ll find two options for configuring registration rules: Simple and Advanced.
Simple OptionBy default, you’ll see the Simple settings, which include three predefined strategies for capturing leads:
- Conservative: No registration rules are applied to any pages.
- Balanced: Requests registration (non-recurring) before showing featured properties and open houses. Forces registration after viewing 5 details pages.
- Aggressive: Requests registration (recurring) every 3 results pages. Forces registration after 3 details pages.

Select the option that best suits your needs and click Save Changes.
Advanced OptionFor more detailed control, enable the Advanced settings by clicking the corresponding button or selecting Customize. Then, go to the Global Registration Rules tab.

Here, you’ll find checkboxes for Request Registration and Force Registration across five types of IDX pages:
- Search Pages.
- Map Search Pages.
- Results Pages.
- Details Pages.
- Photo Galleries.
Selecting a checkbox will enable additional options to customize the pop-up messages
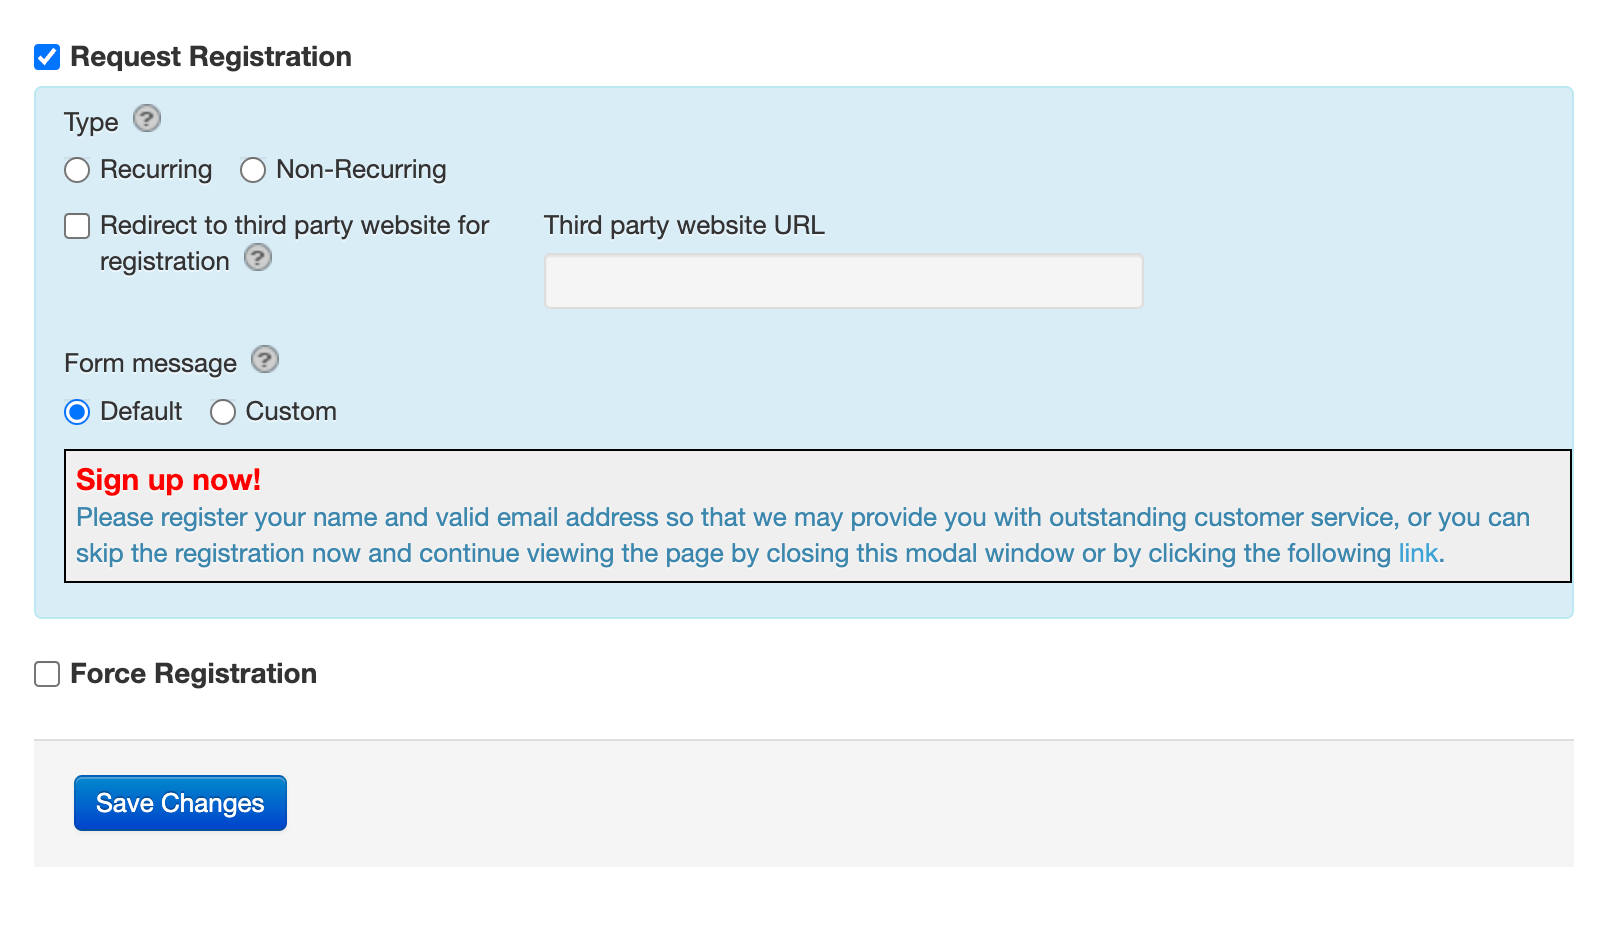
📝 Request Registration Options
- Request Type:
- Recurring: Displays the registration form after a set number of page views. For example, if you set it to 5 pages, the form will appear every 5 pages until the user registers.
- Non-Recurring: Displays the registration form once after a specific number of page views. If the user bypasses it, the form won’t appear again.
- Redirect to a Third-Party Website: If you prefer to use an external service for lead capture, enter the corresponding link. The system will redirect users to this link instead of showing the IDX Broker registration form. 🔗
- Custom Message: You can edit the message that appears above the registration form. Use the editor to add text, images, or links.

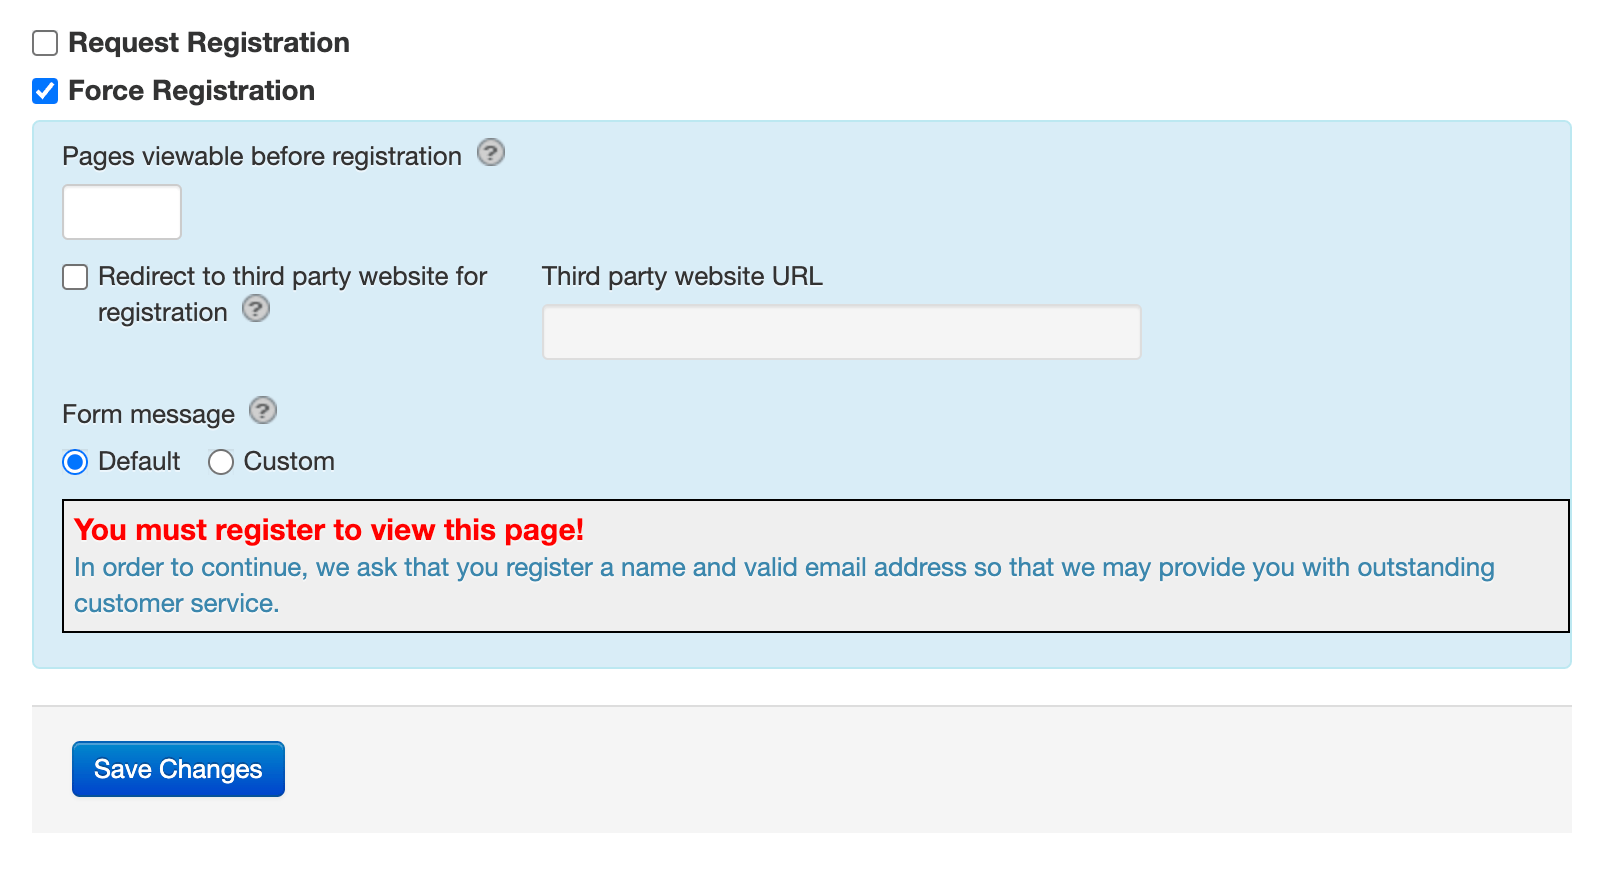
⚡ Force Registration Options
- Pages Viewable Before Registration: Define how many pages a user can view before the forced registration pop-up appears. For example, if you set it to 10 pages, the form will appear after the 10th page view.
- Redirect to a Third-Party Website: Similar to the request option, you can redirect users to an external service instead of showing the IDX Broker registration form.
- Custom Message: Customize the message that appears on the forced registration form.

⚡ Combining Request and Force Registration
You can combine both options to create a layered approach to lead capture. For example:
- Request registration every 3 search pages
- Force registration after 10 search pages
This way, users will see a registration request on the 3rd, 6th, and 9th pages, and be forced to register on the 10th page. This approach maximizes lead capture while giving users multiple opportunities to register voluntarily.
🚀 Recommended Settings
Based on aggregated data and client feedback, we recommend the following settings to optimize lead capture:
- Request registration on Photo Gallery pages.
- Request registration after the 1st or 2nd Details Page view.
- Force registration after the 7th or 8th Details Page view.
These settings strike a balance between user experience and lead generation, helping you capture more leads without frustrating your visitors.
🖥️ Individual Page Settings
To customize registration rules for specific IDX pages, follow these steps:
- Click on Design in the main menu.
- Select Website in the submenu.
- Choose Page Templates.
- Click Edit next to the page you want to customize.
- Go to the Lead Registration tab
- Configure the Request or Force Registration options for that specific page
- Save your changes.
This level of customization allows you to tailor the registration experience for different types of content on your website.
💡 Final Tips
Finding the ideal setup may require some time and experimentation. Test different combinations and adjust based on your results. With IDX Broker’s tools, you can optimize lead capture and boost your real estate business.
🌟 Let’s Get Started!
Now that you’re equipped with the knowledge to set up Force and Request Registration, it’s time to put it into action. Start experimenting with these tools today and watch your lead generation soar! If you have any questions, feel free to reach out. Happy lead capturing!