Google Map Widget Pro Tutorial
How does it look?
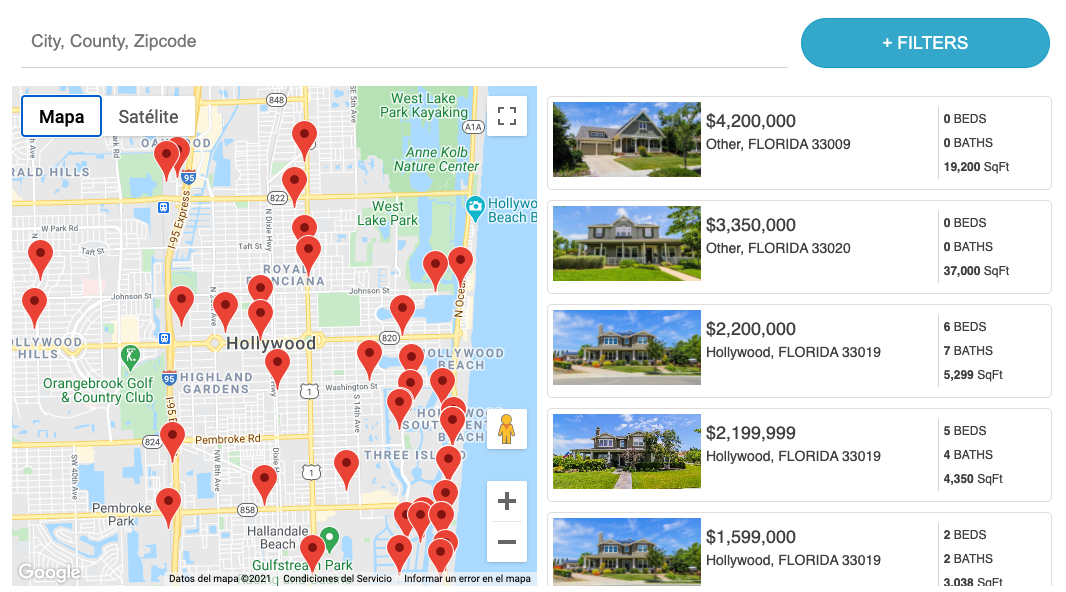
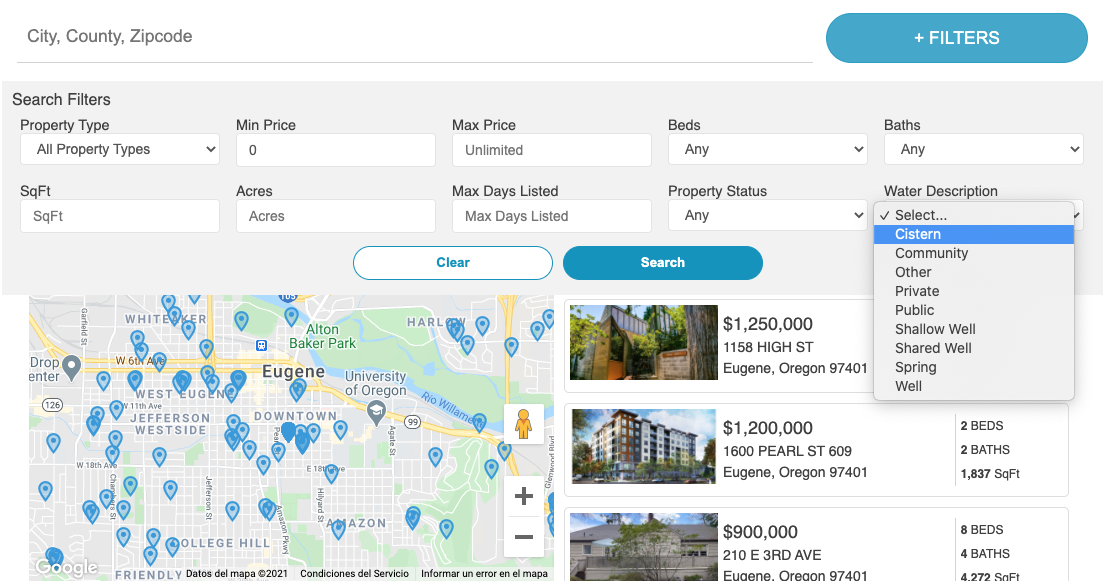
When you add the Google Map Widget Pro, your clients can search listings in a map like this one:
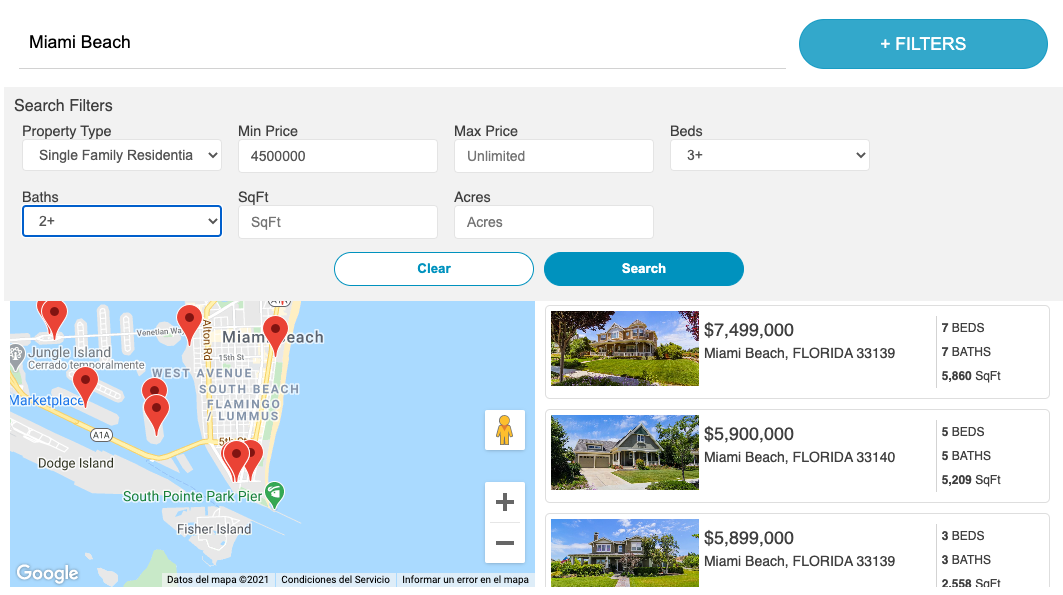
They can filter listings with the following options:
How to set it up:
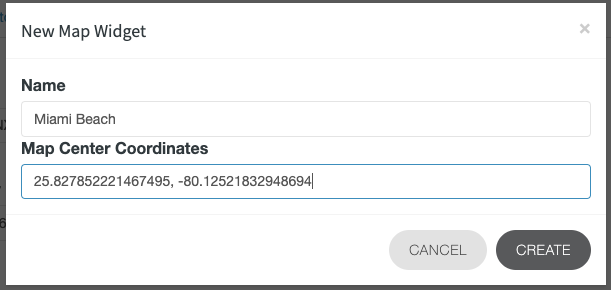
1. Create a new map
Click on "Create New Map" and fill the form with a name for the map and the map center coordinates.
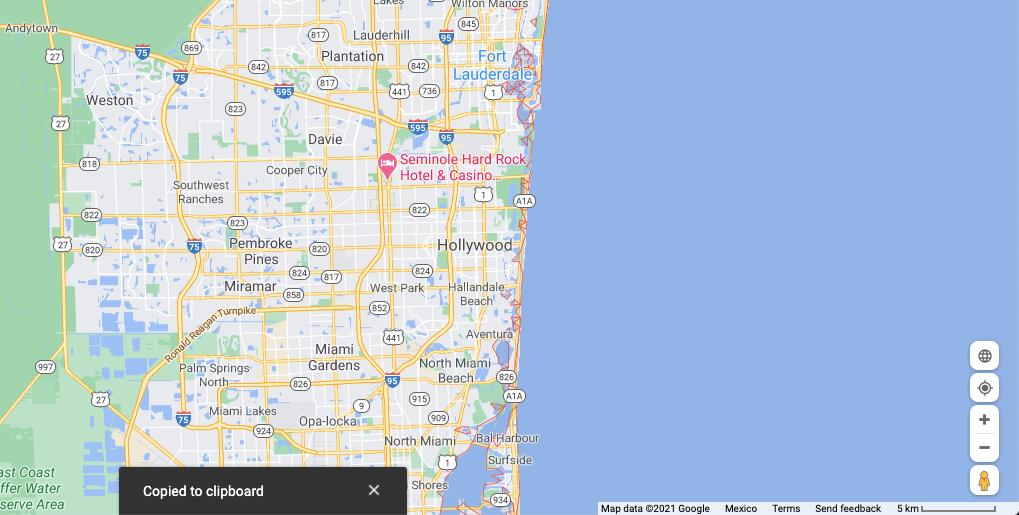
To get the map center coordinates, you'll need to go to Google Maps and select the location that you'd like to display in the map.
Next, on the map, right click on the place you want to get the coordinates from. A pop-up menu like this one will show up:
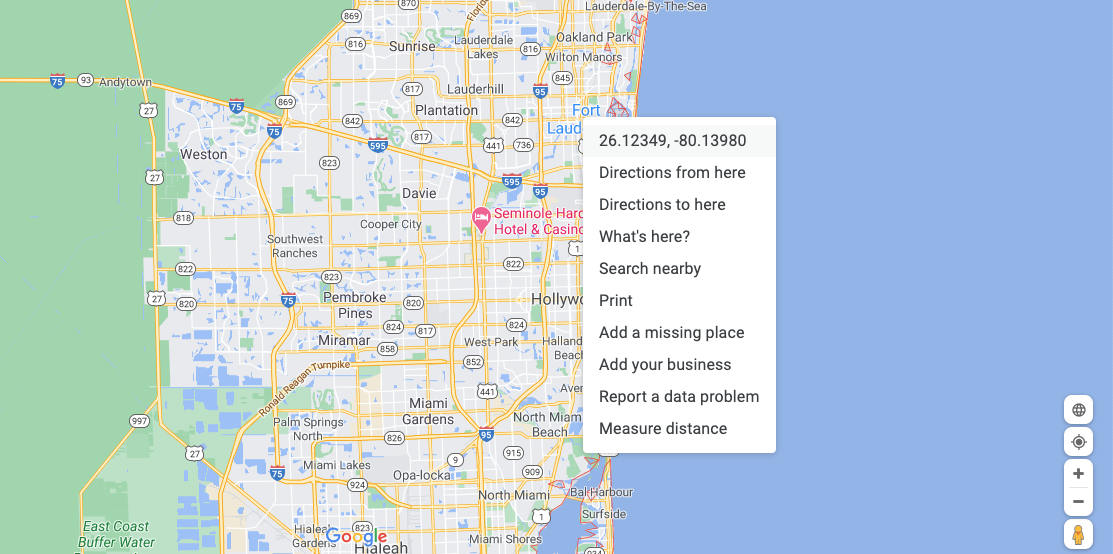
Click on the first row of the menu that contains the map coordinates. It will be automatically copied to your clipboard.
Paste the coordinates in the Map Center Coordinates input field.

Click on the Create button.
Your new map will appear below "Your Maps".
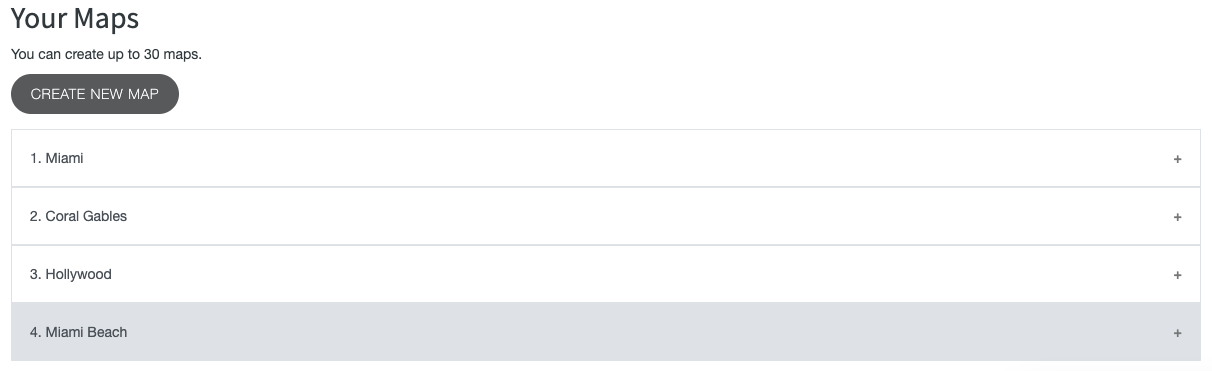
Click on the name of the map you want to customize.

2. Select a style for your map
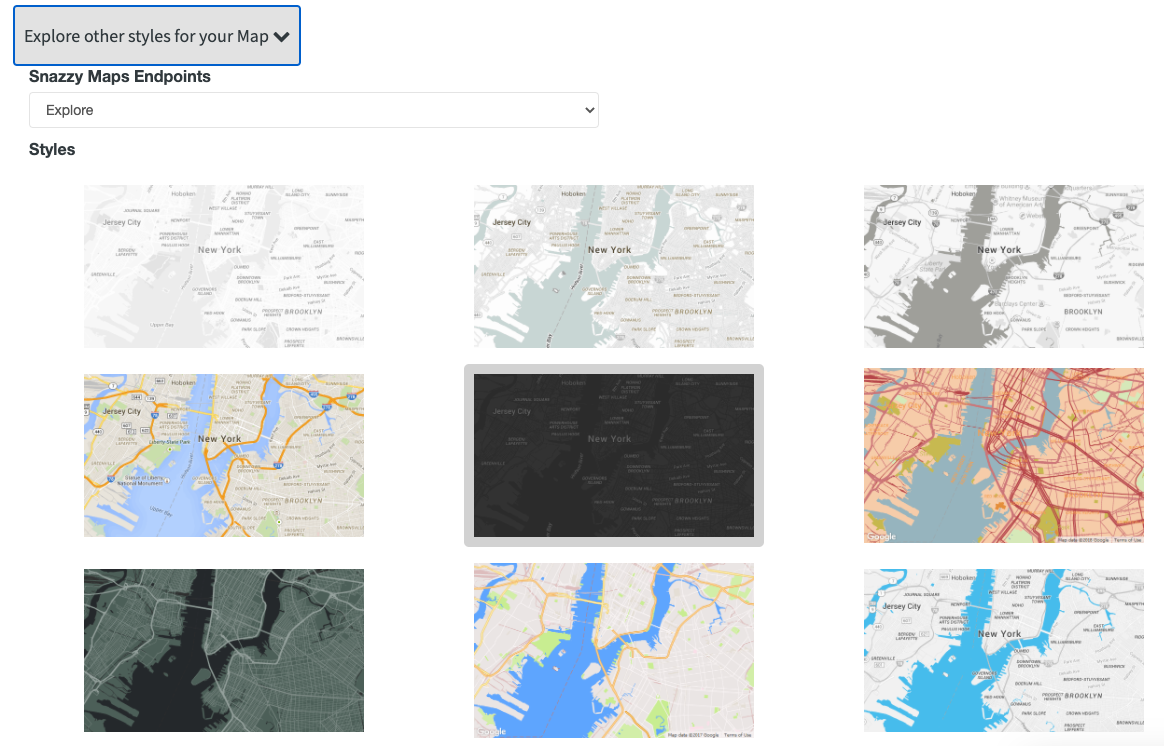
Snazzy Maps is a repository of different color schemes for Google Maps. Click here to get your API Key and create your own styles.
Click on "Explore other styles for your Map" to retrieve the styles created by other users in Snazzy Maps. You just need to select the one you liked.
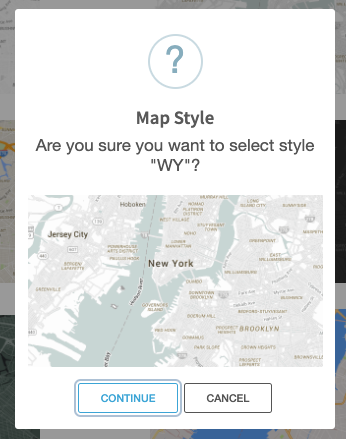
And click on "Continue" to establish this style for your map.
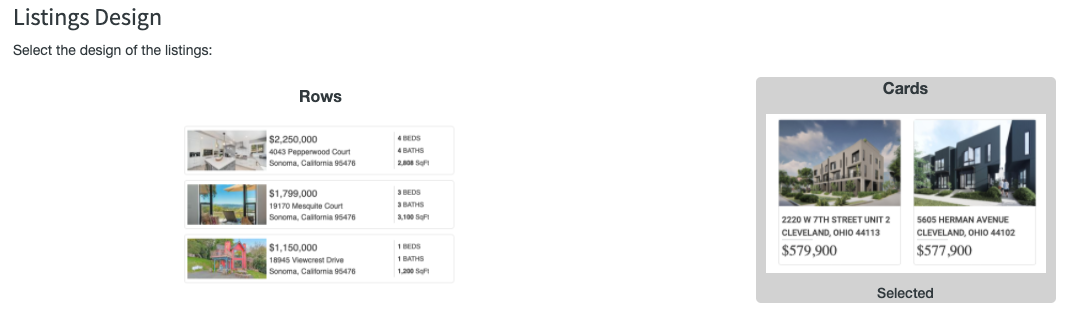
3. Listings style
Select the style you'd like the listings to have. The listings can appear in rows or in cards.
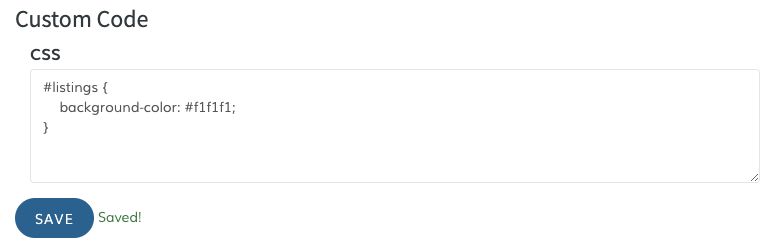
4. Custom CSS
Customize the CSS of your map and click on the "Save" button.
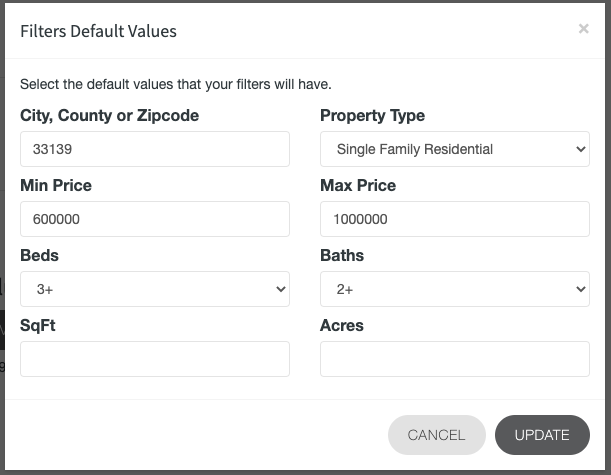
5. Select default values for the filters
Select the default values you'd like the listings to have. Just click on "Update Default Values" and a pop-up will appear.
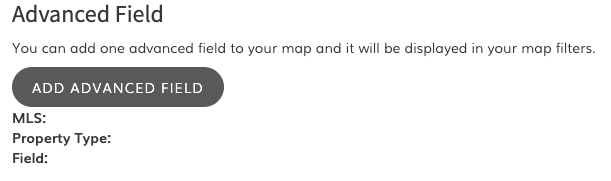
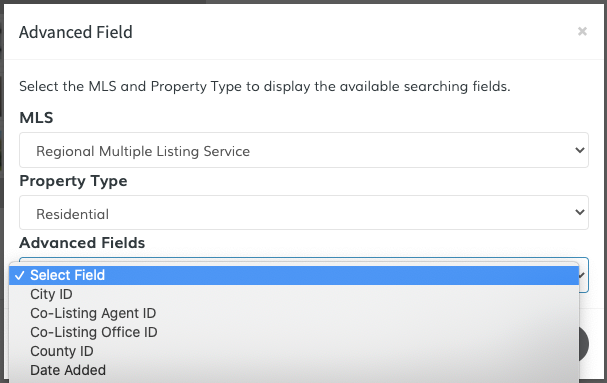
6. Add an Advanced Field
You can add one advanced field to your filters, just click on "Add Advanced Field":
A pop-up will appear. You'll need to select the MLS and then the property type in order to display the available advanced fields.

Once you've selected the advanced field, click on "Add".
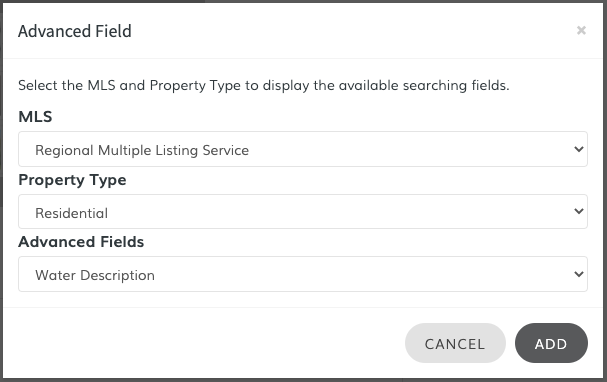
Now the advanced field will be displayed in the map filters.
7. Copy and paste the code
Once you're happy with your selection, click on the "Copy Code" button. The code will be automatically copied to your clipboard. You can now paste it in the section of your page where you want the Google Map Widget Pro to appear.