Omnisearch Tutorial
This tutorial will show you how to use the Omnisearch Creator. You can customize the search bar to your liking: add or remove fields, assign an agent, change the colors, and more!
-
Setup tab
Placeholder Text
This is the text that will show up in the search bar, it will serve as a guide for users so that they know what they have to search.


City List
You can select the custom city list that will be used. Go to Manage Location Lists to create or edit a list. This is the list of cities that will show up in the dropdown menu. You can add or remove cities as you'd like.

Agent
If you have an Office account, you can select an agent to assign the leads to.

Default Sort Option
You can select one of the following default sort options to show the listing results: newest, oldest, price (high to low), price (low to high), beds (high to low), beds (low to high), baths (high to low), baths (low to high), sqft (high to low), sqft (low to high).

Default Status Option
Select the default status option to show the listing results. The available options depend on your MLS.

Show City, County and ZIP code labels
If enabled, it indicates the category of each result in the autocomplete field that shows city, county and ZIP code.


Show State abbreviations for cities
The state abbreviations are displayed in the cities. By default this option is enabled, but you can turn it off.

-
Search Fields tab
Basic Fields
You can turn off the fields that appear in your search tool: beds, baths, min price and max price.

In this example, we disabled the beds and baths fields.

Property Type
If you click on...
None: A regular search bar will be generated.

Buy and Sell Tabs: The search bar will have Buy, Rent, and Sell tabs above the bar.

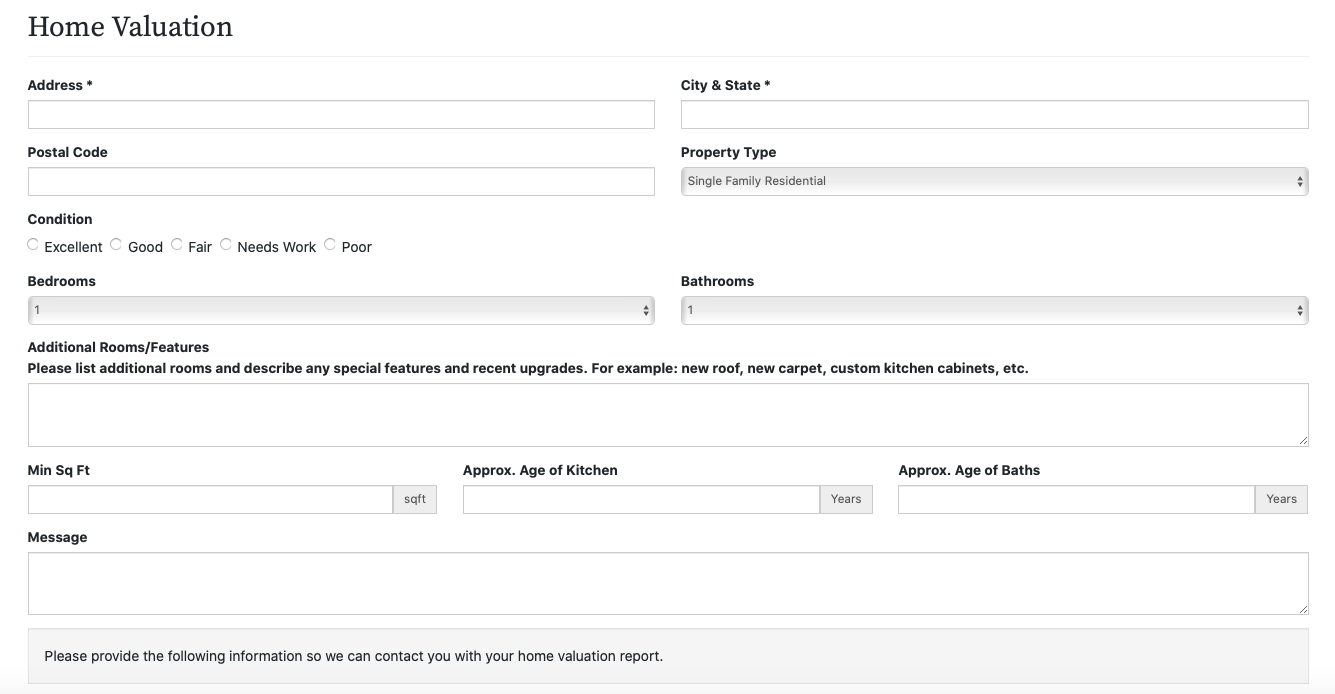
The Buy and Rent tabs will work in the same way, but if you click on "Sell", this page will show up:

If clients fill in this Home Valuation form, they will receive a report.

Dropdown: The bar will include a "Property Type" dropdown menu.

Open New Tab
If you enable this button, when clients click on the search button after filling out the search criteria, the properties will automatically open up in a new tab.

Sort By
If enabled, the bar will include a "Sort By" dropdown menu.


Status
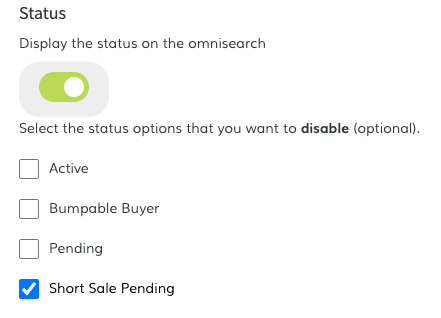
If you activate this button, the bar will include a "Status" dropdown menu. You can select the options that will be disabled in the dropdown menu.

For this example, we disabled the status "Short Sale Pending".

Advanced Field
You can add one advanced search field to your omnisearch, just select the MLS and Property Type to display the available searching fields. For this example, we will select "Region" and click on "Save Advanced Field".

The bar will include a "Region" dropdown menu.

-
Style
Custom Style
Turn on this button to customize the style of your omnisearch. It will automatically have a new styling and you will be able to change the colors of the search bar, the text, the borders and more.

When you turn on the "Custom Style" button, your search bar will have this new styling.

To change the colors of the search bar, click on the "Show color scheme and styles" link. The available oprions will be displayed at the bottom and you will be able to change the colors.

Once you have selected the colors, click on "Save changes" and the search bar will have the new styling.

-
Code Snippet
Once you're happy with your selection, click on the "Copy Code" button. The code will be automatically copied to your clipboard. You can now paste it in the section of your page where you want the search bar to appear.
