-
Adding ZIP Codes
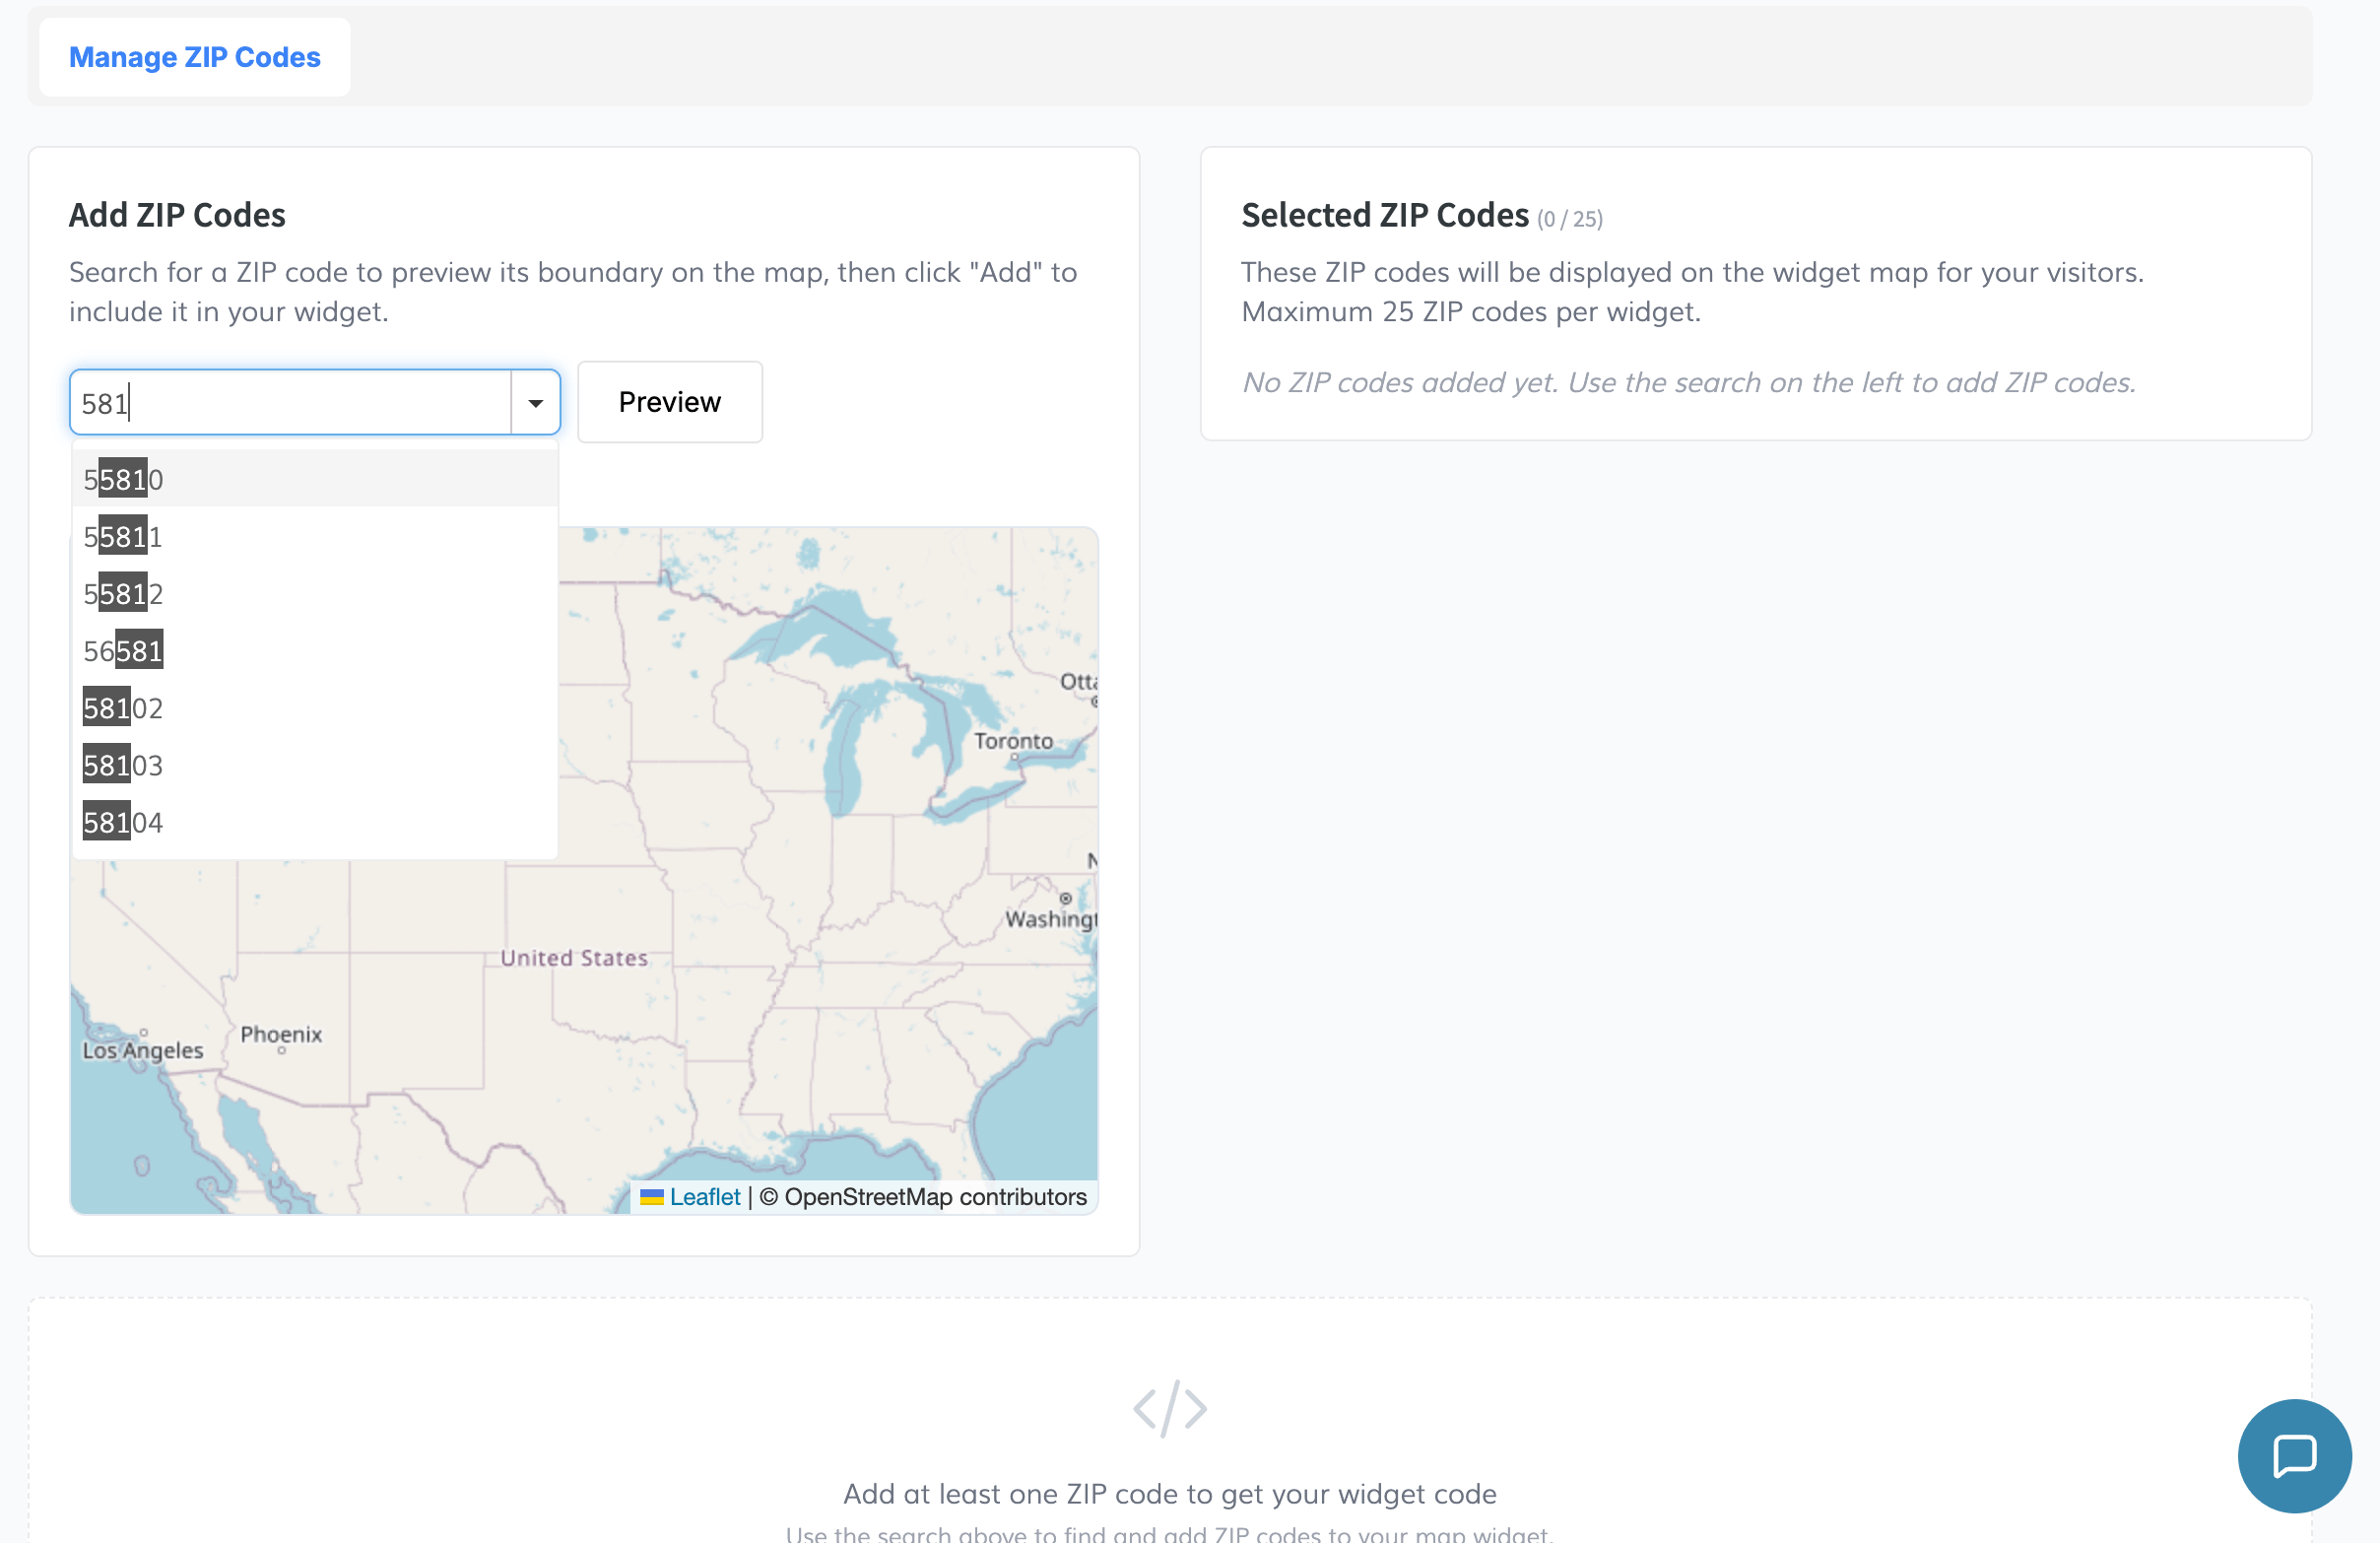
Use the search input on the left side of the admin panel to find ZIP codes. The autosuggest field is pre-populated with ZIP codes from your IDX Broker account. Select a ZIP code from the dropdown to get started.
-
Previewing Boundaries
After selecting a ZIP code, its ZCTA boundary is automatically drawn on the preview map below the search input. This lets you verify that the boundary covers the area you expect before adding it to your widget. The boundary is highlighted in blue on an interactive Leaflet map.
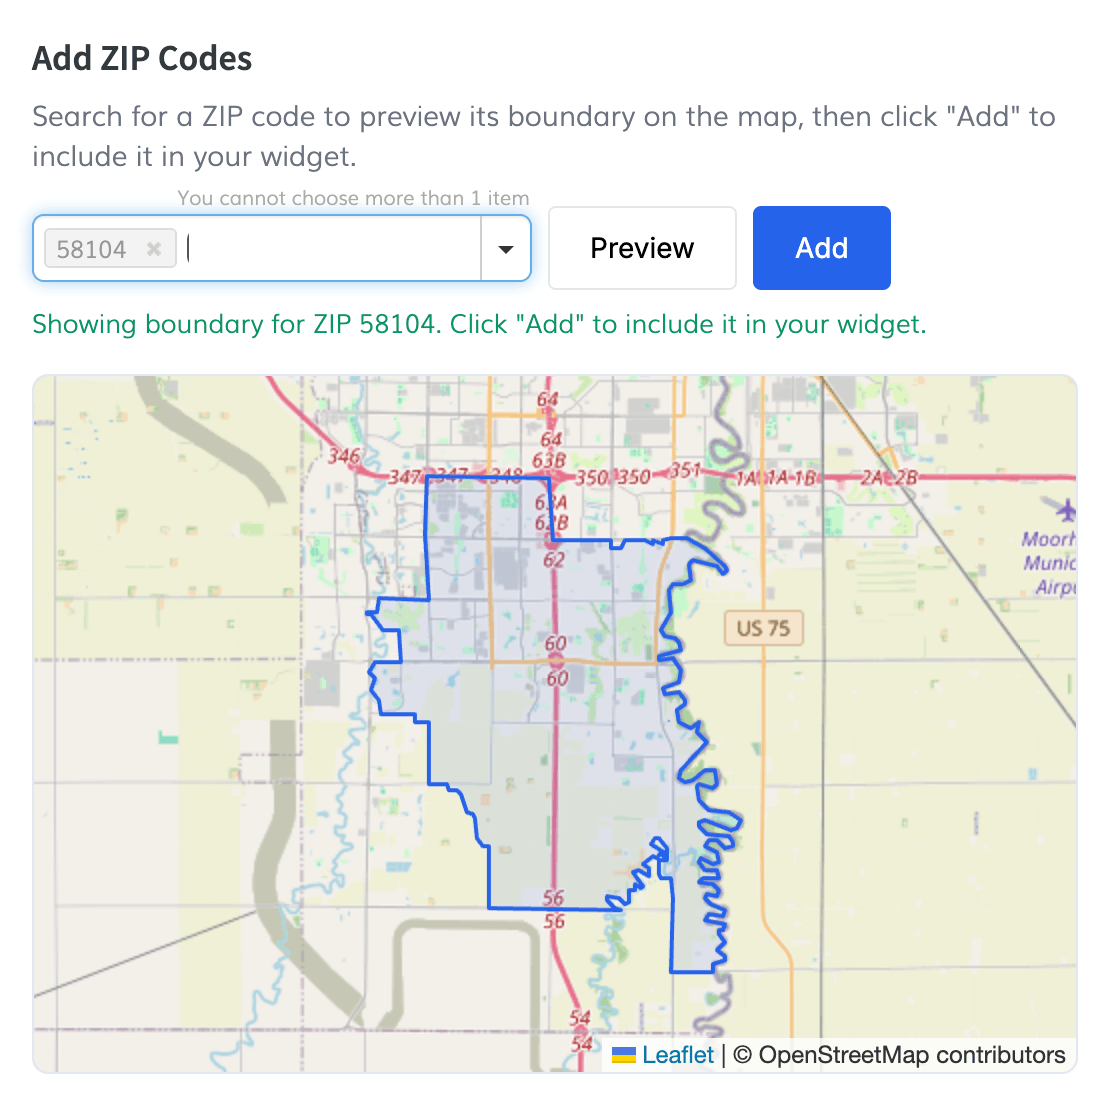
If the boundary looks correct, click the Add button that appears next to the search input to include this ZIP code in your widget.
-
Custom Labels
Each ZIP code you add can have a custom label — a friendly name like "Downtown", "Lakefront", or "Historic District". Labels help your visitors understand the areas on the map without needing to know the ZIP code numbers.
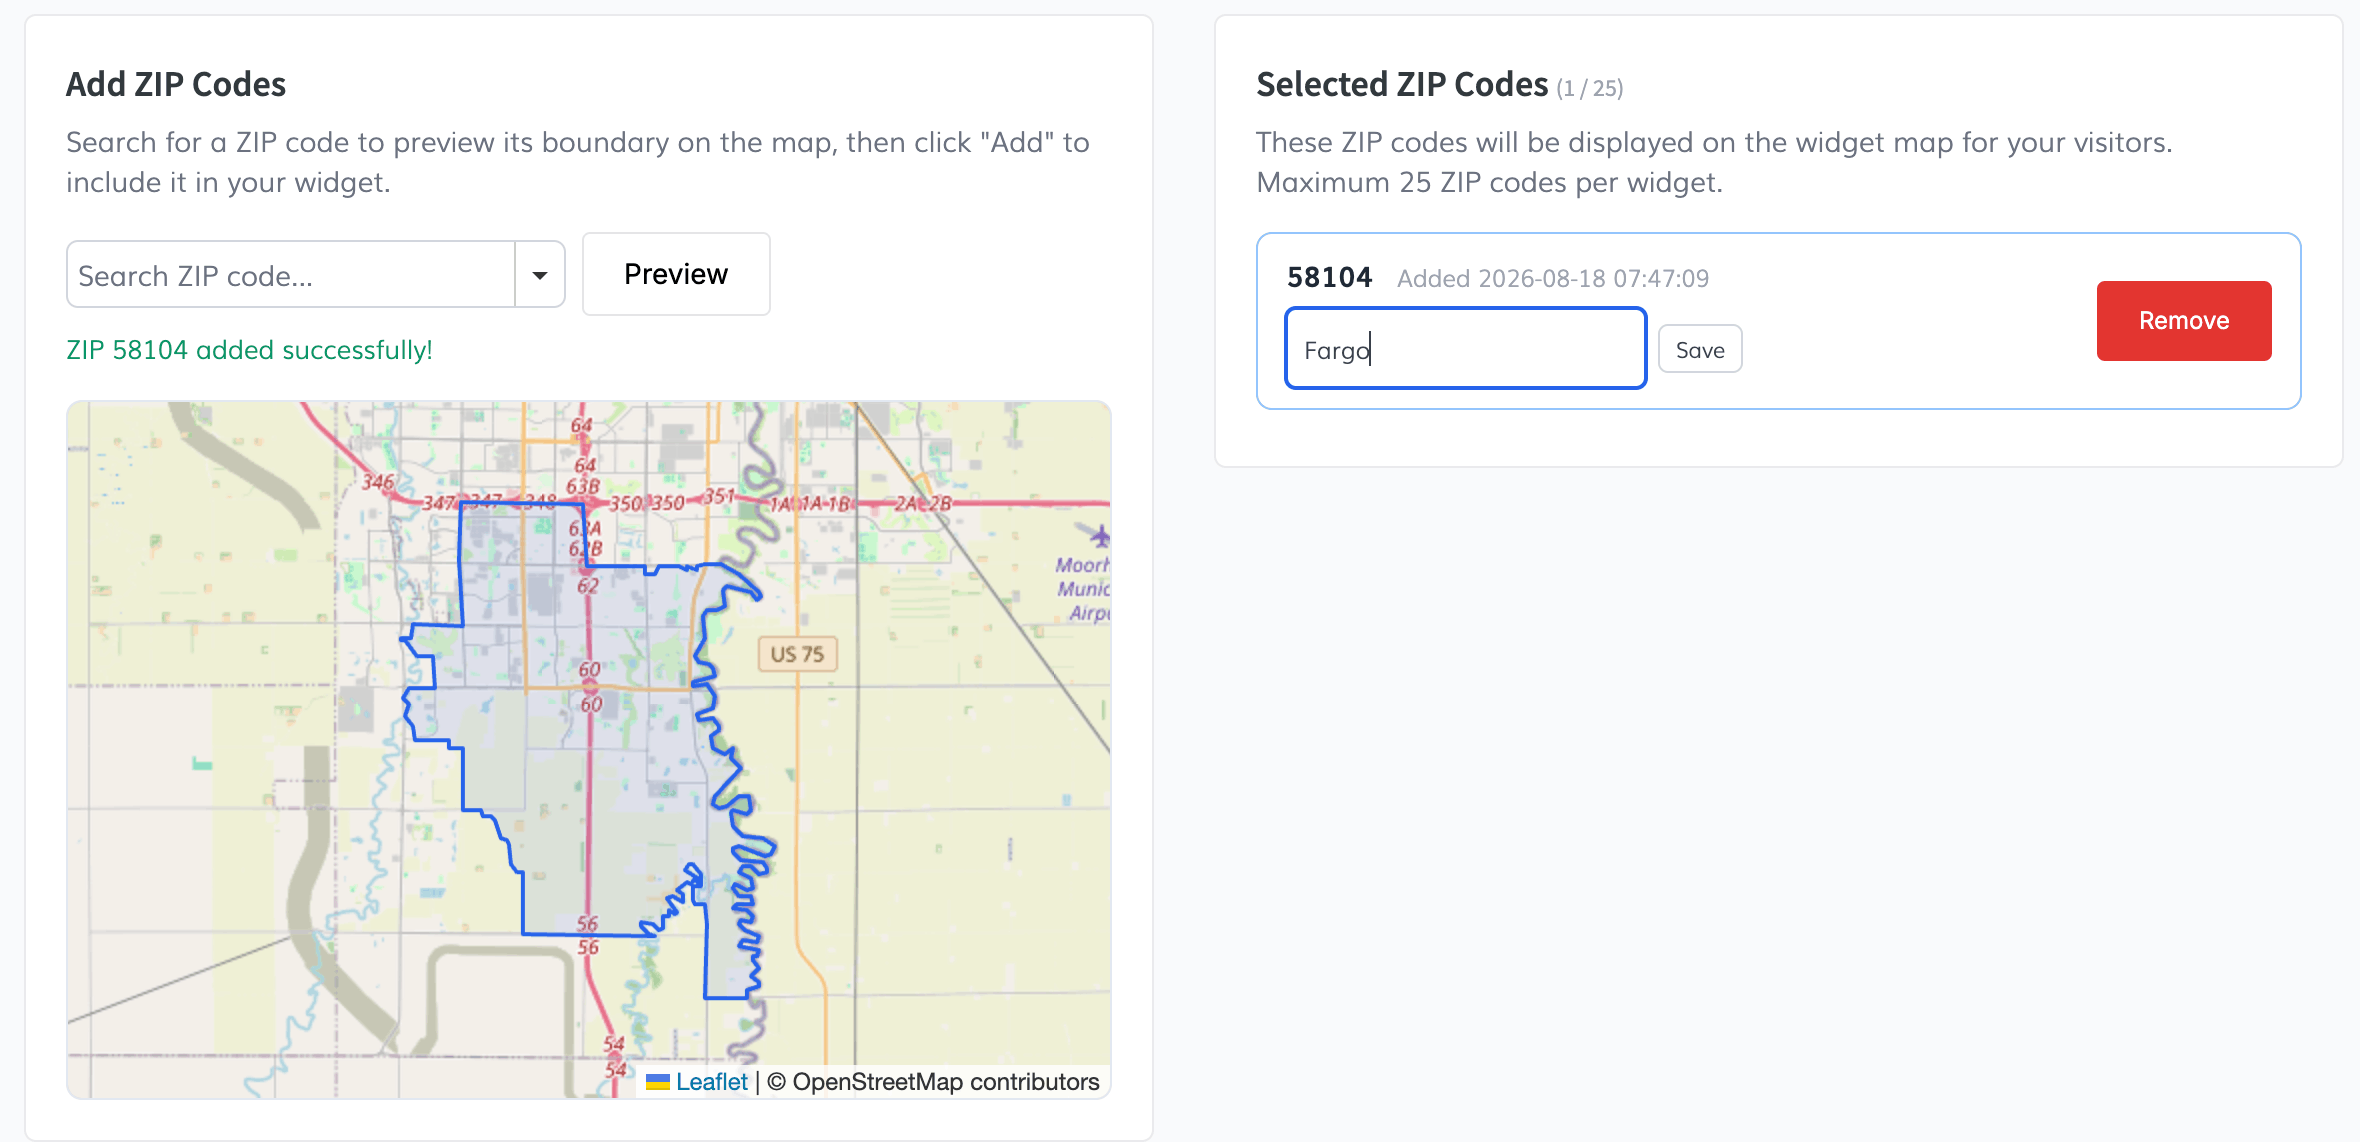
To add or edit a label, type in the text field next to the ZIP code in the "Selected ZIP Codes" list and click Save. The label is saved immediately and will appear on the public-facing widget.
-
Managing ZIP Codes
All your selected ZIP codes appear in the "Selected ZIP Codes" panel on the right side of the admin page. You can add up to 25 ZIP codes per widget. The counter at the top shows how many you've used.
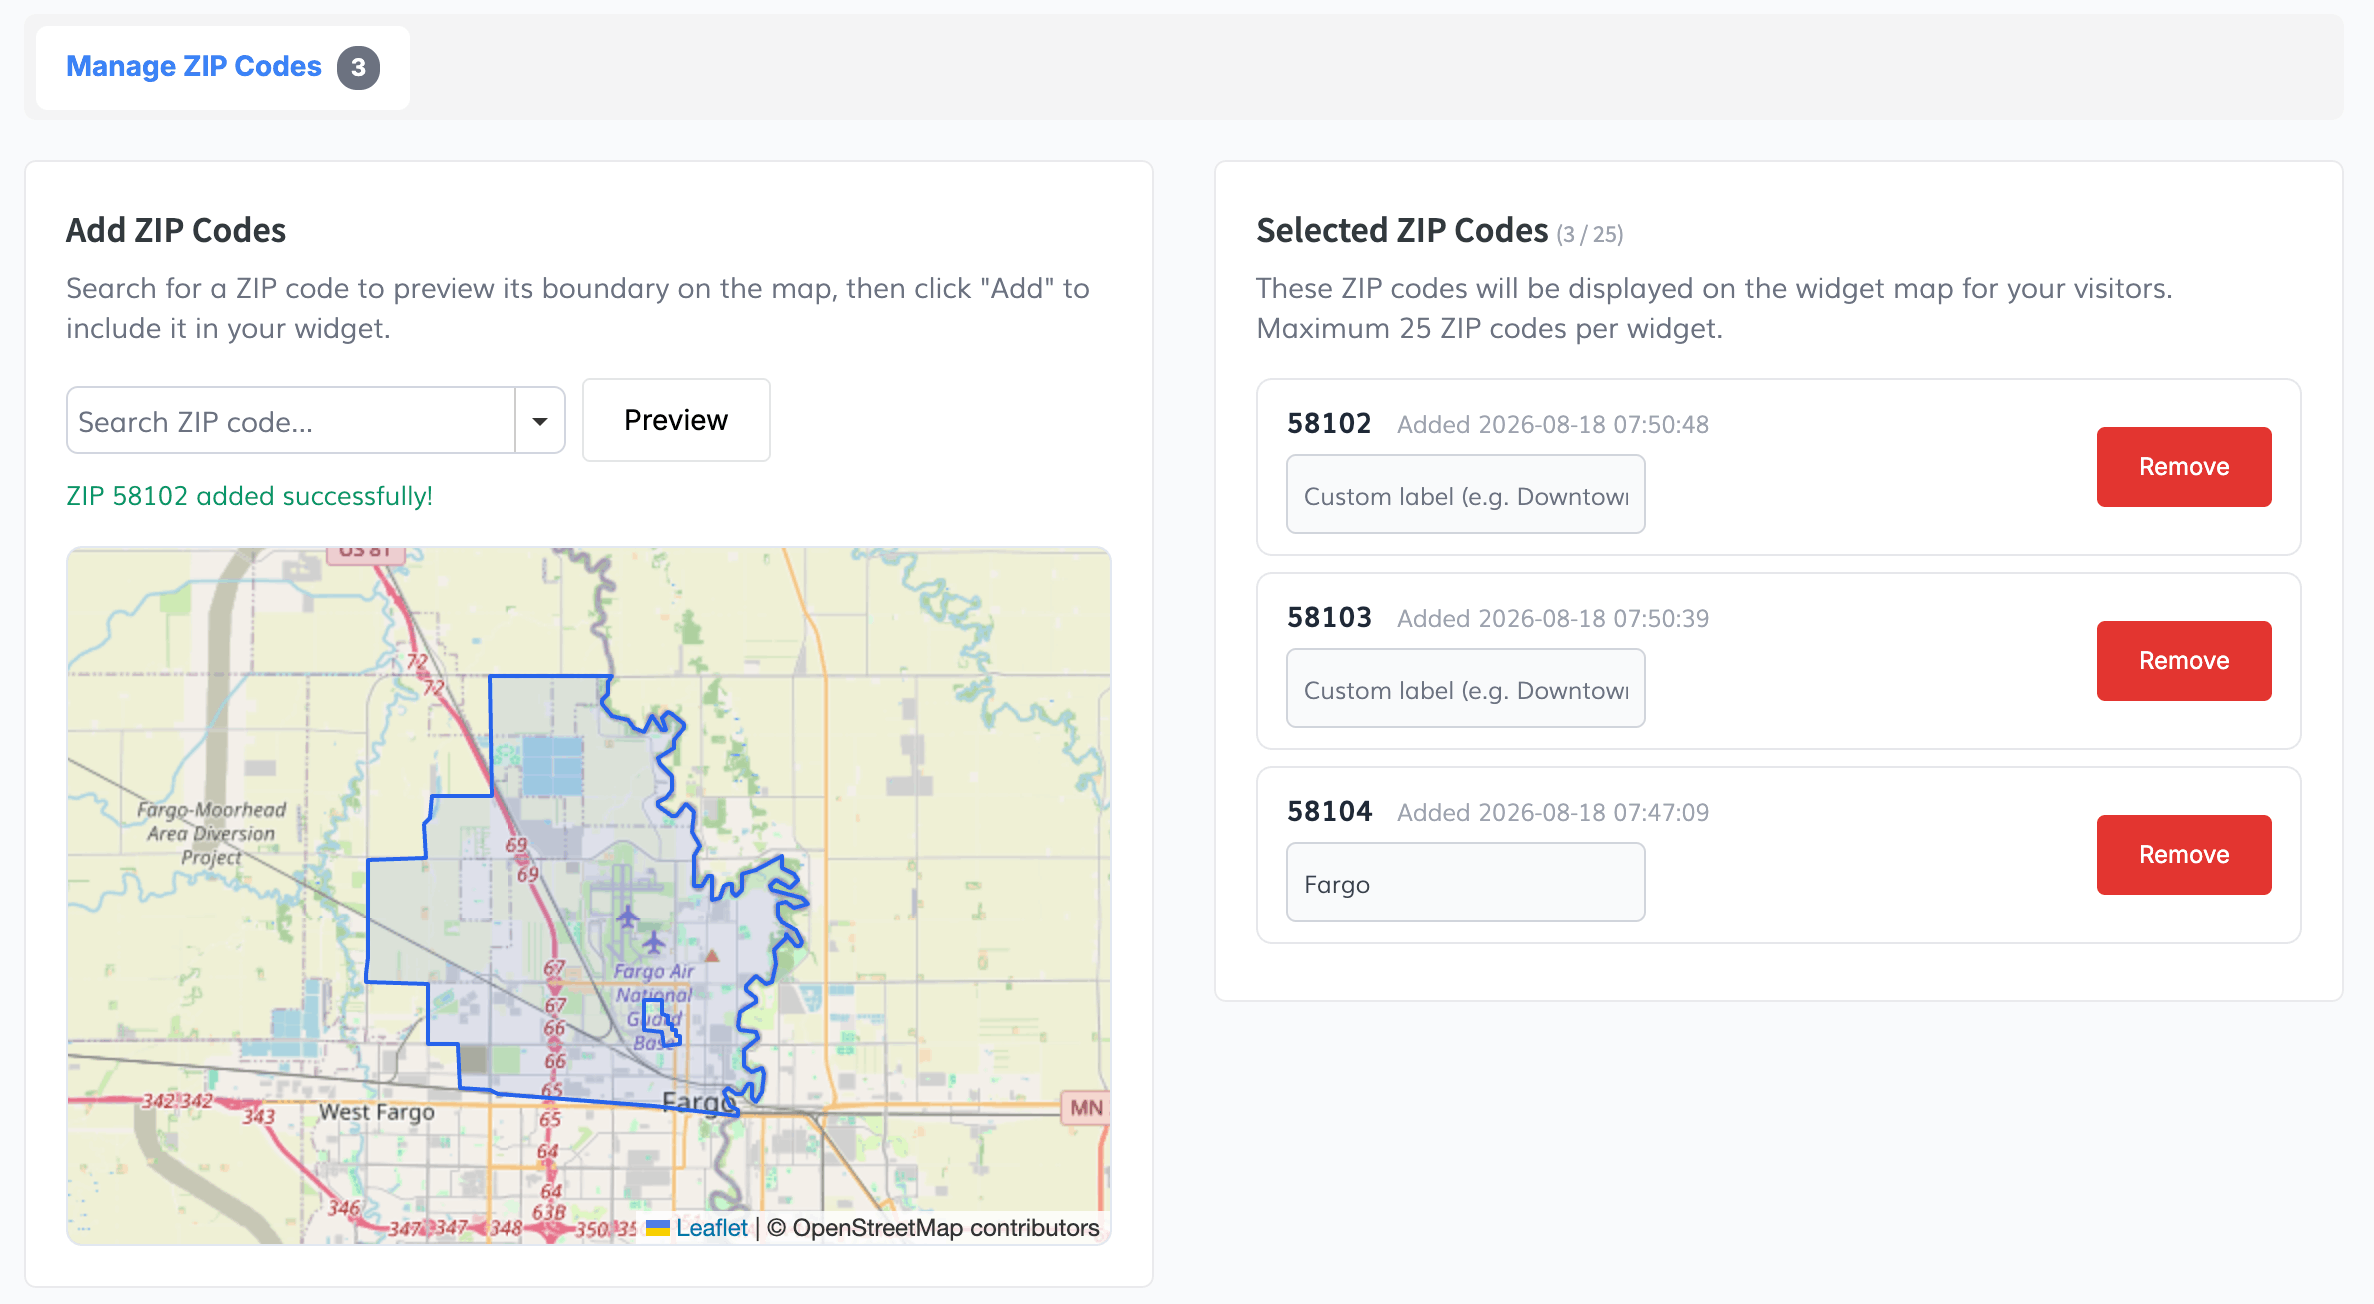
To remove a ZIP code, click the Remove button on its row. You'll be asked to confirm before the ZIP code is deleted from your widget.
-
Embed Code
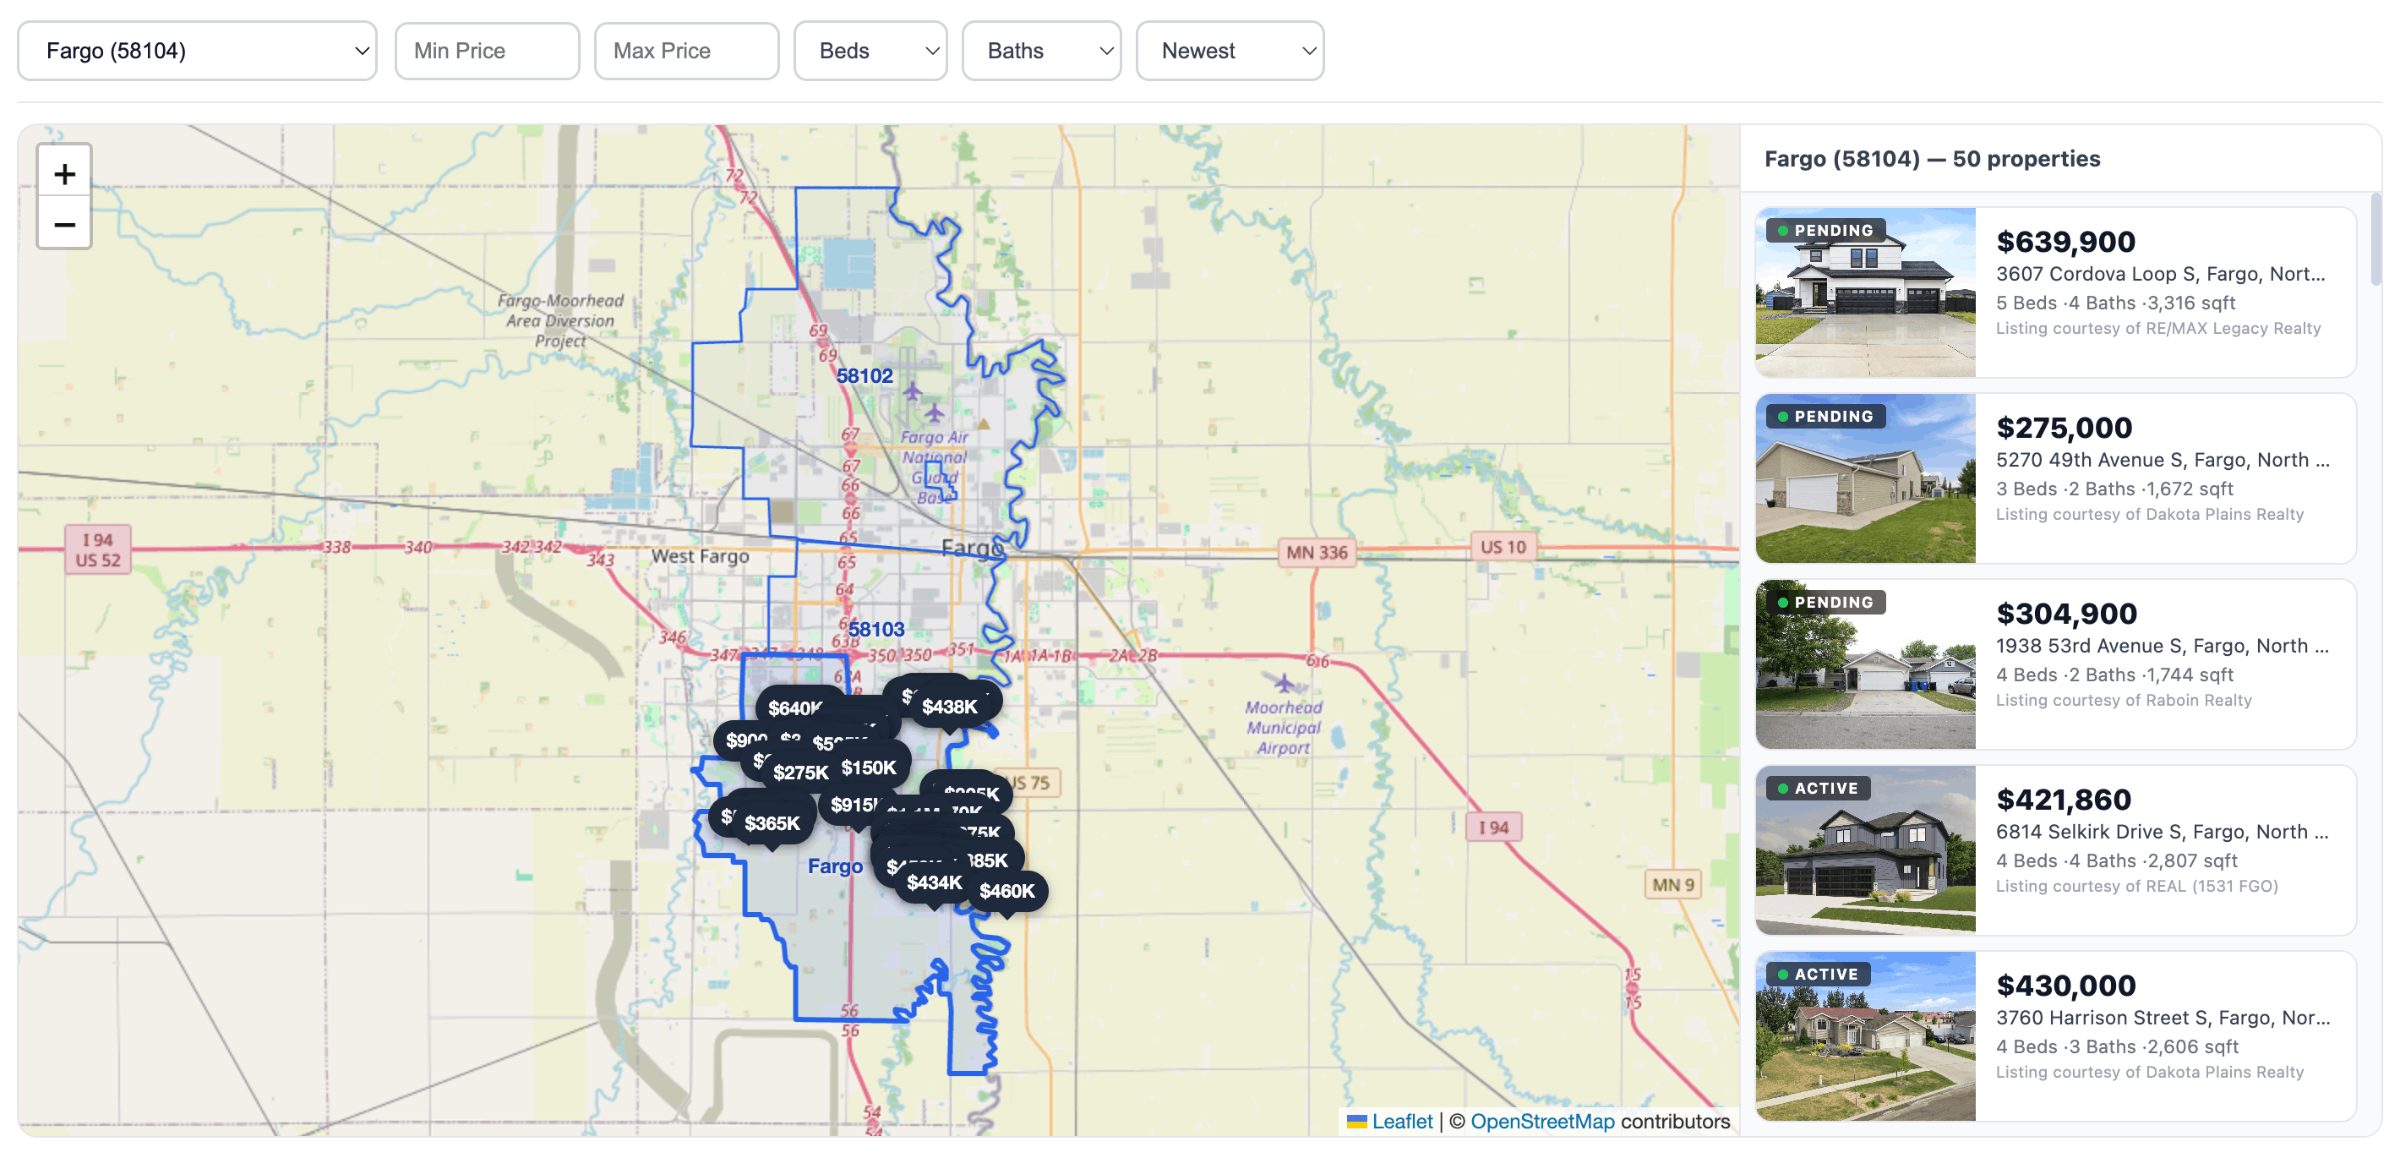
Once you've added at least one ZIP code, the Widget Code section appears at the bottom of the page. Copy the generated script tag and paste it into any web page where you want the interactive ZCTA map to appear.
The widget will render an interactive map showing all your selected ZIP code boundaries. Visitors can click any zone to browse the active listings within that area, powered by your IDX Broker MLS feed.